Kitchen / Garden / Sanctuary - Urban Homesteading to Nourish Body + Spirit

Category: Frugal Living (Page 10 of 13)

Enjoying Wild Foods: Daylilies + Lamb’s Quarters

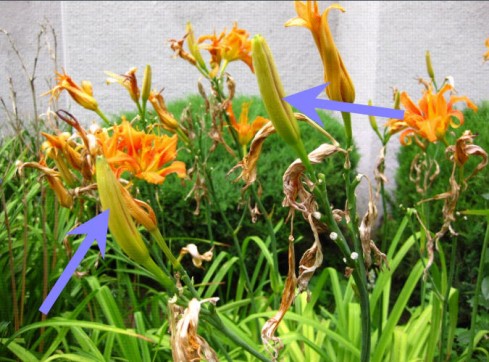
Daylily buds

Now that it’s summer, there are lots of forage-able treats in the urban landscape, and today I wanted to highlight a couple of my favorites: Daylily flower buds and Lamb’s Quarters leaves. I often take walks on my lunch break through the neighborhoods near where I work, and munch on these, raw, as I encounter them (picking mindfully, of course). The daylily buds have an unusual, sort of mild spicy taste that grows on you, and the Lamb’s Quarters leaves taste very similar to spinach, and can be eaten either raw or cooked like spinach.

Just be sure to avoid plants growing near busy roadways or areas that are likely to have been sprayed with pesticides (like the grassy areas of parks).

Here’s what Alan Hall’s Wild Food Trailguide says about Daylilies:

Unopened flower buds, opened flowers, and withered flowers may be eaten. Unopened buds boiled in salted water for a very few minutes make an excellent cooked vegetable. Buds and opened flowers can be dipped in batter and fried like fritters. Both open and withered or dried flowers can be added to soups and stews, where they provide body and impart an interesting flavor. The flavor of dried and freshly collected flowers is somewhat different and they should be tried both ways. If flowers are dried for later use they should be soaked until soft in cold water before using. The softened dried flowers will have a slightly genatinous quality. The small tubers can be dug anytime during the period when the ground is unfrozen. Only firm, young tubers should be collected. After digging they should be washed clean of clinging earth and freed of small rootlets. Boiled in salt water they have a flavor reminiscent of sweet corn. They can be eaten raw as a salad and are sweet and crisp with a pleasant nutty flavor.

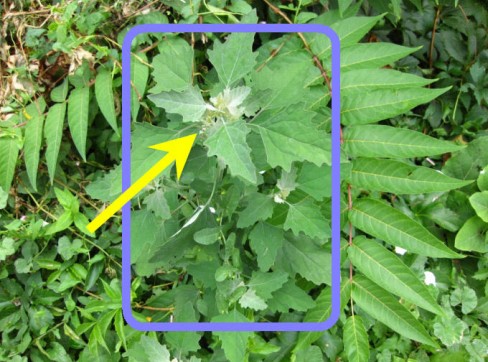
Lamb's Quarters leaves

Lamb’s Quarters is a member of the Goosefoot family and a relative of Quinoa. You’ll find it growing mainly in poor, disturbed soils and in other weedy areas.

Here’s what Alan Hall’s Wild Food Trailguide says about Lamb’s Quarters:

Lamb’s Quarters leaves make an excellent potherb that is considered by many people to be superior to spinach. And like spinach, it loses a great deal of bulk in cooking so an ample supply should be collected. Young plants are best, but this plant continues to put up new shoots that can be used well into summer. The leaves are not bitter, and the cooking water need not be changed. Seeds can be collected by rubbing them from the spikes into an appropriate container. They are available from the time they are dry in the fall until they drop, often well into winter. The seeds are extremely abundant and it is possible to gather several quarts in less than an hour. Winnow out the husks and trash, and then grind the seed into flour. Since the seeds are very hard, grinding can be difficult: the seeds slip away from the grinders in hand mills (although kitchen blenders work well). To get around this, it helps to boil them until they are soft, then mash up the softened seeds and allow them to dry out before grinding. The flour produced from the seeds is very black. It is good for making pancakes, muffins, etc., and can be used by itself or mixed with wheat flour. The mush produced by boiling seeds until they are soft can be eaten as a breakfast cereal or emergency food.

And don’t forget about Purslane! It’s another nutritious weed with a lovely mild lemon flavor that’s also growing abundantly at this time of the year.
How to Make Sauerkraut

Today I’m going to show you how to make your own old-fashioned, raw, lacto-fermented sauerkraut. The first time I made sauerkraut, I was sure I was doing something wrong because it was so easy!

Ingredients:

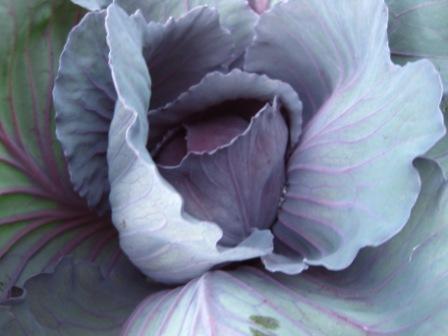
Cabbage – red or green (or a combo), organic

Sea salt – See my salting chart below, plus you may need more to mix up extra brine. (Any non-iodized salt will do, but unrefined sea salt is better for your body.)

*****

Here’s my salting chart. These are just guidelines — if you want, you can add a little more salt in the summer and a little less in the winter.

10 tsp salt per 5 lbs vegetables

5 tsp salt per 2 ½ lbs vegetables

2 tsp salt per 1 lb vegetables

1 tsp salt per ½ lb vegetables

½ tsp salt per ¼ lb vegetables

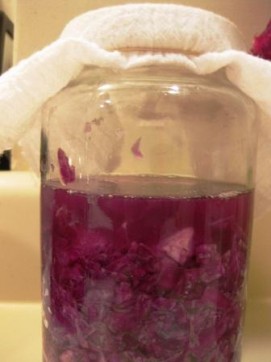
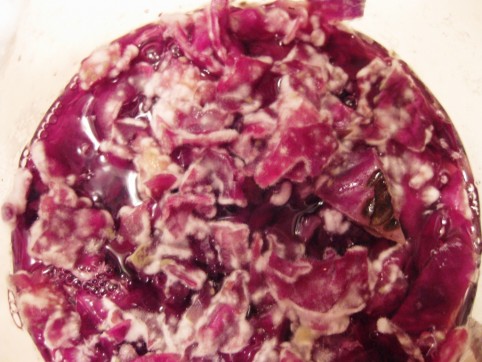
Cabbage becoming sauerkraut. (Little bits of cabbage clinging to the side of the jar --like in the picture-- should be scraped down into the brine, otherwise they'll get moldy.)

Chop, shred, or grate your cabbage — coarse or fine, however you like it. Sprinkle the salt onto the cabbage and mix it up. I let mine sit on the counter for several hours or overnight (this step is in place of pounding) so that the salt can begin to draw water out of the cabbage. The water contains nutrients, and these nutrients then become the substrate for the growth of the lactic acid bacteria which is what turns your cabbage into kraut. (Steinkraus, Handbook of Indigenous Fermented Foods, p.120.)

After the cabbage is wilted and some water has been drawn out, pack the cabbage WITH its water into a glass jar. You really want to pack it in there (use your fist or any kitchen tool), because this will help squeeze more water out. You can also use a specially-made ceramic sauerkraut crock, or a glass or ceramic bowl (anything except metal, since salt and acid can react with metal).

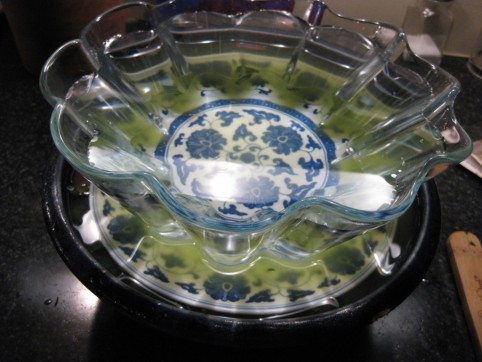
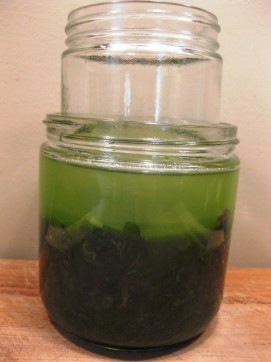
Keep your cabbage submerged under the brine by placing a smaller plate on top and weighing it down with something heavy (a jug of water, a boiled rock, etc.). Or, nest a smaller jar of water inside your larger glass jar. Or, wedge a whole cabbage leaf into the jar to keep everything submerged.

Sauerkraut fermenting in a ceramic bowl, weighed down with a plate & a water-filled bowl.

This is kale, not sauerkraut, but same idea. I particularly like this nesting-jars method for keeping everthing submerged in brine.

Whatever method you devise, just be sure that all traces of cabbage are completely submerged in the brine. Little bits sticking up above the water line will quickly lead to a moldy situation like the photo below (and if you do end up with mold like this, scrape off the entire top layer of cabbage, but the rest underneath should be fine! The kraut below the mold in this picture turned out great.)  So if you need to mix up some more brine (which is just a fancy name for salt water), use the ratio of 1 tsp salt to 1 cup of water.

This is what happens if your cabbage doesn't stay submerged in brine.

Cover the jar with either a lid (leave it loose to prevent pressure buildup) or a towel to keep bugs out.* Leave it to ferment at room temperature until you like the taste of your kraut. Let your tongue be your guide to done-ness. Taste it every few days, and transfer into the fridge when it tastes the way you like it. I like mine pretty sour, so I usually leave it out for 1-2 weeks or more, depending on how warm it is in the kitchen.

Once in the fridge, your sauerkraut will keep for many months. Don’t throw out the sauerkraut juice; it’s full of beneficial Lactobacillus (lactic acid bacteria) and is said to be a very good digestive tonic. And if you like, add a little of the juice to your next batch of sauerkraut as a starter.

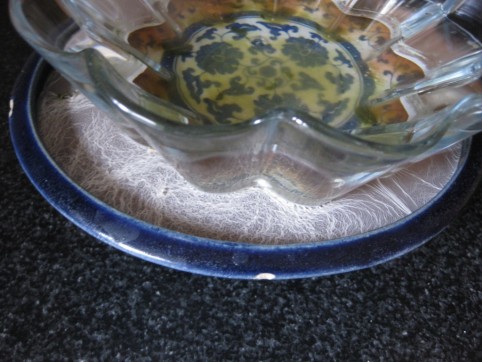
*If you see a white film (“kahm yeast”) develop on the surface of the brine, scrape off what you can each day until the kraut is done. Sometimes I don’t get any film. Sometimes I get a fair amount. There doesn’t seem to be any rhyme or reason. The kahm yeast won’t harm anything, but if you keep getting a lot of it day after day, it can sometimes (not always) impart an off taste to the brine. If that happens, I will actually dump out the brine and replace with new brine. How salty to make the replacement brine? Good question. I’m still experimenting with this. When I did this I used 1 tsp salt to 1 cup water, but then my kraut was almost done fermenting and ready to go into the fridge. In the summer — or if your kraut still has a ways to go — I might increase the ratio to 1 Tbsp salt per 1 cup water. Use your judgment and go for it; fermentation is an imprecise art!

Here you can see the white film (kahm yeast) that sometimes develops on the brine's surface (between the blue bowl and glass bowl).

Moroccan Carrot Salad

I made the most delicious carrot salad the other day, and the recipe is just too good not to share with you! It even features two ingredients that I don’t always love…carrots and cumin. But in this dish, they’re both dynamite! Do try it. As with most salads, this one is best enjoyed the same day it’s made. I was still eating mine two days after I made it, and it was still yummy, but just not quite as fresh. If serving to company, I’d definitely make it that same day. It’s a frugal dish too. I ate mine as a main dish for lunch with some cottage cheese on the side for protein. Yum!

Moroccan Carrot Salad

For the salad:

6 cups shredded carrots (about 6 large carrots)

1 cup raisins

2 1/2 cups chopped oranges (about 3-4 oranges)

1 1/2 cups green onions, thinly sliced

1 cup cilantro leaves, chopped and well-packed into the measuring cup

For the dressing:

1/3 cup olive oil

1/4 – 1/3 cup fresh lemon juice

2 – 3 tsp honey (raw is nice)

1 1/2 to 2 tsp ground cumin (more if you like)

1/2 tsp smoked or regular paprika

1/8 tsp cayenne

salt to taste

Combine dressing ingredients into a jar and shake well to combine. (Heat the honey gently if needed so that it’ll mix into the dressing more easily.)

Put all the salad ingredients into a bowl and pour the dressing over top. Mix gently to combine well, and enjoy!

Next time I might add some toasted pine nuts since I think they’d further enhance this already delightful dish. But it’s wonderful just as it is. Since it is a frugal dish that can be used as a light lunch or dinner with a bit of protein on the side, I’m including it in this week’s Pennywise Platter Carnival over at The Nourishing Gourmet.

Homemade Pumpkin Pie Fruit Leather

I think it’s time for another recipe! It’s been a while since I’ve posted one. I’m still off work for another few days as I continue to recover from my foot surgery, so I’ve got extra time at home which is wonderful! I can’t be in the kitchen all day since I need to continue to rest a lot and elevate my foot, but I could never completely stay away from my kitchen 🙂 — crutches or not — so I’ve been experimenting here and there with some simple recipes.

Today’s recipe for homemade fruit leather is definitely simple! I used to eat fruit leather all the time when I was younger, but I’d pretty much forgotten about it, even though it’s a yummy & very portable snack. Recently I came across the idea of homemade fruit leather, and decided to experiment using a can of pumpkin that’s been sitting in the back of the pantry for over a year (or maybe two…). Voila! Pumpkin Pie Fruit Leather. It’s so good that I had to restrain myself from eating the whole entire tray, and it’s incredibly easy to make!

If you don’t have, or don’t want to use, canned pumpkin, just substitute cooked pumpkin (or winter squash) puree.

Also…if you don’t have pumpkin, you could use this basic method to make fruit leather from cooked/pureed apples, pureed peaches (no need to cook them first), plums, berries, bananas, or a combination of fruits — and with these fruits, there’s no need to add any spices unless you want to! If I have an abundance of tomatoes this year, I think I’ll even try it with tomatoes. Anyway, here’s the recipe:

Pumpkin Pie Fruit Leather

2 cups (or one 15-oz can) cooked pumpkin or winter squash puree

1/4 cup honey

1/4 – 1/2 tsp cinnamon (depending on your taste…I used a 1/2 tsp because I like the bold taste of spices)

1/4 – 1/2 tsp ginger powder, optional

1/4 tsp powdered cloves

1/8 tsp nutmeg

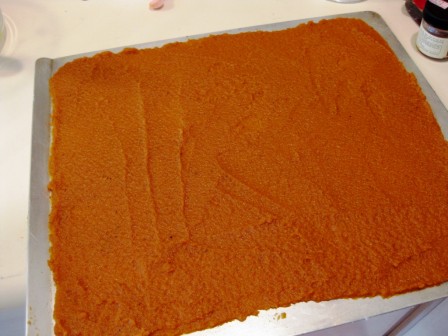
Preheat oven to 200* F. (If you have a dehydrator, you can use it for this recipe. Dehydrate at 140*.) Mix all ingredients well. Generously oil a cookie sheet (really slather the oil on…it’ll make it much easier to peel off the leather!), or use parchment paper. Using a spatula, spread your mixture on the cookie sheet, taking the extra time to spread as thinly and evenly as possible; this took me a few minutes to get it just right. Spreading it as evenly as possible is important because otherwise some parts will be over-done and other parts will be under-done (which will probably happen to some extent anyway, but at least you’ll be minimizing it).

Spread the mixture as evenly and thinly as possible on the oiled cookie sheet.

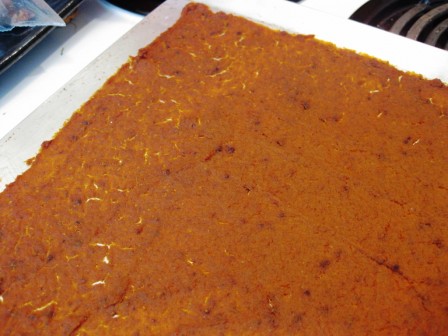
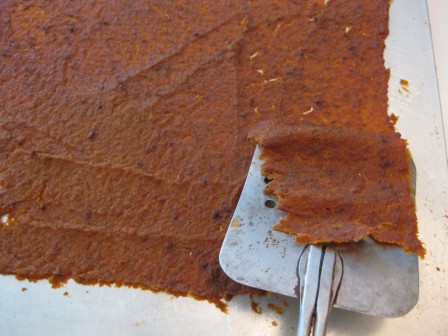
Put your cookie sheet into the oven and let it “dehydrate” in there until the fruit leather is pliable…not wet, but not hard & brittle either. Mine took about 2 1/2 hours to get done; you’ll want to check on yours every now and then. A little bit was over-done and I had to let the cookie sheet cool a little before I could pry it off, and another little patch was under-done, so I just put it back in the oven for a little while. But most of it was easily peeled off the cookie sheet with a flexible metal spatula; this whole process would probably be even easier if you use parchment paper.

The fruit leather is done.

Peel it off the cookie sheet with a flexible metal spatula. If it's not over-done, it should peel right off with no problem. If it's under-done, it will be too wet to peel off...so just pop that part back into the oven for a while.

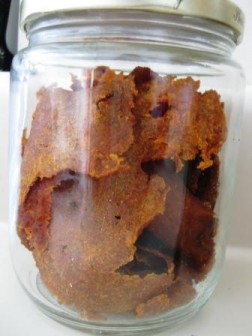
Store in a glass jar. I stored mine in the fridge, but you can also store it at room temperature.

From Trash to Treasure: Chocolate-Dipped Candied Orange Peel

Chocolate-Dipped Candied Orange Peel, (c) The Herbangardener

First of all, I have to say that since I made these chocolate-dipped candied orange peels over the weekend, I have NOT been able to stop eating them — they’re just the perfect combination of chocolate and orange, a flavor combination which I love. They are just SO GOOD!

And I can’t get over that they’re made with the orange peels that you’d normally toss into the trash or compost heap! Besides that, the fact that they’re dipped in chocolate means that you stretch your chocolate further, while still getting your chocolate fix! All in all, a delightful & unusual treat that can be made for not much money at all.

Chocolate-Dipped Candied Orange Peel, (c) The Herbangardener

Don't toss 'em...Eat 'em!

Start by saving your orange/mandarin orange/tangelo/clementine peels. I store mine in a sealed container in the fridge for a few days while collecting enough to use. You can store them in the freezer, but if they’re in there too long the texture suffers and the peels become mealy; I like to stick with the fridge.

Also, I use peels from organic mandarin oranges. I feel it’s important that the peels be organic, since the highest concentration of pesticides is present in the peels of conventionally grown fruit.

First you’ll cook your orange peel in boiling water for about 15 minutes. This seems to mellow out the bitterness. Then you’ll candy it with a honey-water solution (takes about an hour), let the orange peels cool (10 minutes), and then dip them into melted chocolate and refrigerate for about 10 minutes until set. Easy!

Here’s the recipe:

Chocolate-Dipped Candied Orange Peel

2 -3 cups of orange peels, cut into pieces (I used mandarin orange)

1/4 cup water

1/3 cup honey (or 1/2 cup regular sugar or rapadura)

About 2/3 to 3/4 cup chocolate chips (I used basic semisweet chocolate chips, but another idea is to chop up a special bar of chocolate)

First, put the orange peel into a pan and cover with cold water (you’ll use the 1/4 cup of water & honey a little later). Bring to a boil and boil gently until the peel is soft, about 15 minutes. Drain.

Now, bring the 1/4 cup of water and honey to a boil. Add the peel. Boil gently on low heat, uncovered, stirring occasionally. This takes about an hour. When the peel is sodden and the syrup is almost gone from the bottom of the pan, take the peels out and put them onto a cookie sheet to cool.

When the syrup is almost gone, the peel is done.

When the syrup is almost gone, the peel is done.

Transfer the wet peel onto a cookie sheet to cool.

Transfer the wet peel onto a cookie sheet to cool.

While the peels are cooling, put your chocolate into a double boiler to melt over hot water. (Don’t melt chocolate over direct heat because it tends to burn. I don’t have a double boiler, so instead I just use a metal bowl set over a small pan of simmering water.)

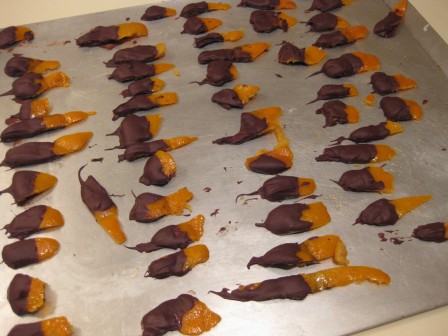
When the chocolate has melted, dip the lower half of each orange peel into the chocolate and set on a cookie sheet. (You can line the cookie sheet with wax paper, but I didn’t.)

Chocolate-Dipped Candied Orange Peel, (c) The Herbangardener

Put the cookie sheet into the fridge for 10-15 minutes to allow the chocolate to set. After cooling in the fridge, the peels will come off just fine with a flexible metal spatula. Though, if you don’t have a flexible metal spatula, you may want to use the wax paper so that you can just peel them off. If they don’t come off very easily, allow the cookie sheet to sit at room temperature for several minutes; they should peel right off then.

I found that storing them at room temperature was just fine, as long as you don’t put a lid on the container; I noticed that they got a little soggy if I kept the lid on. But if having an open container of chocolate orange peels on your counter is just too tempting (uhh, yeah!), you can put them in a sealed container in the fridge — they don’t seem to get soggy then. You can also just as easily store them in the freezer (I have some in the freezer right now), and snack on them directly from there.

Since this recipe produces a large tray full of decadent treats made with what would otherwise be trash…I feel that it deserves a place in this week’s Pennywise Platter Carnival over at The Nourishing Gourmet.

« Older posts Newer posts »

© 2024 The Herbangardener

Theme by Anders NorenUp ↑