Kitchen / Garden / Sanctuary - Urban Homesteading to Nourish Body + Spirit

Category: Frugal Living (Page 5 of 13)

Free Shipping @ Tropical Traditions! (Thru Monday, March 19th)

Yay!

It’s Free Shipping time again at one of my very favorite companies, Tropical Traditions! I love free shipping days. They save about $10-15 off your order, so it’s a good time to stock up, or try them out if you haven’t before. I really love this company’s products, and use them daily. Now through Midnight EDT on Monday March 19th, they’re offering free ground-only shipping when you enter coupon code 12153 at checkout.

***

If you’re a new customer and have never bought from them before, you can also get this Virgin Coconut Oil book, with information & recipes, for free (any time, not just today) by entering my User ID, which is 6032410. When you’re going through the checkout process and you’ve added your shipping address and phone number, you will see the question “How did you hear of us?” Just choose “Referred by a friend” and then a new “User ID” field will appear below that where you can enter my User ID. (See screen shot below.)

*****

Tropical Traditions has lots of products I love; here are my favorites:

Moisturizing lotion – I use this every day on my face and hands. It’s the most luxurious stuff, and very gentle since it has only a few wholesome ingredients. Definitely my all-time favorite lotion.

Moisturizing cream – Much thicker than the lotion, this is another favorite. Also great for use on face and hands.

Virgin organic coconut oil – Great for cooking, eating, and also for skin! Has a much better taste than other unrefined coconut oils I’ve tried. I just love this stuff.

Organic raw honey – This is the best-tasting honey I’ve ever had. I like to buy and taste lots of different honeys, and this one always wins, hands down. When I first tried it, my eyes got big and my mouth dropped open; it just has the most amazing taste! Quintessential, flowery honey taste. This stuff is a staple in our house!

Coconut cream concentrate – I love this stuff. LOVE it. The “format” is a little strange, because when you receive it, it will have settled out into a hardened layer of coconut oil and a layer of dried/finely ground coconut meat. You’ll wonder what to do with it at first; what I do is put the jar into a pan of simmering water and let it sit there until the contents have softened and liquefied, and then I can easily stir it up. Then, I put it in the fridge until it’s hardened again. Once hardened, you can then store it in the fridge or at room temperature (it won’t separate again unless it gets really hot in your house). I usually just eat this stuff plain, it’s so good; I break it into chunks with a knife, and eat it as a snack. Sometimes I’ll eat it dipped in the raw honey, which is a very decadent and extremely delicious snack!!!

Organic Maple Syrup — Delicious, and it’s the Grade B type, which I prefer since it has a richer flavor and more nutrients than Grade A.

Laundry Detergent – This detergent is all we use, now that I’ve discovered it. It works really well, gets the stains out, and lasts a long time, making this a very economical purchase.

Oxygen Bleach – Like OxyClean. If you need a tough stain-fighter/deodorizer for laundry and everywhere else around the house.

*****

Now, I’ve also tried their organic bar soap, and though it was really nice soap, Hubby and I have never seen a bar of soap get used up so fast! It was weird. It just seemed like it was gone in record time. So I wouldn’t get it again. (Though my mom has the liquid soap and really loves it.) I haven’t tried every single product that they sell…but the ones I listed above, I make sure to never run out of!

Also, I bought the Atchara once out of curiosity, and it was extremely strong (even for this vinegar lover!), and a little weird. Not quite a favorite.

*****

My Mittens Are Done!


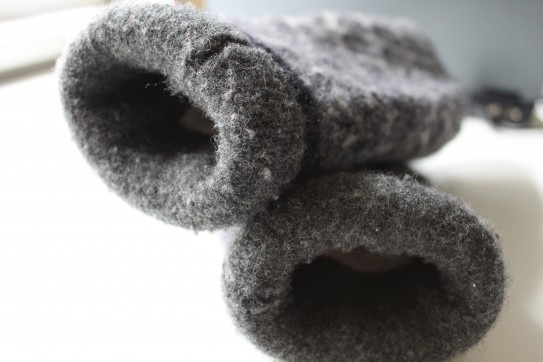
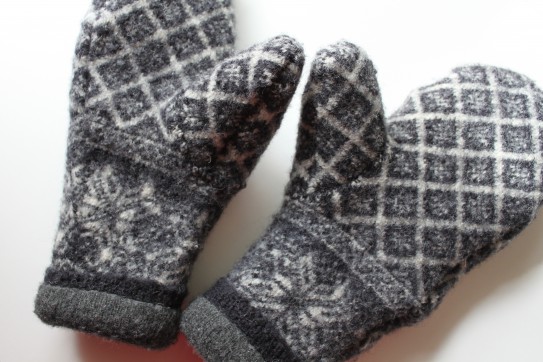
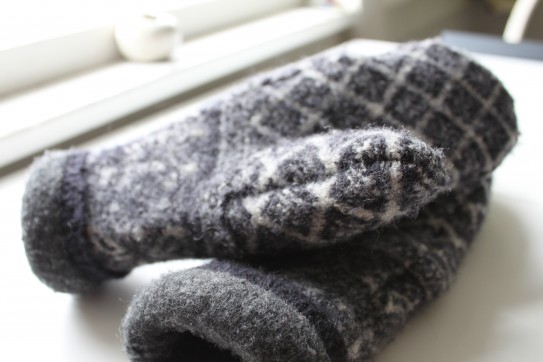
Remember the single felted wool mitten I showed you a couple weeks ago? Well now there are two! They’re finished and I love them. (Just in time for… Spring. Hah! Oh well.)

I still might embellish them a little using the pretty nordic ribbon and buttons from the original sweater they were made from, but I also might just leave them as is. I like their simplicity. Actually, I’m really proud of these mittens. I’ve never made anything like them before so it was a slow project, and one I wouldn’t necessarily care to repeat, but I’m really happy with how they came out. They fit beautifully and they’re so warm! Apart from my time, they cost next to nothing since all the materials came from the thrift store.

They have three layers made from two different felted sweaters plus an inner lining of really soft white fleece. They’re so cozy and luxurious; I wish you could feel them!

They’re made from the sleeves of these sweaters:

***

Do you ever make stuff from felted wool sweaters? I really like the concept — it’s so easy and cheap — the knitting has been done for you already, and you can so easily get used sweaters from the thrift store for such little money!

If you’ve ever done something like this before, please leave a comment and tell me what you made! I’d love to get some other project ideas — maybe something that’s a little simpler than 3-layer mittens. 😉

*****

No-Cost DIY Art Marker Holder

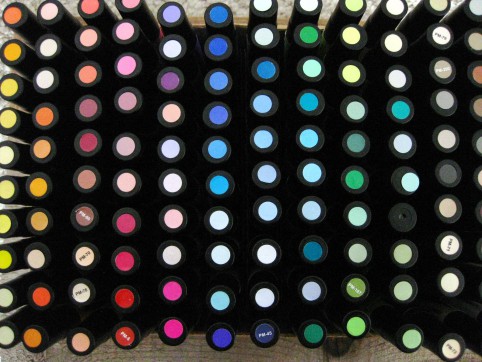
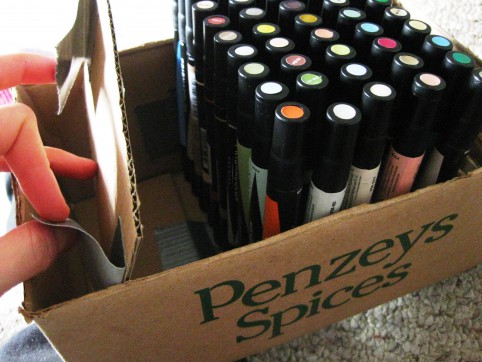
I recently expanded my art marker collection and needed something to keep them all organized within a compact space. So I made a holder using materials I had on hand, and I’m really happy with the way it turned out. It’s not beautiful, but it does the job perfectly.

Here’s how to make your own without spending a cent!

***

Materials:

A small cardboard box (my 10″ x 6.5″ cardboard box fits 140 Prismacolor art markers)

More cardboard, for the dividers

Duct tape or packing tape

Scissors

***

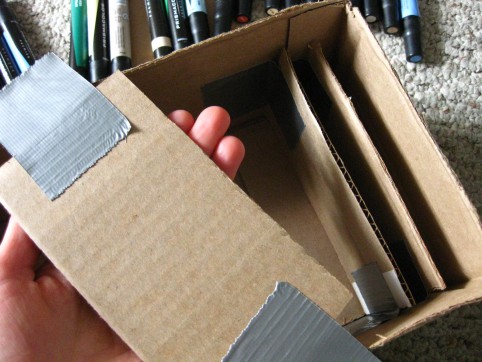
 1. Measure your outer box so that you know how big to make the dividers. Measure and cut out one divider and insert it into your box. Trim if necessary. When it’s the right size, use it as a template to cut more dividers.

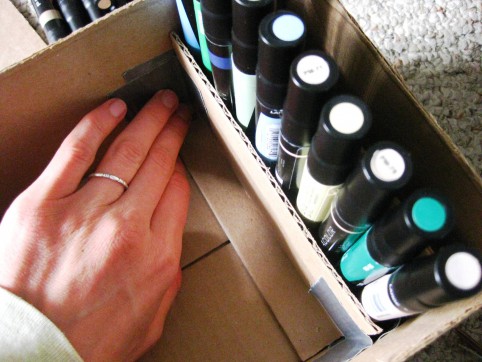
2. Put a row of markers in place at one end of the box. (Putting the markers in helps you know exactly how wide to make the rows.) It helps to prop up the opposite end of the box so the markers stay in place. Insert the divider up against your row of markers to see if it needs trimming. Then put a strip of duct tape on either side of the divider, as in the photo.

Insert your divider to make sure it fits right; remove and trim if necessary, then apply tape.

3. Tape the divider into place, flush against your markers.

Tip up one end of the box so the markers stay in place.

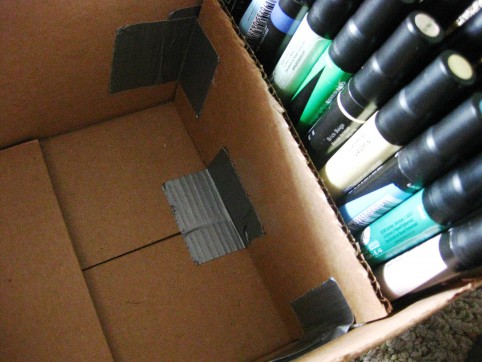
4. When the divider is taped into place, add another piece of tape to the bottom:

5. Keep adding rows of markers and dividers until you’re finished.


*****

Free Shipping at Tropical Traditions (Today only, Monday January 30)!

Just wanted to alert you that Tropical Traditions, one of my favorite companies, is having a Free Shipping Day today! Free shipping will save about $10-15 off your order, so it’s a good time to stock up, or try them out if you haven’t before. I really love this company’s products, and use them daily. Now through Midnight EST on Monday January 30th, they’re offering free ground-only shipping when you enter coupon code 123001 at checkout.

***

You can see a list of all my favorite Tropical Traditions products here.

***

And if you’re a new customer and have never bought from them before, you can also get this Virgin Coconut Oil book, with information  & recipes, for free (any time, not just today) by entering my User ID, which is 6032410. When you’re going through the checkout process and you’ve added your shipping address and phone number, you will see the question “How did you hear of us?” Just choose “Referred by a friend” and then a new “User ID” field will appear below that where you can enter my User ID. (See screen shot below.)

*****

Make Your Own Sushi

We love sushi at our house, though we don’t often go out for it. Actually though, I prefer to make my own — because then I know the source of the fish (which I think is important if you’re eating it raw). And of course it’s also much cheaper to make your own at home. It’s simple and fun, too!

Let’s begin!

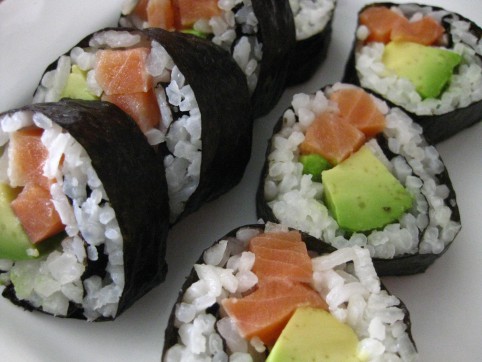
To make one batch of sushi rolls, you’ll need the following. This can easily be multiplied. Today we’ll be making a Raw Salmon-Avocado Roll. But you can fill your sushi roll with anything! That’s part of the fun!

***

You’ll need:

1 sheet of toasted nori seaweed

1/4 cup raw sushi rice or short-grain rice + 1/3 cup water. (This will make enough rice to fill one sheet of nori. To fill about 4 sheets of nori, use 1 cup rice + 1 1/4 cups water.)

half an avocado

about 2 ounces of raw salmon from a company you trust (I always use Lars Larson Trophy Salmon — they’re a Colorado company selling wild, line-caught Alaskan salmon that they process and freeze right on their boat.)

soy sauce to serve with sushi (Nama Shoyu raw soy sauce is our hands-down favorite)

***

1. Cook your sushi rice. You do want to get the actual sushi rice/short-grain rice because you need that sticky texture for your sushi to turn out right. Combine the 1/4 cup rice with 1/3 cup water in a saucepan. Salt the water. Bring to a boil and cover the saucepan. Turn to a very low simmer and cook for 25 minutes. Don’t lift the lid at all during that time.

It’s best to cook the rice right before you plan to make the sushi. Fresh rice gives the best results.

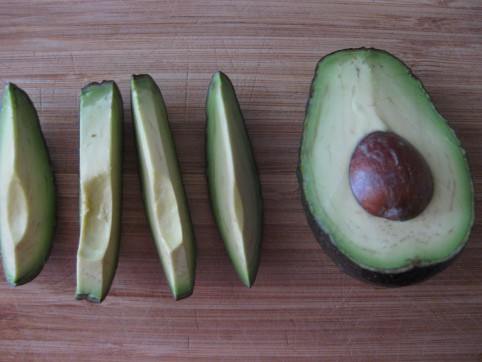
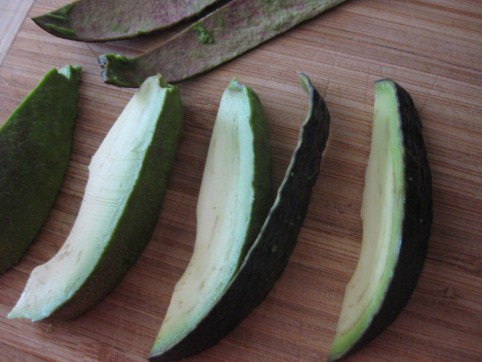
2. While the rice is cooking, slice your avocado and salmon.

Halve the avocado, then cut into slices

Peel the slices

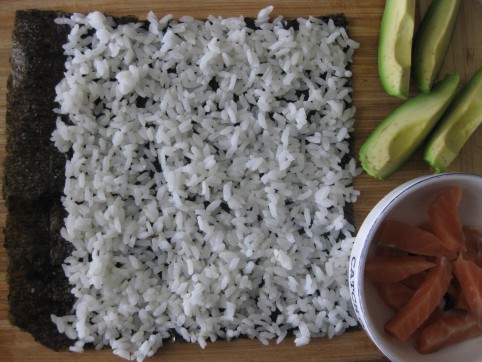
I like to buy the pre-toasted Nori sheets

3. Let the rice cool a little and then spread it all out onto your sheet of nori, except for 1″ at the end.

4. Arrange your salmon and avocado down the middle.

5. Wet your fingers with water, and moisten the entire 1″ strip of nori that you didn’t cover with rice. This will be your glue and will hold your roll together.

6. Beginning at the opposite end (not the moistened strip), roll your sushi up. It’s effortless; you don’t need any fancy bamboo sushi rollers or plastic wrap or any other tool. Just your hands! (I threw away my sushi roller many years ago; I found that it just got in the way.)

7. Your roll will end up seam side down, and while you slice it, the gentle pressure will help glue the seam shut.

8. Slice the roll. To get nice clean slices without squashing the roll, work with a nice sharp knife. Wetting it first also helps, as does cleaning it off under running water after every couple of slices.

9. Arrange on a plate and eat it up!

*****

« Older posts Newer posts »

© 2024 The Herbangardener

Theme by Anders NorenUp ↑