Kitchen / Garden / Sanctuary - Urban Homesteading to Nourish Body + Spirit

Category: Holistic Health (Page 4 of 8)

Chicken-Foot Bone Broth


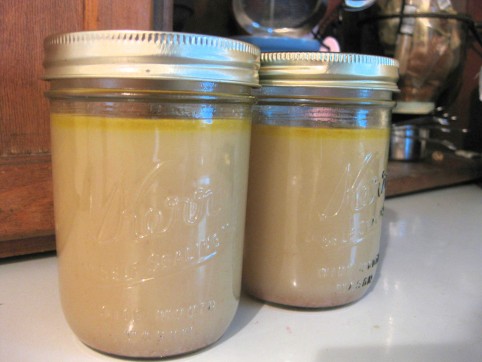
Chicken feet! In this post, I mentioned that I’d found pastured chicken feet at the farmer’s market, and how excited I was about that! (I bought them from the good folks at Cottonwood Creek Farms — their pastured chickens are awesome…if you’re in Colorado, definitely support these local farmers!) I made chicken-foot bone broth from them, and WOW. It’s incredible stuff. I was amazed at the amount of gelatin that ended up in the stock…three or four times the gelatinousness of Jello! A delicious, rich broth…rich without being fatty.

Calcium-rich bone broth (stock) is a staple in my kitchen; I make sure it’s always in my freezer. It adds so much nutrition to a dish, and the taste is incredible. It’s the cook’s secret weapon! Lentils made with homemade bone broth instead of water is an entirely different experience (and one of my all-time favorites!). I like to simmer down my bone broth till it’s really concentrated and delicious; it’s both easier to store — taking up less space in the freezer — and adds a deeper flavor to whatever I use it in. I could dilute the concentrate once I thaw it out, but usually I just use it straight.

And so, Why bone broth? Well I will tell you. Well actually I’ll let Sally Fallon tell you. She’s the author of one of my favorite cookbooks that I sometimes mention here, Nourishing Traditions.

“Meat and fish stocks are used almost universally in traditional cuisines — French, Italian, Chinese, Japanese, African, South American, Middle Eastern and Russian; but the use of homemade meat broths to produce nourishing and flavorful soups and sauces has almost completely disappeared from the American culinary tradition.

Properly prepared meat stocks are extremely nutritious, containing the minerals of bone, cartilage, marrow, and vegetables as electrolytes, a form that is easy to assimilate. Acidic wine or vinegar added during cooking helps to draw minerals, particularly calcium, magnesium and potassium, into the broth.

It was Dr. Pottenger who pointed out that stock is also of great value because it supplies hydrophilic colloids to the diet. Raw food compounds are colloidal and tend to be hydrophilic, meaning they attract liquids. Thus, when we eat a salad or some other raw food, the hydrophilic colloids attract digestive juices for rapid and effective digestion. Colloids that have been heated are generally hydrophobic — they repel liquids, making cooked foods harder to digest. However, the proteinaceous gelatin in meat broths has the unusual property of attracting liquids — it’s hydrophilic — even after it has been heated. The same property by which gelatin attracts water to form desserts, like Jello, allows it to attract digestive juices to the surface of cooked food particles.”

*****

 *****

Below is the Chicken Stock recipe straight from Nourishing Traditions. Nowadays I stray from the recipe — no longer bothering to weigh or measure — and often leave the veggies out to achieve a truer chicken flavor. Sometimes I’ll add the veggies too, but never the carrots since I dislike the sweetness they impart.

Anyway, I simply dump some bones (usually chicken backs, feet, or the carcass from a whole chicken) into my crock pot, fill with cold water according to how many bones I have (this is all very unscientific — you’ll get a feel for it quickly). I tend to add less water than is called for in the original recipe because I like a very concentrated stock with lots of flavor. To the water, add a tablespoon or two of vinegar. Turn on your crock pot and let it simmer away for about 24 hours. I’ve also done this on the stove many times, but I definitely prefer the crock pot.

When it’s done, I pour everything through a strainer, reserving the bones and picking off any meat for another use. I like to munch on the ends of the bones (which will be very soft by then) — a great calcium & mineral supplement. Pour into jars (leaving at least an inch of head space if you’ll be freezing them), and place in the fridge so the fat can harden on the surface; if there’s lots of fat I’ll skim some off, but I do like to leave at least some. Use, or transfer to the freezer. (As a side note, I’ve noticed a big difference with stock made from pastured chickens — much less fat, much more gelatin!)

*****

Nourishing Traditions Chicken Stock

1 whole free-range chicken or 2-3 lbs of bony chicken parts, such as necks, backs, breastbones, and wings

gizzards from one chicken (optional)

feet from the chicken (optional)

4 quarts cold filtered water

2 Tbsp vinegar

1 large onion, coarsely chopped

2 carrots, coarsely chopped

3 celery stalks, coarsely chopped

1 bunch parsley

If you are using a whole chicken, cut off the wings and remove the neck, fat glands and the gizzards from the cavity. By all means, use chicken feet if you can find them — they are full of gelatin. (Jewish folklore considers the addition of chicken feet the secret to successful broth.) Even better, use a whole chicken, with the head on. These may be found in Oriental markets. Farm-raised, free-range chickens give the best results. Many battery-raised chickens will not produce stock that gels.

Cut chicken parts into several pieces. Place chicken or chicken pieces in a large stainless steel pot with water, vinegar, and all vegetables except parsley. Let stand 30 minutes to 1 hour. Bring to a boil, and remove scum that rises to the top. Reduce heat, cover and simmer for 6 to 24 hours. The longer you cook the stock, the richer and more flavorful it will be. About 10 minutes before finishing the stock, add parsley. This will impart additional mineral ions to the broth.

Remove whole chicken or chicken pieces with a slotted spoon. Remove meat and reserve for other uses, such as chicken salads, enchiladas, sandwiches, or curries. (The skin and smaller bones, which will be very soft, may be given to your dog or cat.) Strain the stock into a large bowl and reserve in your refrigerator until the fat rises to the top and congeals. Skim off this fat and reserve the stock in covered containers in your refrigerator or freezer.

 *****
 

Make Your Own “Green Smoothie Frozen Concentrate”

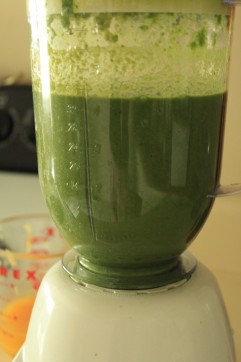
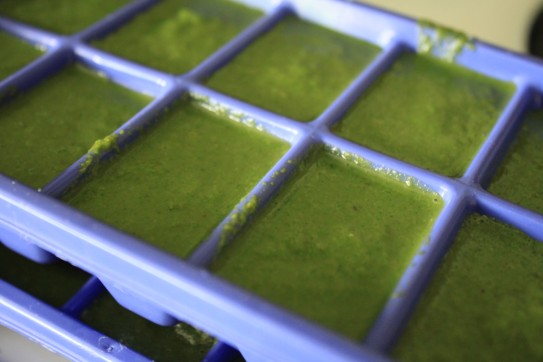
Green smoothie frozen concentrate made with lettuce, spinach, and lambsquarters.

So I peeked into my remaining three bags of lettuce from the garden this year, and discovered that they were starting to go south and needed to be used right away. I separated out the slimy leaves, washed the rest, and had an idea! I’ll make green smoothie frozen concentrate cubes!

To make the concentrate:

1. Pour some kefir, water, juice, or watered-down yogurt into a blender. You won’t need too much — just enough to get everything to blend together smoothly.

2. Add lots of greens. Ideas are: lettuce, spinach, beet greens, chard, lambsquarters, purslane, mint, parsley, cilantro, edible flowers, etc. (Kale is the only one I don’t like in a shake, but if you do, go for it!)

3. Start the blender and let it run until you have a uniform slurry.

4. Pour into ice cube trays and freeze.

To use:

When you’re ready to make a green smoothie, thaw out some cubes; I usually use 2 cubes when I make a shake for myself. Add the green liquid to your blender containing the rest of your smoothie ingredients — I like to use fruit and kefir with some ground flax seed and vanilla extract. Blend & enjoy. Yum!!

*****

If you’re curious about green smoothies, you might check out the book Green for Life by Victoria Boutenko, or the related website. My friend Sasha recommended this book to me, and I loved it! While I don’t agree with absolutely everything in the book, I’m glad I read it.

*****

Give Your Health a Boost with Refreshing Green Smoothies!

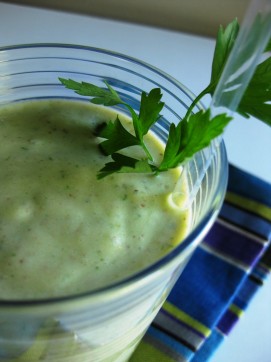
Mmmmm, these green smoothies are a lush-tasting way to sneak more veggies into your diet — and the time is now, since it’s spring and salad greens are in season!

There are so many variations to this concept — please be creative and dream up your own! — but here’s how I make mine:

Green Smoothie

kefir (or yogurt thinned with water)

banana pieces (pretty much essential for adding some sweetness)

apple pieces, or any other fruit

spinach leaves and/or lettuce leaves and/or cucumber slices (or two green smoothie frozen concentrate cubes!)

several fresh mint leaves or parsley sprigs

vanilla extract

ground flax seed

First, add kefir and your greens and mint leaves to the blender and blend thoroughly. Add everything else, blend thoroughly, and enjoy!

*****

How to Make Sauerruben

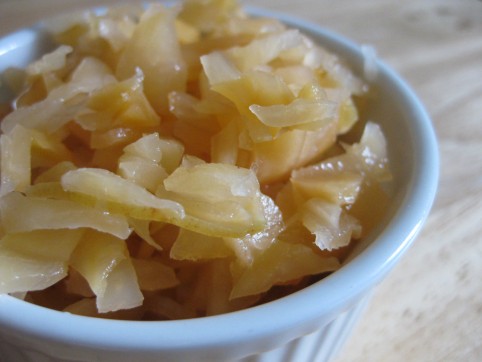
Sauerruben is made just like sauerkraut, only with rutabagas (or turnips, or a combo). It’s lovely stuff, and a nice change from kraut. It has a sweet, radish-like bite — although that will mellow out after a few weeks in the fridge. I like sauerruben a lot more than I thought I would, especially after it mellowed. Give it a try!

Ingredients:

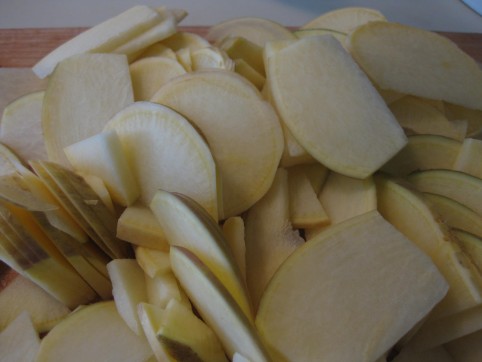
Rutabagas (or turnips, or a combo), washed/scrubbed. I don’t bother to peel mine.

Sea salt (see my salting chart below, plus you may need more to mix up extra brine. (Any non-iodized salt will do, but unrefined sea salt is better for your body.)

*****

Here’s my salting chart. I usually just stick to this, but you can add a little more salt in the summer and a little less in the winter if you like.

10 tsp salt per 5 lbs vegetables

5 tsp salt per 2 ½ lbs vegetables

2 tsp salt per 1 lb vegetables

1 tsp salt per ½ lb vegetables

½ tsp salt per ¼ lb vegetables

*****


Shred, grate, or finely chop your rutabagas. Add the salt, and mix well.

I let this sit on the counter for several hours or overnight (this step is in place of pounding) so that the salt can begin to draw water out of the rutabagas. The water contains nutrients, and these nutrients then become the substrate for the growth of the lactic acid bacteria which is what turns your rutabagas into sauerruben. (Steinkraus, Handbook of Indigenous Fermented Foods, p.120.)

After some water has been drawn out, pack the rutabaga WITH its water into a glass jar. You really want to pack it in there (use your fist or any kitchen tool), because this will help squeeze more water out. You can also use a specially-made ceramic sauerkraut crock, or a glass or ceramic bowl (anything except metal, since salt and acid can react with metal).

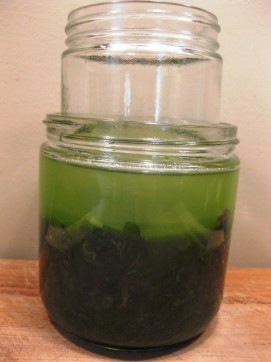
Keep the rutabaga submerged under the brine by placing a smaller plate on top and weighing it down with something heavy (a jug of water, a boiled rock, etc.). Or, nest a smaller jar of water inside your larger glass jar.

This is kale, not sauerruben, but same idea. I particularly like this nesting-jars method for keeping everthing submerged under the brine.

Whatever method you devise, just be sure that all traces of rutabaga are completely submerged in the brine. Little bits sticking up above the water line will quickly lead to a moldy situation (and if you do end up with mold, scrape off the entire top layer, but the rest underneath should be fine!). So if you need to mix up some more brine (which is just a fancy name for salt water), use the ratio of 1 tsp salt to 1 cup of water.

Cover the jar with a towel to keep bugs out. Leave it to ferment at room temperature until you like the taste of your sauerruben. Let your tongue be your guide to done-ness. Taste it every few days, and transfer into the fridge when it tastes the way you like it. I like mine pretty sour, so I usually leave it out for 1-2 weeks or more, depending on how warm it is in the kitchen. If the taste is right but the ‘ruben is still too bitey, shove it to the back of the fridge for several weeks for it to mellow out.

Once in the fridge, your sauerruben will keep for many months. And when it’s all gone, don’t throw out the juice; it’s full of beneficial Lactobacillus (lactic acid bacteria) and is said to be a very good digestive tonic. And if you like, add a little of the juice to your next batch of sauerruben as a starter.

Troubleshooting:

If you see a white film (“kahm yeast”) develop on the surface of the brine, scrape off what you can each day until the ‘ruben is done fermenting. Sometimes I don’t get any film. Sometimes I get a fair amount. There doesn’t seem to be any rhyme or reason. The kahm yeast won’t harm anything, but if you keep getting a lot of it day after day, it can sometimes (not always) impart an off taste to the brine. Just try to scrape it off on a regular basis (daily is nice).

*****

How to Make Beet Kvass

Beet kvass is a favorite at our house! It’s so easy to make and so good for your body, and we love the taste — salty, sour, very refreshing.

Beets are extremely nutrient rich and have long been valued as a blood tonic (and their doctrine of signatures would suggest this — they make everything look bloody after you’ve cut into them!). They are rich in iron, calcium, magnesium, phosphorus, carotene, B complex, copper, and vitamin C. Beets and their greens contain special substances that protect the liver and stimulate the flow of bile (Nourishing Traditions, p. 373). And drinking beet kvass is especially beneficial to digestion because it’s lacto-fermented and therefore contains beneficial enzymes and bacteria for your digestive tract. It’s an all-around health tonic, and according to p. 610 of Nourishing Traditions, beet kvass promotes regular elimination, aids digestion, alkalinizes the blood, cleanses the liver, and is a good treatment for kidney stones and other ailments.

Well, all I know is that it tastes good!

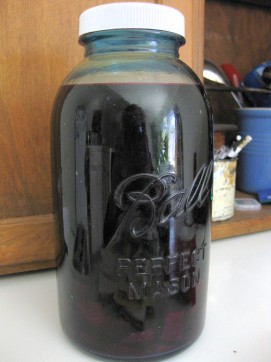
The recipe in Nourishing Traditions describes letting your beet kvass ferment for 2 days on the counter and then refrigerating it. However, I find it usually needs to ferment a lot longer than that. I let mine go a week or two on the counter, until the kvass is completely opaque — a deep, thick red that you can’t see through. I give it a taste, and if it’s sour with no hint of sweetness left, I know it’s done (though some may like to have that hint of sweetness). As with all fermentations, let it go until it tastes good to you, regardless of what the directions say.

Here’s my recipe:

Beet Kvass

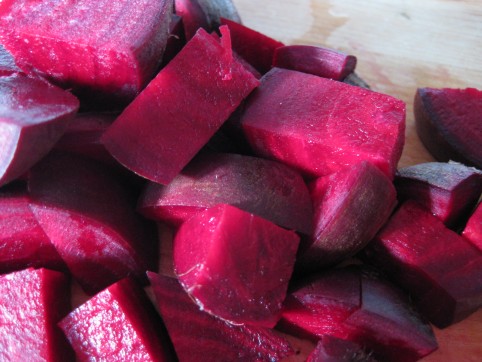
8 – 10 ounces organic beets, scrubbed & coarsely chopped (I don’t bother to peel them)

1/4 cup whey* (optional)

1 Tbsp sea salt (I like unrefined sea salt because the minerals haven’t been taken out)

water

Place the salt into a 2-quart glass jar. Pour in a little warm water to dissolve the salt, and then add the beets and whey (if using). Fill the jar to the top with water. Stir and cover. Let sit at room temperature until the kvass tastes good to you — several days to a couple weeks, depending on your kitchen temperature and your tastes. Transfer to the fridge. If the kvass isn’t delicious, it may need a few weeks to “do its thing” in the fridge. I always find that my ferments taste even better when they’ve been shoved to the back of the fridge for a few weeks (or…er…months!).

And I have found that the whey is an optional ingredient, even though it isn’t listed as such in Nourishing Traditions. Feel free to leave it out; your kvass will take a little longer to ferment, but will be just as delicious!

When the liquid is nearly gone from your jar, you can fill it halfway again with water (no extra salt) and let it re-ferment if you want. Or you can save some kvass to add to your new batch as an innoculant, or you can juice your spent beet chunks! Or all of the above.

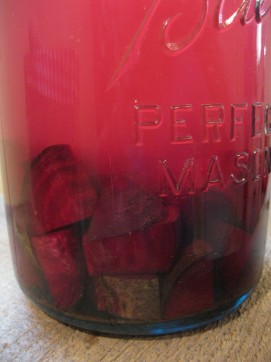
Starting a new batch of beet kvass

Beet kvass, finished and ready to drink

*****

*Whey: a clear yellowish liquid that can be drained off a fermented milk product like yogurt, buttermilk, or kefir. Whey will actually last for a couple months in your fridge. There are several ways to collect it:

– Easiest way: make kefir and let it over-ferment until curds and whey have separated. Spoon off the curds, and strain the whey through a fine mesh seive.

– Another way: Place a colander or seive over a bowl. Line the colander with a clean, damp tea towel, and pour yogurt into that. Leave for a day or two in your fridge to drain. You’ll then be left with whey in the bowl and “Greek yogurt” (or “yogurt cheese” if it’s really thick) in the colander. Both are great for making dips.

*****

Troubleshooting:

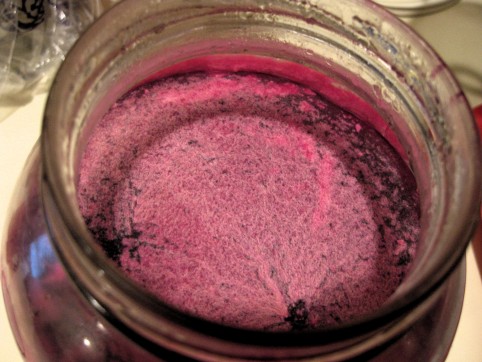
My ferments, including my kvass, sometimes get a white film (kahm yeast) on top during fermentation. It looks like this:

Kahm yeast is harmless, but you’ll want to try to keep it scraped off so it doesn’t affect the flavor of the kvass too much. I do find that my kvass gains a depth of flavor when it’s had this film on it, but if you let it go uncontrolled, it can make your kvass taste weird. Try to scrape as much of it off each day as you can.

*****

« Older posts Newer posts »

© 2024 The Herbangardener

Theme by Anders NorenUp ↑