Kitchen / Garden / Sanctuary - Urban Homesteading to Nourish Body + Spirit

Category: How-To / DIY (Page 8 of 14)

Vegetable Crop Lists: When to Plant What

In this post about how to plan your vegetable garden, I talked about Spring Veggies, Spring “Carryover” veggies, and Summer veggies. A couple days ago, I got an email from Val, who asks: “…Would you mind posting a list or resource for what you define as spring, spring carry-over, and summer vegetables?? THANKS!!”

Sure, Val! Great idea. Since I don’t know of a resource for this info, I’ll post my own list.

I garden in Zone 5/6, in Colorado. Our growing season is about 110 days…our last average Spring frost is mid-May, and our first average Autumn frost is early October. So this list won’t apply to you lucky folks who garden year-round in mild climates. (Don’t know your zone? Enter your zip code at the Arbor Day Hardiness Zone Lookup.)

The following list is based upon my personal experience in my own garden, where I grow almost everything from seeds sown directly into the garden (except tomatoes & peppers, which I start indoors a month or two ahead of time). Often there is overlap between Spring and Summer gardens, but it works out OK because the mature Spring stuff will protect and shade the Summer seedlings for a while. By the time the Summer stuff is up and running, the Spring stuff has been pulled out.

Also, you’ll notice that some veggies are flexible and can be included in more than one category.

******

Spring Veggies Plant in early Spring (usually two months before the last frost…March 15 for me), and harvest before the intense heat of Summer (usually up to a month after the last frost…late June for me). Spring veggies are pretty much in-n-out before the main Summer season.

Arugula/Rocket

Beets/Beetroot

Broad Beans/Fava Beans

Broccoli

Broccoli Raab/Rapini

Collards (can also be a carryover veggie, where you leave it in all Summer)

Green Onions/Scallions (can also be a carryover veggie, where you leave it in all Summer)

Kale (can also be a carryover veggie, where you leave it in all Summer)

Lettuce

Peas

Radishes

Spinach

Swiss Chard/Silverbeet (can also be a carryover veggie, where you leave it in all Summer)

Turnips

Spring Carryover Veggies – Plant in early Spring (usually two months before the last frost…March 15 for me), and leave in the garden all Summer long.

Cabbage

Carrots

Cauliflower

Cilantro

Collards

Dill

Garlic

Green Onions/Scallions

Kale

Onions

Parsley

Potatoes (planted a month before last frost — mid-April in my garden)

Swiss Chard/Silverbeet

Turnips

Summer Veggies – Plant only after the last Spring frost (late May for my Zone 5/6 garden). Leave in the garden all Summer long.

Basil

Beans, all types

Brussels Sprouts (harvest after frost in fall & winter)

Carrots

Celery (probably will want to use seedlings, since starting from seed can be difficult)

Cilantro

Corn

Cucumbers

Dill

Eggplant/Aubergine

Gourds

Melons

Malabar Spinach (Basella rubra)

New Zealand Spinach (Tetagonia)

Okra

Peppers/Capsicum

Pumpkins

Rutabagas

Squash, summer & winter

Soybeans

Tomatoes

Tomatillos

Turnips

Watermelon

Zucchini/Courgette

Caveman’s Heating Pad

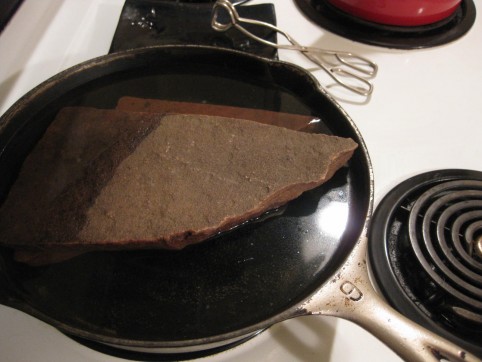
Stuck without a heating pad? No problem! Gather one or two flat rocks (flagstone in this case) and simmer them in water on the stove (or pop them into the oven). When thoroughly hot, remove with tongs and wrap in a couple towels. Use both rocks at once, or keep one in the water to exchange when the first one cools down. You can’t exactly wrap a rock around your body the way you can a heating pad, but it’s a perfectly good do-fer solution!

The Perfect Tool For Unclogging Drains

We’ve discovered a great tool!

Our shower has been draining very poorly lately. We don’t like Draino because of how very toxic it is, and so F. had the brilliant idea to buy a flexible grabber from the local auto parts store to shove down the drain and grab the gunk. It was $7.50, and took care of the problem in about 10 seconds! No chemicals involved, and the water drains like a charm now!

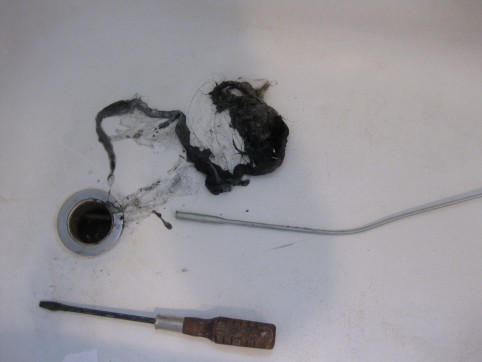
Look at the gross clog I pulled out!!!

Grossest thing I've encountered in a long time.

Since we always keep a mesh screen over our drain, I’m afraid some of that is from previous tenants — which is something I am NOT going to think about, so let’s move on, shall we…

*****

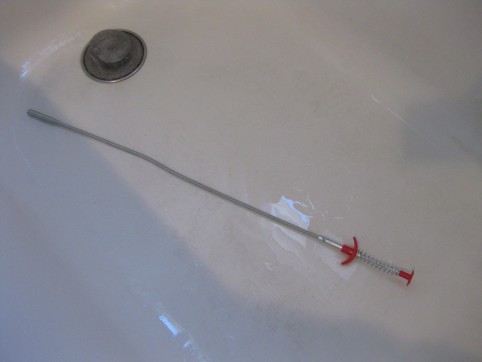
Here’s the flexible grabber tool. Sort of like a syringe, you push down on the top, and the little claw comes out the bottom. Of course we tested it first on each other’s fingers…and it has quite a grip!

Flexible grabber claw tool

*****

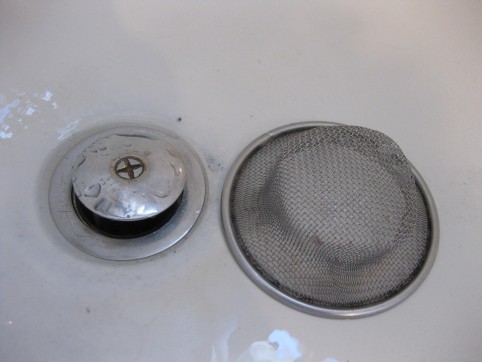
Oh and here’s the screen we keep over the drain — an essential preventive measure! We also have one in the kitchen since we don’t have a garbage disposal.

I’ve heard of other preventive methods to keep your drains clear, like using baking soda and vinegar, and also pouring boiling water down the drain each day. Do you have any tricks up your sleeve to share?

Natural, Homemade Deodorant That Actually Works

So you don’t want to use the standard grocery store antiperspirant due to its toxic aluminum content, but you’ve tried the health-food-store deodorant and it just doesn’t work — despite its own not-very-natural ingredient list. What to do?

Try this recipe!

I mixed up a batch of this deodorant several months ago and gave it a hardcore test on our hot, muggy trip to Argentina. I was amazed! Never has a deodorant worked this well for me. You still sweat, but it doesn’t smell. Even after being in the same clothes for well over 24 hours of travel down to Buenos Aires, my shirt smelled only of baking soda. My socks were a different story, however…

Coconut Oil Deodorant

1/4 cup coconut oil, at room temperature (not melted)

2 Tbsp cornstarch or arrowroot

2 Tbsp baking soda

essential oils (optional)

In a bowl, with the back of a spoon, mix your cornstarch (or arrowroot — both work equally well) and baking soda (plus any essential oils) into the coconut oil. These ratios are flexible — use more coconut oil if it seems too dry, or more baking soda if it’s too goopy.

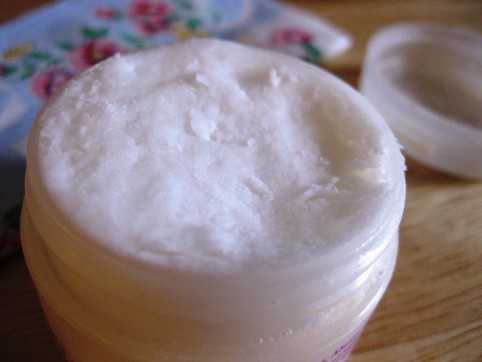
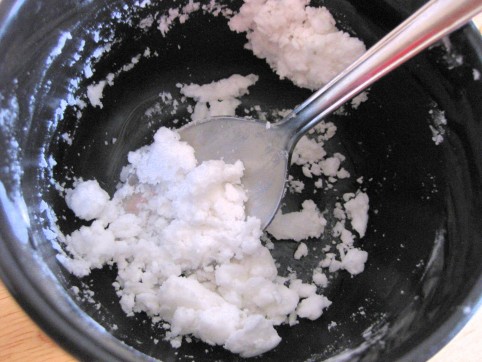
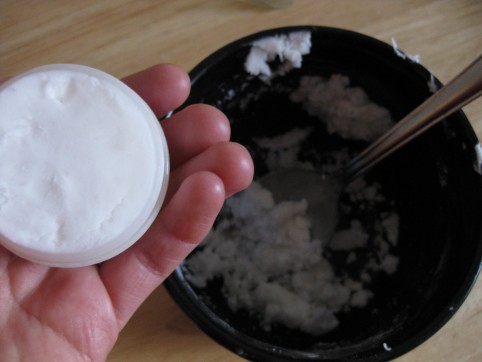
This is the consistency I like — still crumbly, but wet enough to easily hold together and get packed into a jar:

Tip: don’t melt your coconut oil to accomplish this task; although it’s easier to mix, the cornstarch and baking soda will sink to the bottom of the container as the deodorant hardens, and the top layer will be coconut oil only — which, by itself, doesn’t work as well at preventing stink.

Scoop into a jar. Store at room temperature. If it’s hot enough in your house that the oil liquefies and the ingredients separate, shake the jar before you use it each time.

To use, scoop some out with your fingers and smear under your arms. I use a generous pea-sized amount for each arm.

How To Plan Your Spring & Summer Vegetable Garden

Good grief, it’s already March! Planning my spring & summer vegetable garden is on the agenda for this coming week, and so I’m re-posting my instructions from last year on the planning process I devised and use every year. Hopefully it’s helpful to you!

Today I’m going to give you a little tutorial on how to plan your vegetable garden. Over the years I’ve developed a planning method that works well for me. Admittedly, I don’t really like garden planning very much. I do love looking through all my seed packets and deciding what to grow for the year, but the process of actually planning what to put where is a task that takes literally hours of mental work (for me at least). It’s a lot of thinking, decision-making, & considering all different garden plan configurations (and past years’ plant placements) in my head before I even put pencil to paper.

That said, though, there comes a feeling of satisfaction and excitement when I’ve completed the plan and am thoroughly happy with it. Each year’s plan is different, depending on what I want to grow and also considering what grew there last year.

I have three 4’x8′ raised beds, one 2’x8′ raised “lasagna” bed (a story for another day!), another 4’x8′ raised bed against the south side of the house, plus various pots here and there for extra tomato growing space.

Here’s my basic planning process:

1. Decide what you want to grow. Look through seed catalogs or go to a garden center to get seeds, or if you’re like me and already have wayyy too many seeds to choose from, go through all your seed packets and set aside what you think you want to grow. (I like to start all my veggies from seed, but you could just as easily decide what you want to grow, and then buy plants from the nursery.)

Once you’ve narrowed down which veggies you want to grow, write them all down on a piece of paper.

2. Determine which vegetables will be in the Spring plan, the Summer plan, or both plans. If you’re planning both a spring and summer garden (which I do), you’ll have 3 categories of vegetables:

– Early-spring-planted veggies that you’ll harvest before summer (like spinach, peas, lettuce, etc.)

– Early-spring-planted veggies that you’ll leave in the garden through the summer — the “spring carry-over veggies” (like cabbage, onions, parsley, potatoes, cilantro, dill, chard, carrots, etc.)

– Summer-planted veggies (like tomatoes, squash, peppers, cucumbers, etc.)

Click here for a comprehensive list of which veggies fit into which categories.

As you can see in the photo below, I mark my piece of paper with “Sp” (for “spring”) to the right of the spring-planted veggies, and “M” (for “main” summer) to the left of the summer-planted veggies. Vegetables with both “Sp” and “M” will be in both garden plans. As I place each vegetable into the plan, I put a check mark next to it.

3. Draw two outlines of your garden plots on paper — one for spring, one for summer. For my plans, I have one piece of thick paper; on one side I have Spring, on the other side I have Summer. Be sure to also note the year somewhere on your garden plan. On both plans, draw in any perennial vegetables that have overwintered.

Graph paper isn’t necessary, unless you like to use it. I draw my plans free-hand, and just eye the scale of things. The first year that I did a formal plan, I got mathematical about it and used graph paper, with “one square = 6 inches” and all that, but in the end, I found it unnecessary to be so precise, and I haven’t used graph paper since.

Also, always work in pencil! 🙂
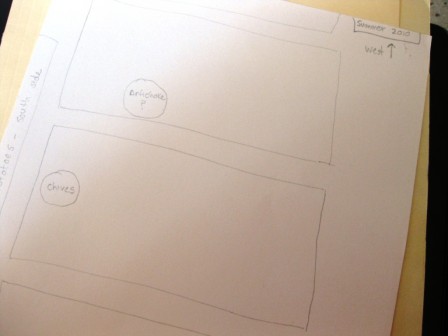
Draw your garden plots, and draw in any overwintering perennial vegetables.

4. Plan your summer garden first. I find it easier to plan my summer garden first, and then my spring garden. To plan my summer garden, I decide on the location of both the spring-planted carry-over vegetables as well as the summer-planted vegetables.

I begin with deciding where I’ll put my tomatoes…though in doing this, you’ll be thinking about all your vegetables — not just the tomatoes. But I like to put the tomatoes down on paper first, as this makes it easier to place other things.

I also place the tallest vegetables (tomatoes, plus anything grown on a trellis) at the north end of each of the raised beds, so that they don’t block the sun from reaching shorter veggies.

I also consider the locations of last year’s vegetables, and try not to plant the same thing in the same place the next year. It doesn’t always work out that way (for instance, this year’s cabbage will be partially in the same spot as last year), but to me, that’s okay.
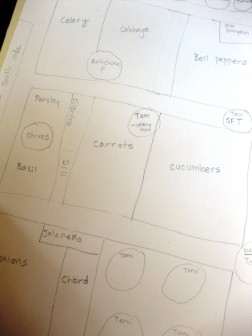
I like to plan the summer garden first.

5. Plan your spring garden based on the summer garden. Now, on your spring garden plan, copy down the spring carry-over veggies that you placed in your summer plan. Then, fill in the empty spaces with all of your spring veggies that will be harvested before summer, like the lettuce, radishes, spinach, peas, etc.
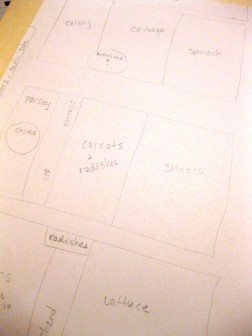
I plan the spring garden based upon which veggies will be carrying over to summer.

6. Check your veggie list to be sure you’ve placed everything, and then you’re done! Now it’s time to plant your spring garden!

Click here to read about how I amend my soil each year to get ready for spring planting.

And as a side note…if you start your own seedlings inside (rather than buying from a nursery), that adds another step to the spring preparation process, but it’s not bad. I definitely prefer to grow my own seedlings! Mostly I start my summer stuff inside, like tomatoes, squash, cucumbers, and peppers, but this year I also started my cabbage inside and it’s germinating better than when I plant it directly into the garden. But other than cabbage, I plant all my spring stuff directly into the garden, without starting it inside. Anyway, I’ll share more about all that soon, too.

*UPDATE 3/5/11: The past couple years I’ve just planted cucumbers and squash seeds directly into the garden rather than starting them inside. I’m much happier with this method since it’s SO much easier and the difference in fruiting times is not appreciable enough to be worth the bother of starting them inside. So I’ll stick to starting tomatoes, peppers, and cabbage inside. I might also start my celery inside, too, since it never quite took hold when I direct-seeded last year.
« Older posts Newer posts »

© 2024 The Herbangardener

Theme by Anders NorenUp ↑