Kitchen / Garden / Sanctuary - Urban Homesteading to Nourish Body + Spirit

Category: How-To / DIY (Page 9 of 14)

Juice Your Kitchen Scraps!

I was inspired today by this post about raw vegetable juices over at Wooly Moss Roots. I’ve never been into juicing because separating the fiber from the juice just doesn’t seem natural, and it’s not the ideal way to consume vegetables according to what I’ve read. But then I’ve also read that as long as juicing is used in addition to your regular consumption of fruits and vegetables, it can actually be a very good way to boost your intake of vitamins and minerals. I can certainly see both sides of the story.

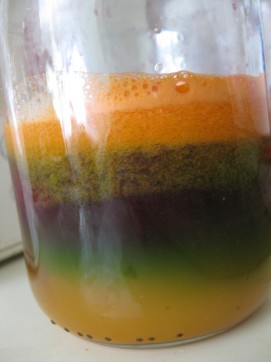
We actually have a juicer already (it came with my Hubby), so today I decided to go for it. I used some kitchen scraps that would’ve otherwise gotten tossed (cilantro and parsley stems, a mandarin orange with very tough membranes, and spent beet chunks from making beet kvass), as well as a carrot and some celery. It turned out pretty well! I was especially thrilled to be juicing the last drops of lacto-fermented, enzyme-rich goodness out of those beets! (I’ll share my beet kvass recipe soon. We love beet kvass in this household!)

Remembering that all those vitamins and minerals would probably need some fat in order to be absorbed properly, I added some grassfed whipping cream in a ratio of about 3 or 4 parts juice to 1 part cream.

OH YEA.

The cream was the key. Better nutrient absorption, better taste!

I even felt a sort of…uplift…after drinking this raw veggie juice. And I loved how it was such a clean, light way to start the day!

What’s your opinion about juicing? If you juice, what are your favorite veggie combos?

Pretty layers of juice!

The Best Way to Eat an Orange

I’ve rediscovered oranges after years of passing them by! I never liked peeling them, never liked the pithy white part or chewing forever on the membrane that covered each segment. Never liked juice dribbling off my elbows as I ate them, or the sticky fingers at the end.

Well, it turns out I’d been doing them wrong.

And when you do them right, they’re like a different fruit — easy to eat, juicy, and refreshing! And in January, refreshing is precisely the taste I’m after.

So…

Cut off the north and south poles.

Slice off the rind in strips from top to bottom.

Cut the orange into rounds, latitudinally (like the equator).

Slice the rounds into wedges.

Sprinkle with cinnamon if you like, and eat with a fork.

Blend Your Own Russian Caravan Tea

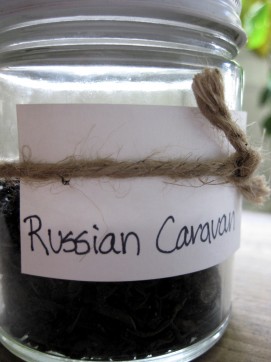
If you like smoky flavors in your food, I bet you like Russian Caravan tea! I absolutely love it! It’s black tea with a smoky twist, thanks to the addition of Lapsang Souchong — black tea that’s been smoked over smoldering pine or spruce wood. Legend has it that the tea absorbed the smoky aroma of nighttime campfires during its journey from China to the Russian Czar. Others say the tea was smoked as a way of preserving it for the 6,000-mile trip. Either way, the name is enchanting and the flavor is an unusual treat!

I used to buy Russian Caravan in teabags at our local health food store, but when they stopped selling it, I decided to blend my own using the ratios below. I like to measure the tea by weight rather than volume, because I happen to have a food scale and because equal weights don’t always have equal volumes (oolong seems to have more volume), but either way it’ll work.

Once blended, I use 1 tsp of tea per mug of hot water (about 12 oz) and I love to add milk or cream. If you prefer decaf tea like I do, take a look at my post on How to Decaffeinate Your Tea.

Russian Caravan Tea

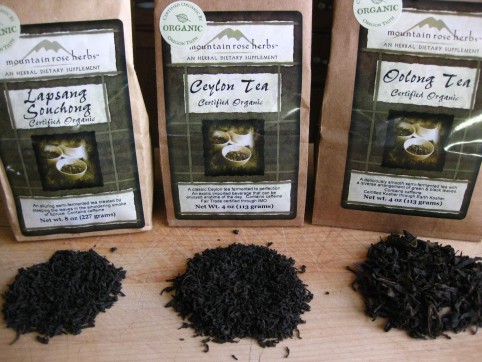
1 part Lapsang Souchong

1 part black tea (English Breakfast, Assam, Ceylon are all good, but don’t use anything flavored like Earl Grey)

2 parts Oolong tea

Where to source these ingredients? I like Mountain Rose Herbs. Although I think their shipping is a little pricey, I always get my stuff from them because it still comes out cheaper in the end, and I like the company and their products.

Equal weights don't quite have equal volumes...

*****

After Halloween: Cooking Your Pumpkin and Roasting Its Seeds

I hope you had a happy Halloween! Mine was uneventful, but I did go on a wonderful bike ride through the neighborhoods on Halloween night to see the decorated houses, carved pumpkins, and kids trick-or-treating. I think I had a smile on my face the entire time. To boot, it was an unusually mild night with a few diehard crickets still going (usually it’s snowing here on Halloween!), and people were sitting out on their front porches, candy bowls beside them.

Anyway, last year I cooked our Halloween pumpkin and I wanted to share the process if you’re interested in doing the same thing. One thing to note about the generic jack-o-lantern pumpkins is that they’re very lacking in flavor. Bland! And watery! But after draining out the excess water (which we’ll address below), the blandness can be a good thing because you can then sneak the pumpkin puree into your cooking (or baking) without affecting the dish’s flavor very much.

Here’s what to do:

With a sharp knife, cut your pumpkin in half, then cut off the stem.
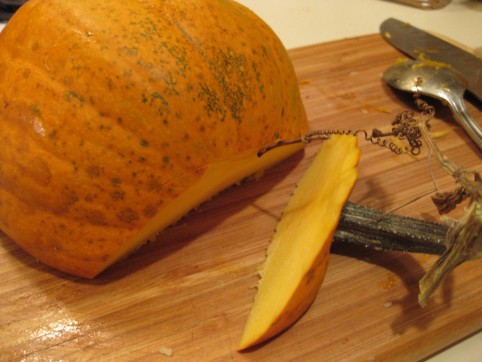
Cut off the stem

Scoop out the seeds and SAVE THEM! We’ll be roasting them while the pumpkin cooks.
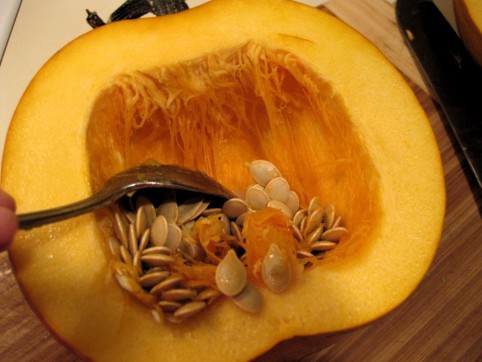
Scoop out the seeds and save them for roasting.

With a spoon and some elbow grease, scrape out the long stringy fibers. You have to really get in there with your spoon; attack that pumpkin!
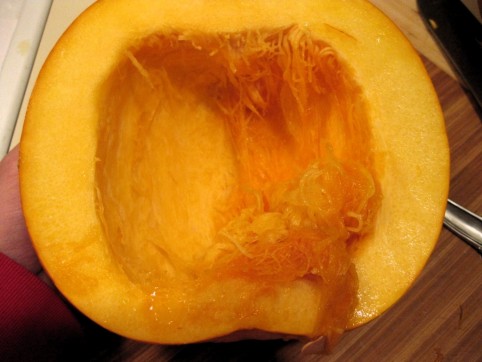
Scoop out the stringy fibers

Set pumpkin cut-side down into a large baking pan with sides to contain the juice. If you don’t have a pan with sides large enough, then just bake them on cookie sheets, cut-side up. Or be creative and set them on something else, like a muffin tray to catch the juice!
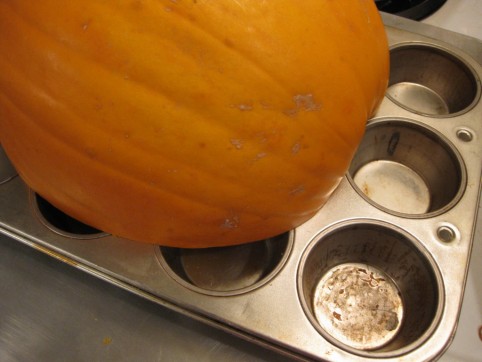
Bake at 350* (or 375* — the temperature isn’t too important). You’ll bake it until the flesh is very soft, which usually takes about an hour, maybe more.

After you put your pumpkin in the oven, put the seeds into a colander. Rinse them and remove as much of the stringy orange stuff as you can.
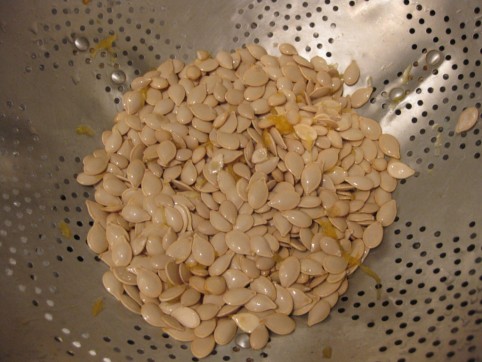
Wash seeds & remove orange fibers

Spread them onto an un-greased cookie sheet and sprinkle them fairly liberally with salt. Bake them until they’re a very light golden color; you don’t want to over-bake them, but you do want them dry to the touch, and crunchy. This seems to take about 15 minutes for me, but the times may be different for you.
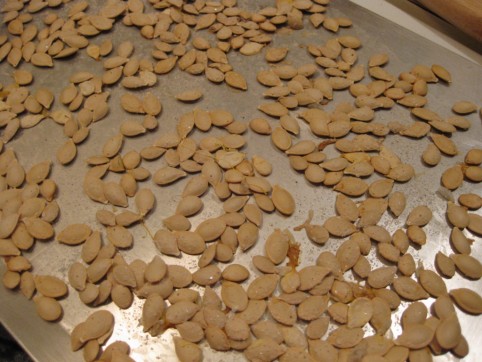
Spread on a cookie sheet and sprinkle with salt; cook till dry and crunchy
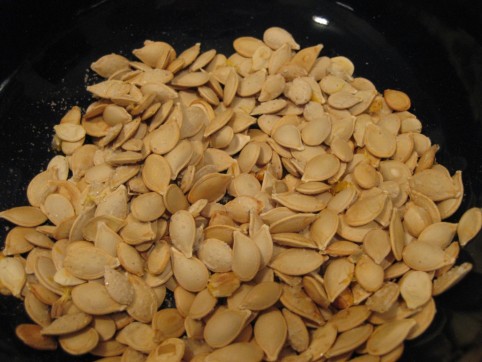
Eat!

Now, back to the pumpkin.

When the flesh is very soft, remove from the oven and let the pumpkin cool until it’s handle-able.
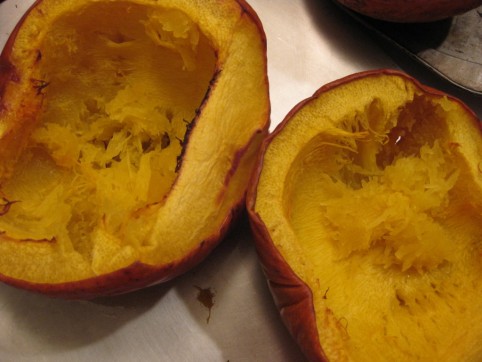
Bake till very soft

Scrape out the flesh, and discard (or compost) the skin-shell. Run the pumpkin flesh through a food processor or blender to improve the texture and break up stringiness. If it’s too dry to run through the blender, add a little water and blend; you can drain the water out (or cook it off) later.
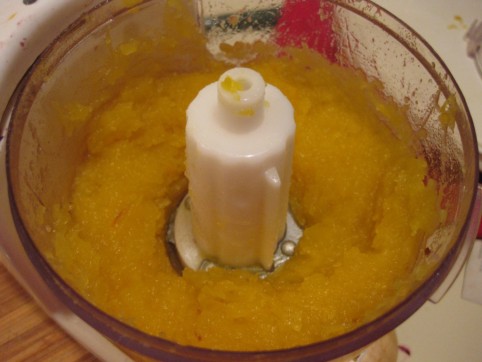
Blend till smooth, adding a little water if needed

Since these pumpkins generally have quite a bit of water in their flesh, you’ll want to drain the puree after blending it. I like to dump the pumpkin puree into a colander and let that sit over a bowl overnight. You’ll be amazed at how much water drains out! Alternatively, you can just cook the water off instead of letting it drain away; just simmer the pumpkin puree, uncovered, in a pot over low heat until you’re satisfied with its consistency.

That’s it! Measure your puree into ½- or 1-cup portions and freeze into ziploc bags; I like to stack my bags neatly on a plate and freeze them so that they freeze into stackable shapes, like this:
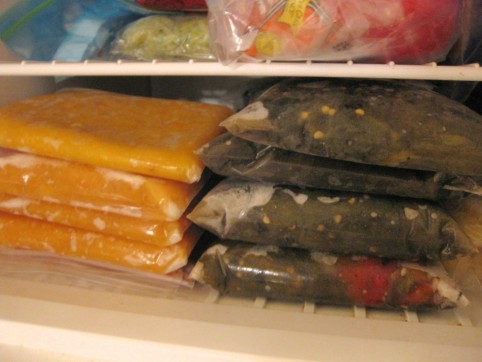
Measure, stack, and freeze!

Camping Trip Supply List

Well gosh, it’s a little late in the season to be posting a camping supply list, but if anyone is going camping over the Labor Day weekend, it might help. I came up with the list (in no particular order!) based on what we took on our recent camping trip, so this will pretty much cover all your bases.

tent

tarp (optional, but nice to have something to put the tent on so you don’t track dirt inside and all over your sleeping bags)

water — roughly a gallon per person per day or more, for drinking/cooking/washing

sleeping bags or bed rolls

inflatable pads to go under your sleeping bag

pillows

toilet paper

trowel/small shovel (if there aren’t outhouses, bring a trowel to dig a 6” deep hole for when nature really calls)

unscented baby wipes for “dry showers”

bath towels

kitchen hand towel

coleman stove

extra gas or propane if needed

coleman lantern (optional if you have flashlights)

fire extinguisher

matches

pots and pans as needed

potholder if needed (or use kitchen towel as a pot holder)

tupperware or ziploc bags for leftovers

cooler

food

measuring cup/measuring spoons if needed

metal spatula

ladle

steak knife or slicing knife

silverware

napkins

dish soap (we like Dr. Bronners because it’s gentle on the environment, and can be used for dishes, hands, bodies, hair, toothpaste, etc)

sponge

trash bags

2 flash lights

cups or mugs

plates and/or bowls

rope for clothesline if needed

collapsible chairs if your site doesn’t have a picnic table

bug spray

salt & pepper

oil for cooking

[UPDATE: rain ponchos are handy, too!]

What are your camping essentials?

« Older posts Newer posts »

© 2024 The Herbangardener

Theme by Anders NorenUp ↑