Kitchen / Garden / Sanctuary - Urban Homesteading to Nourish Body + Spirit

Category: Recipes + Nutrition Info (Page 9 of 21)

How to Make Beet Kvass

Beet kvass is a favorite at our house! It’s so easy to make and so good for your body, and we love the taste — salty, sour, very refreshing.

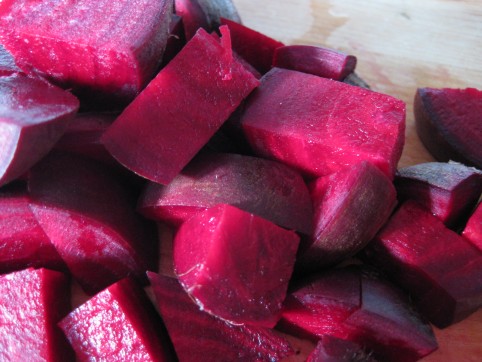
Beets are extremely nutrient rich and have long been valued as a blood tonic (and their doctrine of signatures would suggest this — they make everything look bloody after you’ve cut into them!). They are rich in iron, calcium, magnesium, phosphorus, carotene, B complex, copper, and vitamin C. Beets and their greens contain special substances that protect the liver and stimulate the flow of bile (Nourishing Traditions, p. 373). And drinking beet kvass is especially beneficial to digestion because it’s lacto-fermented and therefore contains beneficial enzymes and bacteria for your digestive tract. It’s an all-around health tonic, and according to p. 610 of Nourishing Traditions, beet kvass promotes regular elimination, aids digestion, alkalinizes the blood, cleanses the liver, and is a good treatment for kidney stones and other ailments.

Well, all I know is that it tastes good!

The recipe in Nourishing Traditions describes letting your beet kvass ferment for 2 days on the counter and then refrigerating it. However, I find it usually needs to ferment a lot longer than that. I let mine go a week or two on the counter, until the kvass is completely opaque — a deep, thick red that you can’t see through. I give it a taste, and if it’s sour with no hint of sweetness left, I know it’s done (though some may like to have that hint of sweetness). As with all fermentations, let it go until it tastes good to you, regardless of what the directions say.

Here’s my recipe:

Beet Kvass

8 – 10 ounces organic beets, scrubbed & coarsely chopped (I don’t bother to peel them)

1/4 cup whey* (optional)

1 Tbsp sea salt (I like unrefined sea salt because the minerals haven’t been taken out)

water

Place the salt into a 2-quart glass jar. Pour in a little warm water to dissolve the salt, and then add the beets and whey (if using). Fill the jar to the top with water. Stir and cover. Let sit at room temperature until the kvass tastes good to you — several days to a couple weeks, depending on your kitchen temperature and your tastes. Transfer to the fridge. If the kvass isn’t delicious, it may need a few weeks to “do its thing” in the fridge. I always find that my ferments taste even better when they’ve been shoved to the back of the fridge for a few weeks (or…er…months!).

And I have found that the whey is an optional ingredient, even though it isn’t listed as such in Nourishing Traditions. Feel free to leave it out; your kvass will take a little longer to ferment, but will be just as delicious!

When the liquid is nearly gone from your jar, you can fill it halfway again with water (no extra salt) and let it re-ferment if you want. Or you can save some kvass to add to your new batch as an innoculant, or you can juice your spent beet chunks! Or all of the above.
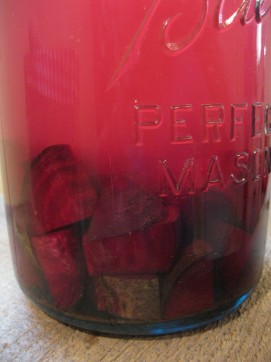
Starting a new batch of beet kvass
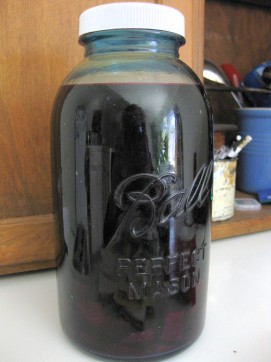
Beet kvass, finished and ready to drink

*****

*Whey: a clear yellowish liquid that can be drained off a fermented milk product like yogurt, buttermilk, or kefir. Whey will actually last for a couple months in your fridge. There are several ways to collect it:

– Easiest way: make kefir and let it over-ferment until curds and whey have separated. Spoon off the curds, and strain the whey through a fine mesh seive.

– Another way: Place a colander or seive over a bowl. Line the colander with a clean, damp tea towel, and pour yogurt into that. Leave for a day or two in your fridge to drain. You’ll then be left with whey in the bowl and “Greek yogurt” (or “yogurt cheese” if it’s really thick) in the colander. Both are great for making dips.

*****

Troubleshooting:

My ferments, including my kvass, sometimes get a white film (kahm yeast) on top during fermentation. It looks like this:
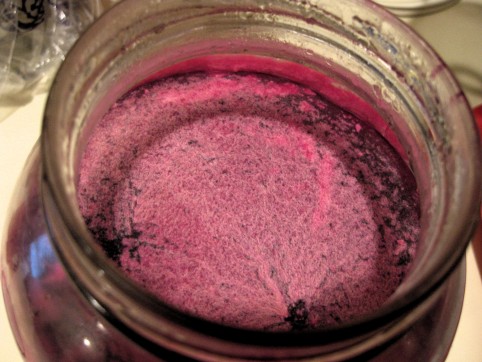
Kahm yeast is harmless, but you’ll want to try to keep it scraped off so it doesn’t affect the flavor of the kvass too much. I do find that my kvass gains a depth of flavor when it’s had this film on it, but if you let it go uncontrolled, it can make your kvass taste weird. Try to scrape as much of it off each day as you can.

*****

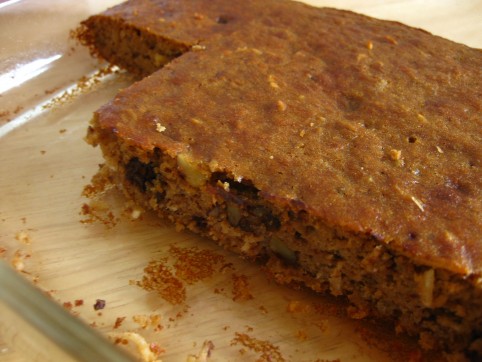
Gluten-Free Chunky Monkey Bars

Time for a recipe! These “Monkey Bars” are a delicious mid-afternoon or after-school snack for both adults and kids — plus they’re grain free and high in protein!

Gluten-Free Chunky Monkey Bars

(Based on this recipe)

1/2 cup coconut flour*

1/2 tsp salt

1/2 tsp baking soda

6 eggs

1/2 cup sucanat (sugar), or 1/3 cup honey

1/3 cup coconut oil, melted

1 Tbsp vanilla

3/4 cup mashed bananas (~2 standard-sized bananas, or 3 smaller ones)

1/2 cup chopped walnuts or pecans

1/3 cup shredded coconut

1/4 cup chocolate chips (optional)

Preheat oven to 350°. Grease a cake pan…mine happens to be 12″ x 7.5″, but you can use a different size and just alter the cooking time as necessary. You could also make these into muffins.

In a medium-sized bowl, stir together the coconut flour, salt, and baking soda. Add everything else and mix well. Pour the batter into the pan and bake for 20-30 minutes, or until golden brown and a toothpick inserted into the center comes out clean. Cool and slice into bars. (For muffins, fill the tins 3/4 full. The baking time is the same. Makes 12 muffins.)

******

*If you’re not familiar with coconut flour, it behaves differently than wheat flour; it’s high in fiber and is therefore a very thirsty flour, which is why you don’t need much of it to do the job. 1/2 a cup in this recipe doesn’t seem like nearly enough, but it actually is! Coconut flour also requires lots of eggs to achieve the light texture of wheat-based baked goods. But it’s a lovely flour to work with! Just a little different. I love it. In fact, in this recipe I can’t even tell that there isn’t any actual wheat flour; the texture is light, moist, and tender, and the taste is yummmmmmy! Enjoy these!

Natural, Homemade Deodorant That Actually Works

So you don’t want to use the standard grocery store antiperspirant due to its toxic aluminum content, but you’ve tried the health-food-store deodorant and it just doesn’t work — despite its own not-very-natural ingredient list. What to do?

Try this recipe!

I mixed up a batch of this deodorant several months ago and gave it a hardcore test on our hot, muggy trip to Argentina. I was amazed! Never has a deodorant worked this well for me. You still sweat, but it doesn’t smell. Even after being in the same clothes for well over 24 hours of travel down to Buenos Aires, my shirt smelled only of baking soda. My socks were a different story, however…

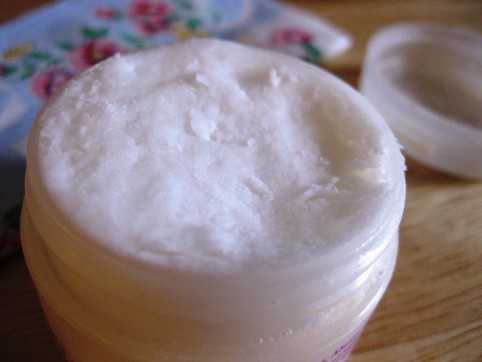
Coconut Oil Deodorant

1/4 cup coconut oil, at room temperature (not melted)

2 Tbsp cornstarch or arrowroot

2 Tbsp baking soda

essential oils (optional)

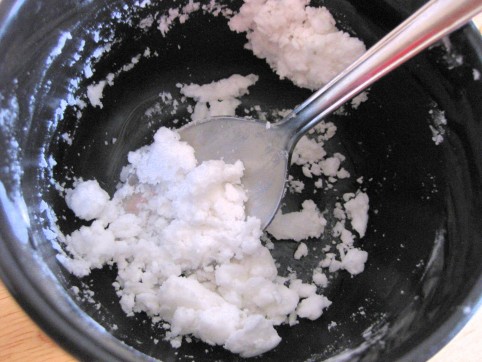
In a bowl, with the back of a spoon, mix your cornstarch (or arrowroot — both work equally well) and baking soda (plus any essential oils) into the coconut oil. These ratios are flexible — use more coconut oil if it seems too dry, or more baking soda if it’s too goopy.

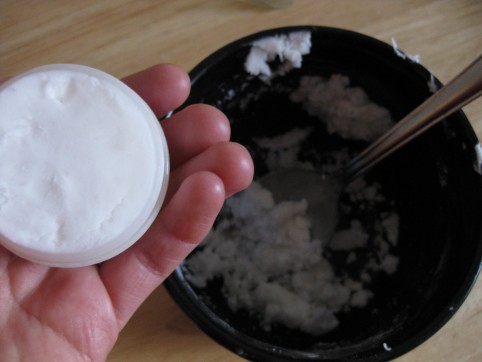
This is the consistency I like — still crumbly, but wet enough to easily hold together and get packed into a jar:

Tip: don’t melt your coconut oil to accomplish this task; although it’s easier to mix, the cornstarch and baking soda will sink to the bottom of the container as the deodorant hardens, and the top layer will be coconut oil only — which, by itself, doesn’t work as well at preventing stink.

Scoop into a jar. Store at room temperature. If it’s hot enough in your house that the oil liquefies and the ingredients separate, shake the jar before you use it each time.

To use, scoop some out with your fingers and smear under your arms. I use a generous pea-sized amount for each arm.

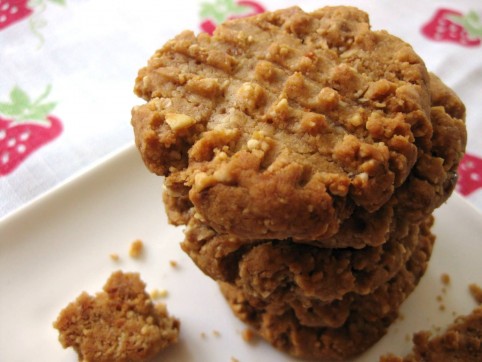
Gluten-Free Peanut Cookies

I tried out a new recipe today, based on the recipe for my favorite Almond Thumbprint Cookies, and it turned out great! If you like classic peanut butter cookies, you’ll love these.

Check it out:

Gluten-Free Peanut Cookies

1 1/2 cups peanuts (I used roasted/unsalted)

1/2 cup melted coconut oil or butter (I like to use 1/4 cup coconut oil & 1/4 cup yogurt or kefir to make these a little less rich for my tummy)

1  1/4 cups arrowroot powder* (start with 1 cup and add more if needed)

1/2 cup sucanat (or a little more if you like)

1/2 tsp sea salt

2 tsp vanilla extract

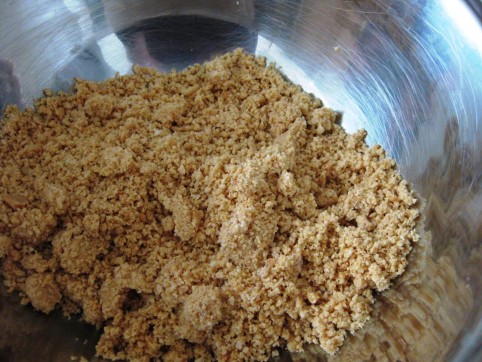
Place the peanuts into a food processor or blender and pulse to a fine meal (but not into peanut butter).

Transfer peanut meal into a bowl, add the rest of the ingredients, and mix well. As mentioned above, start with 1 cup of arrowroot and add more if needed; I always have to add the extra 1/4 cup. The dough should form a nice ball and not be overly sticky.

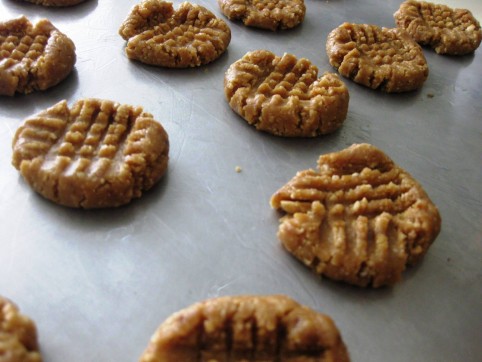
Form dough into tablespoon-sized balls and place on an oiled cookie sheet. On each cookie, make the classic crosshatch pattern with a fork.

Bake at 325° for 20-25 minutes, or until cookies are very lightly browned on the bottom and hold together when you lift them up with a metal spatula.

You’ll want to remove your cookies from the cookie sheet without too much delay. If they cool down and then seem to be glued to the cookie sheet, place them back into the oven to warm up again, and then they’ll be easier to remove.

**********

*Curious about arrowroot? It’s actually not a refined product despite the look of it. It’s the dried, powdered root of a tropical plant that only grows in tidal flats where sea minerals are available. It’s therefore rich in trace minerals and in calcium ash (calcium chloride), which makes it easily digestible. In addition, the calcium ash in arrowroot is very important for maintaining the proper acid-alkali balances in the human body. The downside is its price — $5.35 for a 1lb 4oz bag at our local health food store; however if you have a local Asian store, check with them — I’ve discovered that our local Asian store carries arrowroot for only $2.95/lb!

Refreshing Citrus Salad

I concocted this salad a couple days ago and have enjoyed it for lunch each day since! I just love the taste of it, and the macadamia oil really makes it special.
I wouldn’t normally have macadamia oil on hand since I’m not that gourmet, but I bought it several months ago for making mayonnaise. I’d read that it’s a “good neutral oil” for mayo, except in my opinion, nothing could be further from the truth! It has a prominent macadamia flavor which I really didn’t like in the mayonnaise, but in this salad it really shines.

Lindsey’s Citrus Salad

Lettuce

Cilantro (I love cilantro so I put about 2/3 lettuce and 1/3 cilantro in my salad)

Mandarin orange, fresh, sliced (click here for a good way to slice it)

Avocado chunks

Toasted nuts (macadamias, pecans, almonds, or other)

Macadamia nut oil

Fresh lemon juice

Salt & Freshly ground pepper to taste

Chop the lettuce and cilantro into small pieces and add the mandarin slices, avocado chunks, and toasted nuts. Drizzle fresh lemon juice and macadamia oil over the salad, in approximately equal amounts or to taste. Shake salt & cracked pepper over the salad. Toss and eat immediately with a spoon!

(Tip: If the lettuce and toppings are in small enough pieces, it’s much easier to eat a salad with a spoon than with a fork.)

« Older posts Newer posts »

© 2024 The Herbangardener

Theme by Anders NorenUp ↑