Kitchen / Garden / Sanctuary - Urban Homesteading to Nourish Body + Spirit

Category: Urban Nature + Foraging (Page 12 of 13)

Baby Robin Photo Update – 2 Weeks Old

(If you missed the photos of the babies in the nest, click here.)

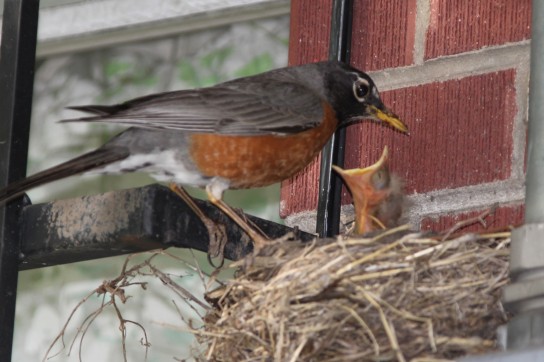
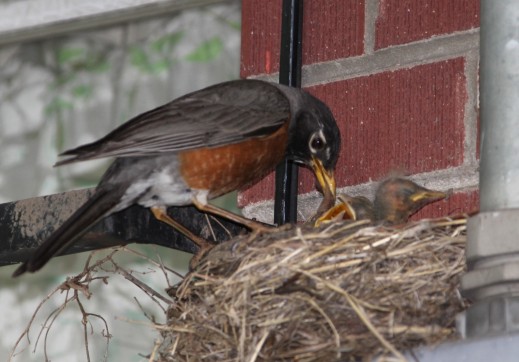
Can you believe these are the same babies from last week?? They are! It’s astonishing to me how quickly they grew up, and I was sad to have missed that whole week. Just two weeks after hatching, the baby robins have fledged! I had no idea it would be that quick, but evidently sometime Wednesday afternoon, they just got up and flew out of their nest. I took these photos on Thursday. The babies were scattered around the neighbor’s yard — still hanging close — and are still being fed by their very busy parents. As if four hungry babies in a nest isn’t tiring enough, now they’re in the bushes, on tree branches, on the fence…mouths still propped open and waiting for bugs. To locate their babies, the parents perch on a branch and call out, bug in mouth, and the babies respond by calling back. They call back and forth until the parent flies down and delivers a bug into baby’s mouth.

Enjoy! Click each for a larger image.

Early Summer Update, Solar Oven, and Baby Robins

How’s your summer going so far?

Mine’s nice! It’s just starting to get hot here, after an unusually cool, wet, windy spring. I usually don’t love hot weather, but the heat feels good right now, after being cold for such a long time…for the last 8 months, it seems.

I spent the last 3 weeks house/cat sitting for my parents, since they were out of town house sitting for family friends. It was great to stay in a real house with a real yard. While of course we have a nice apartment in the attic of a 100-year-old house, I do miss having a clothesline, a private yard, a front and back porch, and my gardens. I spent most of my time outside on the porch, reading and drinking tea! It was like a little retreat. And since my parents have a piano, I played a lot of piano while I was there. I love playing; it’s both a creative outlet and a stress release for me. Though I sure hated those piano lessons in my younger years! But now, I’m so glad my mom & dad forced me to stick with it. (Side note: If you’re considering the Suzuki method of piano instruction for your children, beware! I’ve been playing since I was seven… I took Suzuki lessons for nine years… and I still cannot read sheet music proficiently and I really regret that! It takes me hours upon weeks to learn a complicated piece, and although I then have it memorized, I would give anything to be able to sit down in front of an unfamiliar piece of music and just play it. If I were going to invest in piano lessons for my children, I would make sure they learned how to read music!) Anyway, moving right along!

In other news, my gardens are doing well; as always, some veggies are doing better than others, and it’s different year to year. This year the spinach did nothing. Which was actually fine with me, since last year it went berserk and grew waist-high (it actually did!). The kale has more than made up for that, having self seeded from last year. We have organic, homegrown Red Russian Kale everywhere! What a wonderful “problem”! I’ve been making lots of lacto-fermented kale (like sauerkraut) with good results. The recipe for that is forthcoming.

I’ve heard you can also toast kale in the oven at high heat to make kale crisps. Has anyone tried that?

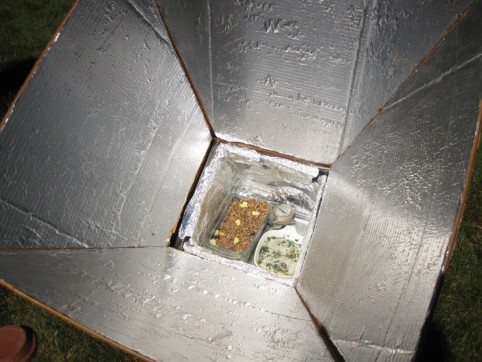
Over Memorial Day Weekend, I hauled out my solar oven while I was house sitting. I built it six years ago and used it all the time that first year, but since then it’s mostly been in the shed, sadly. I dusted it off, and baked some wonderful things in it – eggs topped with garden herbs and parmesan cheese, apple-blueberry crisp, and a homemade frozen calzone. The temperature inside reached an amazing 330*F! I’m going to write up and post some instructions for you on how to build a solar oven…it’s easy, cheap (a few dollars total), and completely fun and satisfying to cook stuff using nothing more than the sun in the sky. [UPDATE: I’ve posted the instructions here.] It’s also very useful for summer cooking, since you don’t have to heat up the house with your regular oven – and of course that will also save you money on the energy bill.

Baking herbed eggs with parmesan and apple-blueberry crisp in the solar oven.

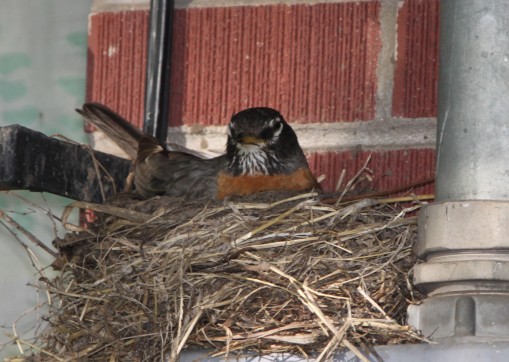
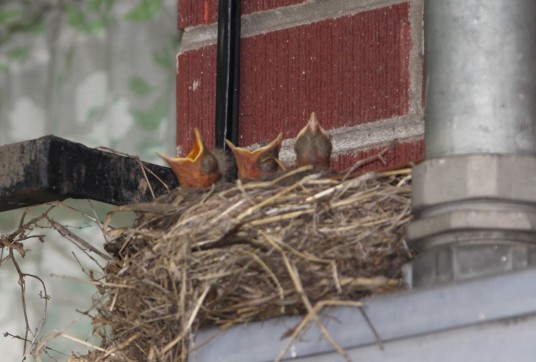
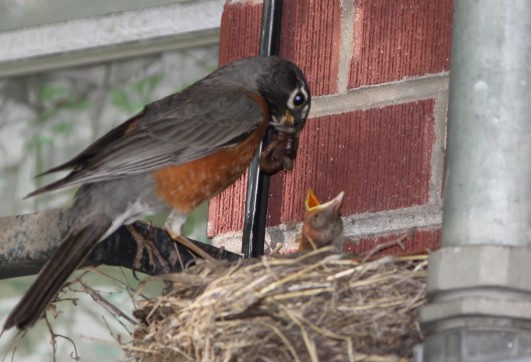
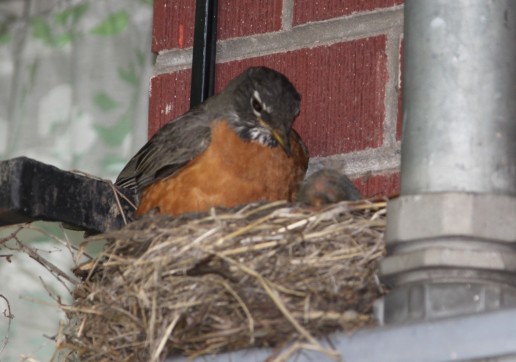
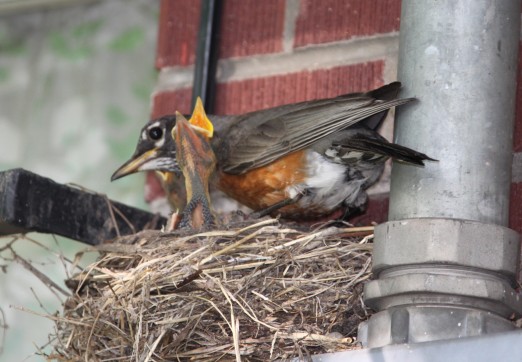
I have to show you one more thing. There’s a brand new family of robins at the house next to my parents’. The house sitting job came at the perfect time because I was able to watch each day as the robins vigilantly sat on their eggs, keeping very silent so as not to attract attention. One day the robin was gone, and instead I saw a little yellow beak — wide open — waving frailly back and forth above the edge of the nest. Now there are four little babies packed into that nest, and every day they’re bigger and stronger. It’s so incredible to watch! Take a look:

Mama's tasks: 1.) Be very quiet. 2.) Keep eggs warm.

"What do I do with it?"

...And Then There Were Three...

A fresh, plump worm for snack.

I'm still HUNGRY!

A quiet moment.

FEAR. (She had just heard crows squawking overhead.)

Serving up dinner bugs.

You'd be exasperated too.

The “Salad Taco”: A New Way to Eat Your Greens

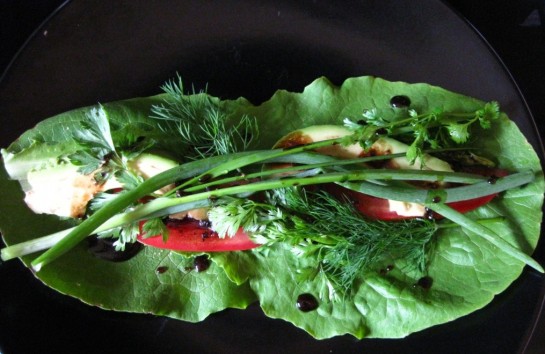
Salad Taco drizzled with balsamic vinaigrette. Ready to be folded up and eaten!

We’re all familiar with the taco salad. It’s present at almost every single potluck I’ve been to. But this is a salad taco, and if your kids don’t enjoy eating veggies, this might be a novel way to present salads. The salad taco idea came about because I like to forage in my garden, picking lettuce leaves and adding bits of whatever else is growing — onion tops, baby chard, cilantro, dill, oregano — and then folding it all up like a taco to munch on.

Today, though, I decided to give the whole thing a little more formality and class. I cut up some avocado and added tomato, along with some other garden goodies — dill, cilantro, and green onion. Drizzled with some homemade balsamic vinaigrette and then folded up and eaten like a taco, it was fantastic!

Apart from using your fingers as salad tongs (which was my preferred method as a kid), this seems like a more efficient way to consume a salad. And loads more fun than trying to use a fork to spear micron-thin lettuce leaves (not to mention a cherry tomato).

You could even take this idea to the ‘next level’ by doing a salad taco buffet at the dinner table — little bowls with different vegetables and toppings that you spoon onto lettuce leaves, and then drizzle with your choice of dressing.

Vegetable ideas: cucumbers, shredded carrots, radishes, tomatoes, green onions, red bell peppers, avocados, sprouts, fresh herbs.

Topping ideas: sunflower seeds, blue cheese, dried cranberries, chopped pears, toasted pecans, hard boiled egg, crumbled bacon, bits of ham, croutons, feta cheese, kalamata olives, black beans, raw cheddar cheese.

Dressing ideas:

– Balsamic Vinaigrette (Balsamic vinegar, olive oil, thyme, basil, salt, pepper)

– Blue Cheese Vinaigrette (Apple cider vinegar, olive oil, crumbled blue cheese, powdered dry mustard, salt, pepper)

– Greek (olive oil, lemon juice, oregano, garlic, salt, pepper)

– Salsa & Sour Cream for a Mexican-style dressing

Kids or not, this makes salad-eating way more fun! 😉

Jerusalem Artichoke Latkes for Hanukkah

Jerusalem Artichoke (Sunchoke) Latkes for Hanukkah

Today we’re making Latkes with a twist, just in time for Hanukkah (which begins this Friday night). I used my garden-grown Jerusalem Artichokes in place of the potatoes that would traditionally be used for latkes. I’m not Jewish, by the way, but I do like Jewish food, and I think it’s fun to get into the spirit of the holiday. 😉

Jerusalem Artichokes (a.k.a. Sunchokes) are actually the edible tubers of a sunflower that’s native to North America. They’re kind of a lost vegetable, having been more popular in days gone by. Sunchokes are usually used in place of potatoes, but have a more pronounced, earthy flavor…and although they can be eaten raw, I prefer them cooked.

This year, I grew them in a small pot in the garden (though they do grow wild in fields). I’ve heard that once you plant them, it’s hard to get rid of them…so I just bought a small tuber from the Whole Foods produce section, broke it into pieces, and planted it. The sunflower grew very tall, and a few weeks after the first frost I dumped out the pot and harvested quite a few jerusalem artichokes. So easy! Anyway, that’s a post for another day. Onward with the recipe:
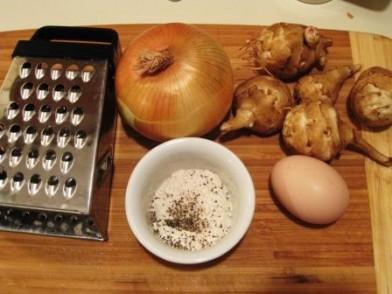
Jerusalem Artichoke (Sunchoke) Latkes

Jerusalem Artichoke (Sunchoke) Latkes

(Makes about 6 latkes / Ingredient measurements don’t have to be exact)

1/4 cup finely diced or grated onion

1 cup grated or shredded Jerusalem Artichoke, raw

1 large egg (or two small ones)

4 Tbsp flour (possibly more), divided — I used whole wheat

1/2 to 1 tsp salt, to your liking

1/4 to 1/2 tsp pepper, to your liking

Oil, to fry in

If you remember, go ahead and squeeze any extra liquid out of your shredded Jerusalem Artichokes. I forgot to do this and my latkes turned out fine, but I’ll try to remember to do it next time because extra liquid does make the oil splatter when the latke is placed in the pan.

Beat the egg(s) in a bowl, and mix in the Jerusalem Artichokes, onions, salt, and pepper. Mix in about 2 Tbsp of flour. You want to have enough flour in there so that the batter holds together after you form it into a little patty.

Pour enough oil (olive oil is traditional) into a frying pan so that it covers the bottom of the pan. Set the burner to medium, or a bit higher. To test the oil, drop a bit of batter in and if it sizzles, the oil is hot enough.

If the batter sizzles, the oil is hot enough.

If the batter sizzles, the oil is hot enough.

Form some of the batter into a little patty, and flatten slightly, like this:

Making a latke

If the latke batter holds together, it's ready to be cooked in the oil.

If the patty just falls apart in your hand, put it back in the bowl and add more flour to the mixture.You’ll notice that as the batter sits around, it will get more watery, so you will likely have to mix in another couple tablespoons of flour.

Slide the patty into the hot oil in the pan. Cook about 4-6 minutes, or until the bottom is golden. When you see the edges begin to brown, it’s time to check if the bottom is golden.

Cooking a Jerusalem Artichoke (Sunchoke) Latke

When the edges begin to brown, check to see if the bottom is golden.

If the latke isn’t browning, turn the heat up a little. If it’s browning too quickly, turn the heat down a little.

Turn the latke over when the bottom is golden brown.

Turn the latke over when the bottom is golden brown.

When the latke is done, place it on a plate lined with paper towels. Serve right away, or make the latkes earlier in the day and then warm them in the oven before serving.

Serve plain, or with sour cream, applesauce, or any other favorite condiment.

Happy Hanukkah!

This post is part of today’s Pennywise Platter Carnival over at The Nourishing Gourmet.

How to Make Snow Ice Cream

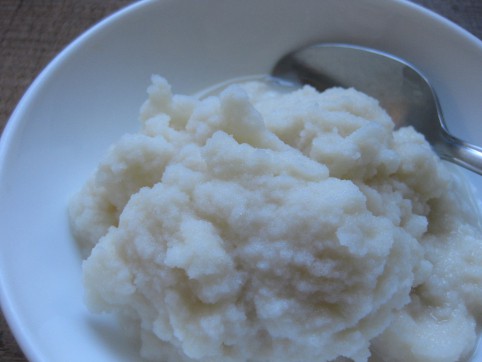
Having been born and raised here in Colorado, I’ve had lots of wonderful experiences in the snow over the years. I love the snow! Sledding, shoveling the sidewalk, cross country skiing, building snowmen, and getting excited when the really big storms hit. And…making snow ice cream! That’s a sweet memory from all the way back to early childhood. It’s awfully easy, and the main ingredient is free! But it’s also a special treat that can only be made when it snows enough! This is how my mom and I have always made it:

Snow Ice Cream

Fresh, clean snow

Milk (Whatever you have. Whole milk is nice, and some cream is even nicer.)

Maple syrup (or sugar)

Vanilla extract

*****

First, set out your ingredients. You’ll want to work fast once you bring the snow inside.

Once it has snowed at least a couple inches, go outside with a large bowl or pan. Scoop up the cleanest snow you can find, being careful to not scrape along the grass…and avoiding dog pee, if applicable!

*****

Now, there aren’t any measurements for this recipe. You just sort of eye it, mix it up, taste it, and adjust. Into the snow, pour some milk, add some sugar (any sugar will work, though I especially like maple syrup for making snow ice cream), and then add a little vanilla.

Mix it together with a spoon and taste. Add more snow, milk, sugar, or vanilla if needed, until it tastes good to you. You’ll get a feel for the ingredient amounts once you make it.

Serve it up and enjoy immediately before it melts. It doesn’t really hold up in the freezer since it will pretty much freeze solid. Enjoy this ephemeral, wintertime treat!

*****

« Older posts Newer posts »

© 2024 The Herbangardener

Theme by Anders NorenUp ↑