Kitchen / Garden / Sanctuary - Urban Homesteading to Nourish Body + Spirit

Tag: crop storage (Page 1 of 2)

Kitchen Tip: Freeze your extra eggs

(c) The Herbangardener, Freeze eggs

Did you know? You can most certainly freeze eggs! I’ve never read about this handy tip but I’m sure others have done it. For the past year I’ve been freezing my extra eggs and they turn out great. I use them mostly in baking, but also for scrambled eggs or an omelet.

And let’s not think about Easter yet, but this is a great thing to do with the contents of the eggs you blow out for your Easter Egg Tree.

Here’s how I freeze them:

1. Crack egg into a small plastic container. Snap the top on and shake it until the egg is scrambled.

(c) The Herbangardener, Freeze eggs

2. With the top still on, place in the freezer till frozen solid.

3. Remove from the freezer, and let the container stand on the counter till it’s melted just enough to pop the egg-disc out.

(c) The Herbangardener, Freeze extra eggs

4. Place into a freezer bag. Thaw at room temperature whenever you need an egg!

(c) The Herbangardener, Freeze extra eggs

***

(c) The Herbangardener, Cat sniffs eggs

*****

Low-tech, No-cost, DIY Herb & Food Dehydrator

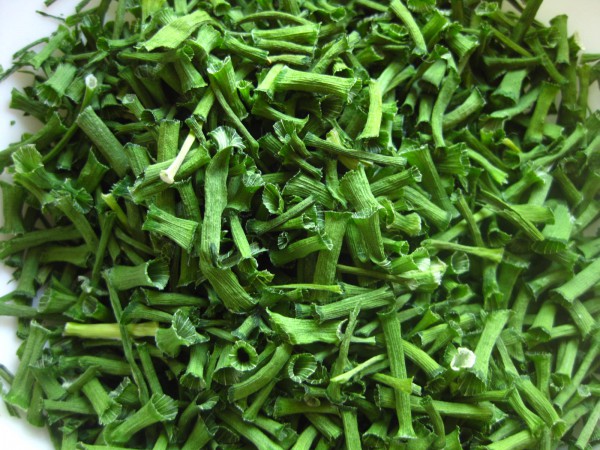
Dehydrated chives

I’m all about low-tech, and this dehydrator is as low-tech as it gets.

The idea for it has been knocking ’round the back of my mind for quite a while now, and finally I just did it. It’s simple and slick. I dehydrated some garden chives yesterday, and they came out great. This would also be great for mushrooms and any other food, really.

Materials:

Cardboard box (shallow with a wide base is nice)

Clean tea towel

Lightweight tablecloth or large scrap of lightweight fabric

A warm day, or an open window with a breeze

Procedure:

1. Lay your tea towel in the bottom of the box.

2. Spread your herbs or food out on the tea towel.

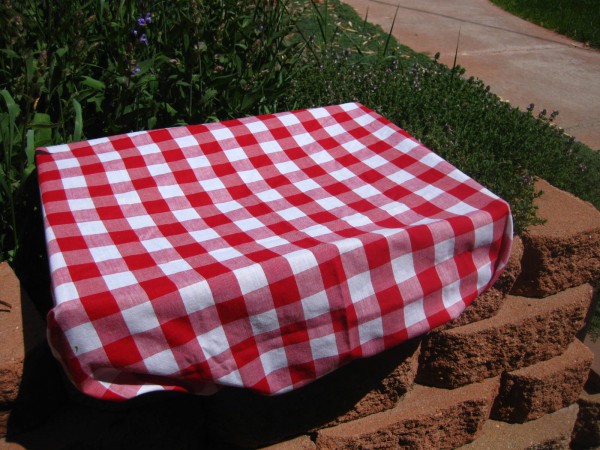
3. Wrap your tablecloth around the top of the box, tucking the ends underneath so it stays secure.

4. Place the box in the sun, or in an open window. The cloth provides shade for the drying items and protection from flies, while also allowing air to flow.

***

*****

How to Ripen Green Tomatoes

I got a question the other day about what to do with green tomatoes… well, let me tell you!

Green tomatoes are always part of the Autumn routine for us. Once picked, most of them ripen over the coming weeks, and some years we’re still eating homegrown tomatoes past Christmas!

*****

Here’s how I handle all the tomatoes that we pick before the first frost hits:

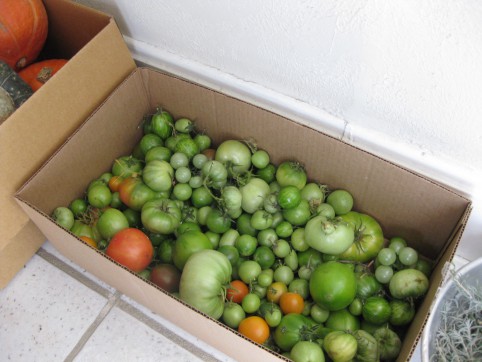
1. Usually I leave the tomatoes hanging out in an uncovered cardboard box for several days or a week. This is usually because I don’t get around to addressing them, but it also allows the close-to-being-ripe ones to ripen more fully.

2. When I’m ready to deal with them, I gather a few cardboard boxes and some newspaper. I go through the tomatoes, separating ones that are showing signs of ripeness (light blushes of color or softening flesh) from the rest that are still very hard and green.

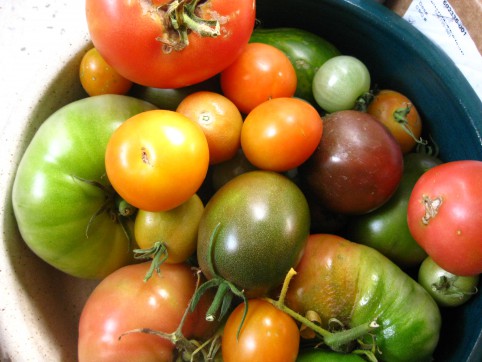
3. Put the ripening ones in their own box or paper bag, and check them every day or two. Or, leave them out on the counter.

4. I put the rest into boxes — only one layer thick — and then lay some sheets of newspaper on top. Over the years I’ve evolved through several methods of green tomato storage, and this is the one I’ve settled on. It’s my favorite because it’s the easiest, with the fewest tomatoes lost to mold.

Methods I’ve used in the past include:

– I used to cut squares of newspaper and wrap each tomato individually — unwrapping, checking, and re-wrapping them each week, and marking with highlighter the ones nearing ripeness. This is not only an insane amount of work, but it’s also totally unnecessary. There are easier ways to get the same result.

– After I evolved away from that, I would use only one box and put multiple layers of tomatoes in the box, separated by sheets of newspaper. This was a little better, but still involved removing layers of tomatoes and newspaper, checking, and re-layering.
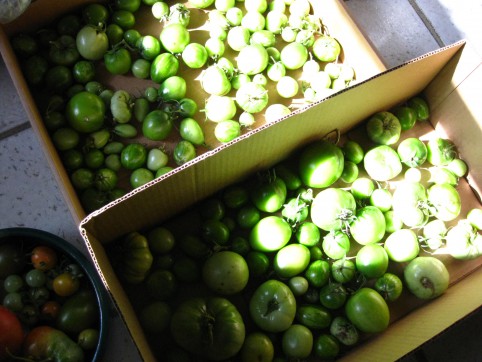
Store the tomatoes, only one layer thick, in boxes.

Cover them with newspaper.

5. Ok, so anyway, you’ll have multiple boxes with tomatoes only one layer thick. For this reason I like to use wide, shallow boxes. The boxes can be stacked as long as they’re supported by the sides of the box below and not resting on top of the actual tomatoes.

6. Keep your boxes in the coolest place in your house. Perhaps that’s a coat closet in your foyer, or in your basement. For us, it’s in the stairwell that leads from our apartment to our outdoor side entrance.

Store the boxes in the coolest part of your house. Check your tomatoes at least weekly.

7. Check your tomatoes at least weekly. It’s as easy as peeking under the newspaper. I like to move the nearly-ripe tomatoes to the top of the newspaper so that I can watch them and grab them when they’re ready.

8. Not all the tomatoes will ripen. Some are just too small and green to hold much promise of ripening, so this year I’m going to pickle them exactly the way I pickle cucumbers, using my trusty pickle recipe.

*****
*****

Do you have a good way of ripening your green tomatoes, or perhaps a good recipe that calls for green tomatoes?

*****

Make Your Own “Green Smoothie Frozen Concentrate”

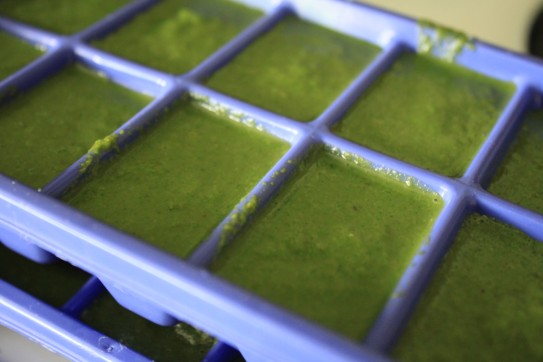
Green smoothie frozen concentrate made with lettuce, spinach, and lambsquarters.

So I peeked into my remaining three bags of lettuce from the garden this year, and discovered that they were starting to go south and needed to be used right away. I separated out the slimy leaves, washed the rest, and had an idea! I’ll make green smoothie frozen concentrate cubes!

To make the concentrate:

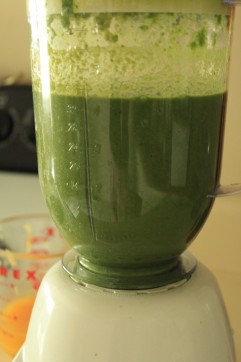
1. Pour some kefir, water, juice, or watered-down yogurt into a blender. You won’t need too much — just enough to get everything to blend together smoothly.

2. Add lots of greens. Ideas are: lettuce, spinach, beet greens, chard, lambsquarters, purslane, mint, parsley, cilantro, edible flowers, etc. (Kale is the only one I don’t like in a shake, but if you do, go for it!)

3. Start the blender and let it run until you have a uniform slurry.

4. Pour into ice cube trays and freeze.

To use:

When you’re ready to make a green smoothie, thaw out some cubes; I usually use 2 cubes when I make a shake for myself. Add the green liquid to your blender containing the rest of your smoothie ingredients — I like to use fruit and kefir with some ground flax seed and vanilla extract. Blend & enjoy. Yum!!

*****

If you’re curious about green smoothies, you might check out the book Green for Life by Victoria Boutenko, or the related website. My friend Sasha recommended this book to me, and I loved it! While I don’t agree with absolutely everything in the book, I’m glad I read it.

*****

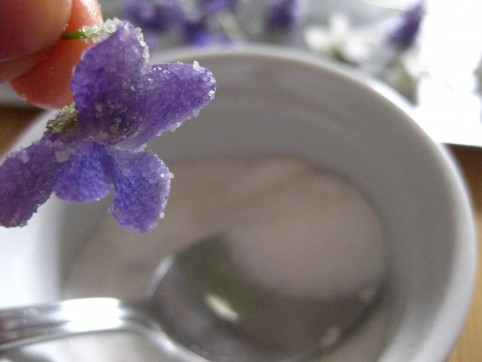
How To Make Candied Violets

Here’s an old fashioned spring project to do! Preserve those ephemeral little violet flowers for use as a garnish (on a coconut cake for Easter would be nice…) or for a lovely treat at any time of year — violets have a wonderful taste and will keep for months once they’ve been candied!

The process is simple, and not too time consuming. You can make this a more delicate project by painting eggwhite onto each flower with a paintbrush, and then dusting with fine sugar, but I think I’d only want to dedicate that kind of time if I were making these for a really special occasion!

Here’s what you’ll need:

Freshly picked violet flowers & leaves (having them very fresh will make the project go faster and prevent frustration!*)

Egg white (not beaten or frothed) (use eggs you trust since it’s raw)

Ordinary white granulated sugar (not powdered sugar)

Here’s what you do:

The flowers should be dry. No need to wash/dry them first — just pick them on a dry day and go for it. Dip each flower into the eggwhite. Give the flower a firm shake to get rid of any excess eggwhite. Hold it over a dish filled with sugar, and spoon the sugar over the flower until all surfaces are coated. Let the flowers dry on wax paper, parchment paper, or on a bed of sugar. (A plain baking sheet works too, but the eggwhite sticks, so you’ll have to carefully loosen the flowers with a metal spatula after they’re mostly dry.)

*The most important thing is to have fresh flowers (and leaves if you’re using them). Don’t pick the flowers, put them in a zip-top bag in the fridge for a few days, and then do the project; the flowers will have lost too much moisture and when you dip them in eggwhite, they’ll collapse. See photo below! Very fresh flowers will hold their shape even after being dipped in eggwhite.

Both have been dipped in eggwhite -- the flower on the left was in plastic in the fridge for a couple days, while the one on the right is fresh from the yard. Fresh is best!

That’s it! When they’re thoroughly dry (give them about 24 hours), store them in an airtight container. Room temperature is OK.

« Older posts

© 2025 The Herbangardener

Theme by Anders NorenUp ↑