Kitchen / Garden / Sanctuary - Urban Homesteading to Nourish Body + Spirit

Tag: DIY (Page 1 of 14)

Bubbie’s Bread & Butter Chips Pickle Recipe

Hello! It’s been a while since I posted something, and I hope all is well on your end.

My original Bubbie’s pickle knockoff recipe is a popular one, and here is another one you may enjoy. If you like the taste, but not the price tag, of Bubbie’s Bread & Butter pickles, try this out. I think I like mine even better.

I have been enjoying these for a couple years now, and most often these days I will blend these into a sauce thanks to my gastroparesis and global dysmotility. I just dump everything into the blender, juice and spices and all, and what comes out is a tangy, delicious pickle sauce! I always peel my cucumbers for this recipe though, because I think it tastes better to not have the peels.


Bubbie’s Bread & Butter Chips pickle recipe

3 lbs cucumbers
½ cup thinly sliced onion (about half of a medium onion)
3 TBSP canning/pickling salt, or regular table salt
2 cups white vinegar
½ cup water
1 cup granulated white sugar
1 TBSP whole yellow mustard seeds
1 tsp celery seeds
¼ tsp ground turmeric

1. Peel the cucumbers, and slice them ¼-inch thick. Crinkle cut is fun, but you can use a normal knife too.

2. Place the cucumber and onion slices in a large bowl and toss thoroughly with the salt. Transfer them into a colander, and place the colander over a smaller bowl so that they can drain freely and won’t sit in the salty cucumber liquid.

3. Let them sit at room temperature for 1 – 2 hours.

4. Discard the salty liquid that has collected in the smaller bowl, and rinse the cucumbers and onions under running water. Give them a good rinse, but don’t be totally thorough.
Divide the cucumbers and onions between two quart-sized canning jars.

5. In a medium saucepan, combine the vinegar, water, sugar, mustard seeds, celery seeds, and turmeric. Bring to a boil, and then pour this hot mixture into the cucumber jars, filling them nearly to the top. Stick a butter knife into each jar and jostle the cucumbers, freeing any air bubbles. If necessary, top up the jar with any remaining hot vinegar mixture.
Secure the lids onto the jars, but you won’t actually be canning them. Keep the jars on the counter to cool (I leave them overnight).

6. Once cool, transfer to the refrigerator. They will keep for at least 6 months.

How to Make Lavender Glycerite

***

In the evening time before bed, after I take all my nasty-tasting pills and potions, I squeeze a dropperfull or two of my homemade lavender glycerite onto my tongue and savor the delightful sweet floral lavender taste.

It’s a wonderful way to wash a bad taste out of your mouth and reward yourself for getting all that stuff down the hatch. It will often physically bring a smile to my face, it tastes so wonderful!

It’s very simple to make, and lavender season is upon us.

***

(This really is an easy project, but if you don’t have access to fresh lavender, may I suggest the absolutely heavenly Rose Petal Elixir made by Avena Botanicals with roses from their own biodynamic gardens. They also sell a Lavender Glycerite which I haven’t tried.)

***

***

Lavender Glycerite

Ingredients:

Fresh lavender flowers and flower buds

Pure food-grade vegetable glycerin (widely available online or at health food stores — vitacost.com is where I usually get stuff like this)

Supplies:

Glass jar with lid

Mesh sieve or funnel

Coffee filter

Clean dropper bottle (1, 2, or 4 oz size)


What to do:

1. Remove most of the stems from your lavender, and chop up the flowers and flower buds with a knife.

2. Place the chopped lavender into your glass jar. (In the pictures above, I’m using an 8-oz wide mouth Mason jar.)

3. Pour vegetable glycerin into the jar until it completely covers the lavender. Stir a few times to release any big air bubbles and top it up with glycerin if needed. Be sure all the lavender is submerged.

4. Screw the lid onto your jar, then label and date it with masking tape and a sharpie.

5. Place the jar into a dark cupboard where you will see it often…

6. Shake the jar once a day, or every couple days.

7. Let it sit in the cupboard at least 2 weeks (I leave mine 4-8 weeks).

8. When you’re ready to strain, place a coffee filter inside a mesh sieve (or funnel). Place the sieve over a bowl, a measuring cup, or another glass jar. Pour the lavender glycerite into the coffee filter and when it has all been filtered, wash your hands and gather the filter around the remaining lavender and gently squeeze to extract the rest of the glycerin. The finished lavender glycerite will look like honey — a light amber color.

9. Pour an ounce or two of your strained glycerite into a dropper bottle to keep in your bathroom. If needed, transfer the rest into another glass jar (or the same one that’s been rinsed and dried), cap it, label it, and date it.

10. Transfer the jar into the refrigerator to store it. It will keep at least a year, and probably significantly longer.

*****

Late-August Vegetable Garden Tour

Hello!

It’s a busy time of year in my garden; in late August the produce is really starting to flood in, meaning a LOT of kitchen time between now and October!

All the time and effort spent thus far in my garden is really starting to pay off though. We have our own private organic farmer’s market just outside the back gate! Here, I’ll show you…

Let’s start in the fruit “orchard” where we have one apple tree, two peach trees, and three or four grape vines. Believe it or not, these are two of the peach trees I started from seed, documented in this post from 9 years ago! I make the grape jam that I love from the grapes, and have been starting to use our cut-up Winesap apples as the fruit in my morning green shake. Later on, I’ll make big batches of applesauce with them.

Standing at the North end of the garden:

Standing at the South end of the garden:

Celery:

Honeydew melons:

Watermelons:

*****

Dawn Chorus Herbal Tea Recipe for Spring

It is Spring. Brown and barren, with the greenery of hyacinth bulbs barely beginning to nose up through the dry soil. Now and then, a wet snowstorm, slush, and mud. This is Early Spring in Colorado, giving way to a period of ephemeral, rarefied beauty that makes it difficult to keep eyes on the road as one drives around a city. Millions of fragrant light pink, dark pink, and white crabapple blossoms filling tree after tree, petals fluttering in every direction on the breeze. Fuchsia redbud trees in protected corners with an iridescent glow on gray days. Cheerful tulips and hyacinth and green grass in front yards. Bushes bowing heavily with lilacs. Fresh spring rain showers. Robins, finches, sparrows, blue jays, flickers — nearly constant birdsong from dawn until dusk. What a feast for our senses.

It is around this time that this winter-lover’s eyes begin to really crave green. It is so nice to see the green!!

I have also rediscovered an old favorite herbal tea blend called Dawn Chorus — it’s a nice one for Spring. Mountain Rose Herbs gets the credit for this one, but it’s such a simple blend that I reverse-engineered a recipe for it quite a while ago. Mountain Rose is so often out of stock on stuff and their shipping is so expensive, that I stopped using them — but I still love this tea blend. My own recipe might have more rose petals in it, which is even nicer than the original.

Dawn Chorus tea blend:

1 part green rooibos (or red rooibos, for a taste that’s different but every bit as good in this blend)

1 part stinging nettles leaf, dried

1 part rose petals, dried

Mix together.

Put a heaping teaspoon into an infuser* in your mug. Add boiling water, steep for 5-10 minutes, squeeze out, add milk!

Then sit down and enjoy it. I am a big tea drinker. A chain tea drinker. I used to have a rule where I had to sit down while I drank my cup of tea. Over time, the rule faded and I’d be up chopping vegetables between sips of tea, starting a load of laundry with a cup of tea in my hand, going out to get the mail with my cup of tea, cleaning up and taking things from room to room with my cup of tea, writing emails with my cup of tea. I’ve recently decided to follow this rule again, most of the time. Taking that quiet moment feels good.

*Infusers! There are so many crappy ones. My favorite is the People’s Brew Basket in stainless steel (made by Republic of Tea — I get this locally at the health food store for about $3.50) and this one which is good for wide mugs. Fill-able tea bags are also sold, but you can make your own with coffee filters like this:

*****


Something from nothing: Breaking ground for a garden

(c) The Herbangardener

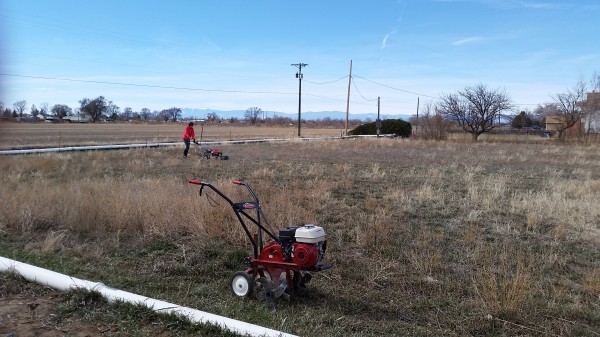
Mowing out the garden perimeter

Because we are now stewards of three whole acres of land, we’ve been spending hours and hours — so many hours — researching tractors and thinking of what we want to do with the space. One thing we want of course is a garden. I am not thrilled to be starting from scratch for another garden. If you garden, you know it’s a ton of work. I don’t have the energy level to match, so it’s overwhelming. But if you garden, you also know that not having a garden is not an option! It’s a given. A necessity. After months of tractor research, stalking craigslist, exploring creative solutions, lots of sticker shock, and springtime — planting time — right at our backs, we decided that we can’t make a decision right now. We’re unclear exactly how much we want to undertake in general, we don’t have a solid plan other than Do A Big Garden, and we haven’t been on the land long enough to have clear answers about either of those things. We had nearly settled on a BCS 853 walk-behind tractor from earthtools.com, but the price is dear and we aren’t settled yet on which attachments we need. We’ve been paralyzed and overwhelmed. Finally on Monday night, the overwhelm reached its zenith as F sat wide-eyed in front of his computer screen staring at yet another page filled with tractors and tractor attachments and other hunks of metal with names we have yet to learn and prohibitive price tags or the right price tag but in a faraway state. Right then is when we decided to work with what we have access to right now that’s within our price range — and without a huge decision or financial commitment needing to be made in haste. This turned out to be a rented rototiller from the local hardware store, and the really nice self-propelled Honda mower F bought for the lawn.

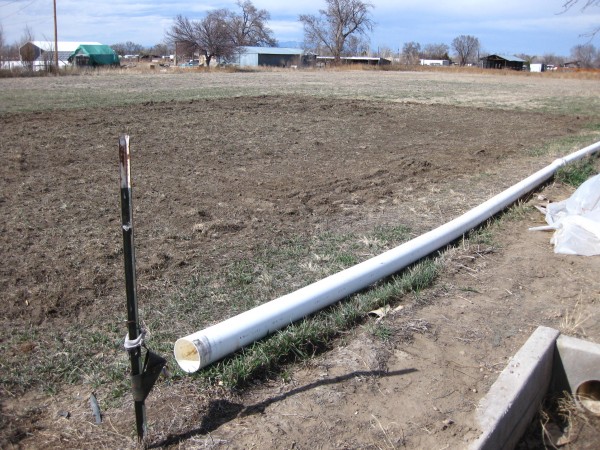
The next day we rented the tiller, quickly eyeballed the area we wanted to make into garden — ‘Yep, there’s about good’ — mowed the weeds and dry grasses, and “started tilling.” But the tiller tines only just picked at the surface weeds and kicked up a little dust. It wouldn’t dig in. The ground was dry, too dry evidently, and nothing was happening. Frustrated moments ensued, we tried forcing it, then we thought of scrapping the whole thing and returning the tiller. Then we both went online, each finding some key pointers. “Ahh – you can raise the wheels so the tines dig in more” and “Ahh – for hard ground try going lightly over your whole area with the tiller east-west, then lightly again north-south. Once you’ve cross hatched it, then try going deeper the next round.” We almost didn’t, but I’m glad we stuck with it. We made progress, though not a whole lot for a laborious !6! passes, but enough to tear into the ground. While I tilled, F mowed the acreage. The lawn mower was awesome and we had no idea it would do so well on rough land; it devoured everything in its path without a single sputter. Probably the mowing of the land wasn’t completely necessary; but mentally oh very much yes. Somehow having the grass mowed on the rest of the land makes the whole thing seem tamer and more under our control and not so wild and untouchable and unmanageable and impossible. And we learned that yes you can mow two acres with your self-propelled yard mower and yes wear those comfortable shoes because you’ll be walking for miles and miles, back and forth back and forth!

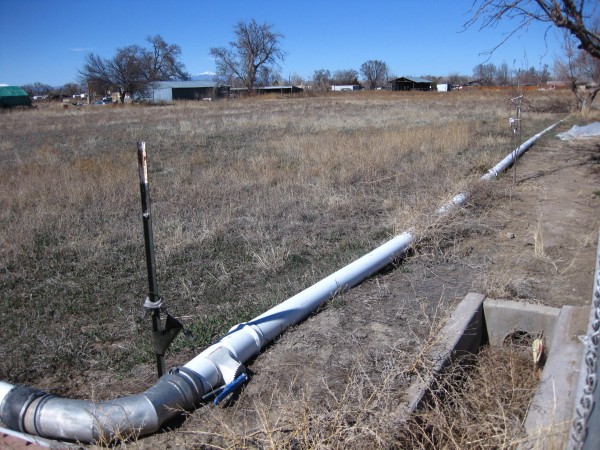
The next day I turned on our irrigation well and opened the floodgates as they say. The garden can be flooded in a matter of minutes which will be a huge time saver this summer. I soaked it several times and we’ve booked the tiller again for this Saturday so that we can do the whole thing again and till much deeper this time we hope.

When I look out at the area we tilled, it’s huge. It’s nearly 3,000 square feet of garden. That in itself is overwhelming, but not as overwhelming as it was last week, before we had started at all. We made huge progress in one day and our bodies made darn sure we knew it (like ‘Ohhh…shit.”). Seeing the land mowed and the garden tilled up makes it easier to believe we can actually make something out of all this nothing.


Mowing 2 acres with self-propelled lawnmower

Mowing 2 acres with self-propelled lawnmower

Mowing done

Mowing done

Rototilling

Rototilling

Before mowing & tilling

Before mowing & tilling

After mowing & tilling

After mowing & tilling

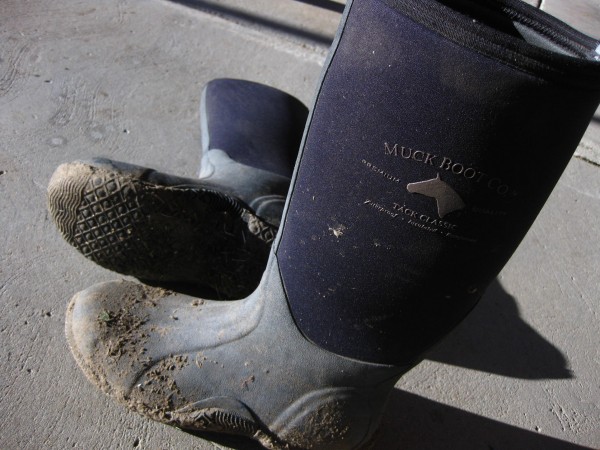
Essential!!! I love these boots.

Essential!!! I love these boots.

(c) The Herbangardener

*****

« Older posts

© 2024 The Herbangardener

Theme by Anders NorenUp ↑