Kitchen / Garden / Sanctuary - Urban Homesteading to Nourish Body + Spirit

Tag: DIY (Page 9 of 14)

How To Plan Your Spring & Summer Vegetable Garden

Good grief, it’s already March! Planning my spring & summer vegetable garden is on the agenda for this coming week, and so I’m re-posting my instructions from last year on the planning process I devised and use every year. Hopefully it’s helpful to you!

Today I’m going to give you a little tutorial on how to plan your vegetable garden. Over the years I’ve developed a planning method that works well for me. Admittedly, I don’t really like garden planning very much. I do love looking through all my seed packets and deciding what to grow for the year, but the process of actually planning what to put where is a task that takes literally hours of mental work (for me at least). It’s a lot of thinking, decision-making, & considering all different garden plan configurations (and past years’ plant placements) in my head before I even put pencil to paper.

That said, though, there comes a feeling of satisfaction and excitement when I’ve completed the plan and am thoroughly happy with it. Each year’s plan is different, depending on what I want to grow and also considering what grew there last year.

I have three 4’x8′ raised beds, one 2’x8′ raised “lasagna” bed (a story for another day!), another 4’x8′ raised bed against the south side of the house, plus various pots here and there for extra tomato growing space.

Here’s my basic planning process:

1. Decide what you want to grow. Look through seed catalogs or go to a garden center to get seeds, or if you’re like me and already have wayyy too many seeds to choose from, go through all your seed packets and set aside what you think you want to grow. (I like to start all my veggies from seed, but you could just as easily decide what you want to grow, and then buy plants from the nursery.)

Once you’ve narrowed down which veggies you want to grow, write them all down on a piece of paper.

2. Determine which vegetables will be in the Spring plan, the Summer plan, or both plans. If you’re planning both a spring and summer garden (which I do), you’ll have 3 categories of vegetables:

– Early-spring-planted veggies that you’ll harvest before summer (like spinach, peas, lettuce, etc.)

– Early-spring-planted veggies that you’ll leave in the garden through the summer — the “spring carry-over veggies” (like cabbage, onions, parsley, potatoes, cilantro, dill, chard, carrots, etc.)

– Summer-planted veggies (like tomatoes, squash, peppers, cucumbers, etc.)

Click here for a comprehensive list of which veggies fit into which categories.

As you can see in the photo below, I mark my piece of paper with “Sp” (for “spring”) to the right of the spring-planted veggies, and “M” (for “main” summer) to the left of the summer-planted veggies. Vegetables with both “Sp” and “M” will be in both garden plans. As I place each vegetable into the plan, I put a check mark next to it.

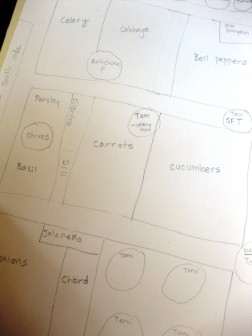
3. Draw two outlines of your garden plots on paper — one for spring, one for summer. For my plans, I have one piece of thick paper; on one side I have Spring, on the other side I have Summer. Be sure to also note the year somewhere on your garden plan. On both plans, draw in any perennial vegetables that have overwintered.

Graph paper isn’t necessary, unless you like to use it. I draw my plans free-hand, and just eye the scale of things. The first year that I did a formal plan, I got mathematical about it and used graph paper, with “one square = 6 inches” and all that, but in the end, I found it unnecessary to be so precise, and I haven’t used graph paper since.

Also, always work in pencil! 🙂

Draw your garden plots, and draw in any overwintering perennial vegetables.

4. Plan your summer garden first. I find it easier to plan my summer garden first, and then my spring garden. To plan my summer garden, I decide on the location of both the spring-planted carry-over vegetables as well as the summer-planted vegetables.

I begin with deciding where I’ll put my tomatoes…though in doing this, you’ll be thinking about all your vegetables — not just the tomatoes. But I like to put the tomatoes down on paper first, as this makes it easier to place other things.

I also place the tallest vegetables (tomatoes, plus anything grown on a trellis) at the north end of each of the raised beds, so that they don’t block the sun from reaching shorter veggies.

I also consider the locations of last year’s vegetables, and try not to plant the same thing in the same place the next year. It doesn’t always work out that way (for instance, this year’s cabbage will be partially in the same spot as last year), but to me, that’s okay.

I like to plan the summer garden first.

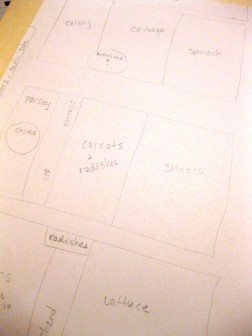
5. Plan your spring garden based on the summer garden. Now, on your spring garden plan, copy down the spring carry-over veggies that you placed in your summer plan. Then, fill in the empty spaces with all of your spring veggies that will be harvested before summer, like the lettuce, radishes, spinach, peas, etc.

I plan the spring garden based upon which veggies will be carrying over to summer.

6. Check your veggie list to be sure you’ve placed everything, and then you’re done! Now it’s time to plant your spring garden!

Click here to read about how I amend my soil each year to get ready for spring planting.

And as a side note…if you start your own seedlings inside (rather than buying from a nursery), that adds another step to the spring preparation process, but it’s not bad. I definitely prefer to grow my own seedlings! Mostly I start my summer stuff inside, like tomatoes, squash, cucumbers, and peppers, but this year I also started my cabbage inside and it’s germinating better than when I plant it directly into the garden. But other than cabbage, I plant all my spring stuff directly into the garden, without starting it inside. Anyway, I’ll share more about all that soon, too.

*UPDATE 3/5/11: The past couple years I’ve just planted cucumbers and squash seeds directly into the garden rather than starting them inside. I’m much happier with this method since it’s SO much easier and the difference in fruiting times is not appreciable enough to be worth the bother of starting them inside. So I’ll stick to starting tomatoes, peppers, and cabbage inside. I might also start my celery inside, too, since it never quite took hold when I direct-seeded last year.

Blend Your Own Russian Caravan Tea

If you like smoky flavors in your food, I bet you like Russian Caravan tea! I absolutely love it! It’s black tea with a smoky twist, thanks to the addition of Lapsang Souchong — black tea that’s been smoked over smoldering pine or spruce wood. Legend has it that the tea absorbed the smoky aroma of nighttime campfires during its journey from China to the Russian Czar. Others say the tea was smoked as a way of preserving it for the 6,000-mile trip. Either way, the name is enchanting and the flavor is an unusual treat!

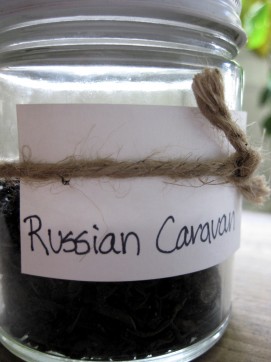
I used to buy Russian Caravan in teabags at our local health food store, but when they stopped selling it, I decided to blend my own using the ratios below. I like to measure the tea by weight rather than volume, because I happen to have a food scale and because equal weights don’t always have equal volumes (oolong seems to have more volume), but either way it’ll work.

Once blended, I use 1 tsp of tea per mug of hot water (about 12 oz) and I love to add milk or cream. If you prefer decaf tea like I do, take a look at my post on How to Decaffeinate Your Tea.

Russian Caravan Tea

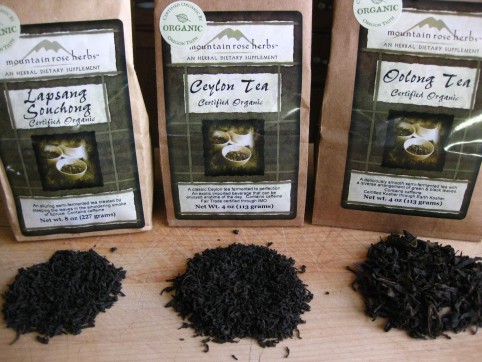
1 part Lapsang Souchong

1 part black tea (English Breakfast, Assam, Ceylon are all good, but don’t use anything flavored like Earl Grey)

2 parts Oolong tea

Where to source these ingredients? I like Mountain Rose Herbs. Although I think their shipping is a little pricey, I always get my stuff from them because it still comes out cheaper in the end, and I like the company and their products.

Equal weights don't quite have equal volumes...

*****

After Halloween: Cooking Your Pumpkin and Roasting Its Seeds

I hope you had a happy Halloween! Mine was uneventful, but I did go on a wonderful bike ride through the neighborhoods on Halloween night to see the decorated houses, carved pumpkins, and kids trick-or-treating. I think I had a smile on my face the entire time. To boot, it was an unusually mild night with a few diehard crickets still going (usually it’s snowing here on Halloween!), and people were sitting out on their front porches, candy bowls beside them.

Anyway, last year I cooked our Halloween pumpkin and I wanted to share the process if you’re interested in doing the same thing. One thing to note about the generic jack-o-lantern pumpkins is that they’re very lacking in flavor. Bland! And watery! But after draining out the excess water (which we’ll address below), the blandness can be a good thing because you can then sneak the pumpkin puree into your cooking (or baking) without affecting the dish’s flavor very much.

Here’s what to do:

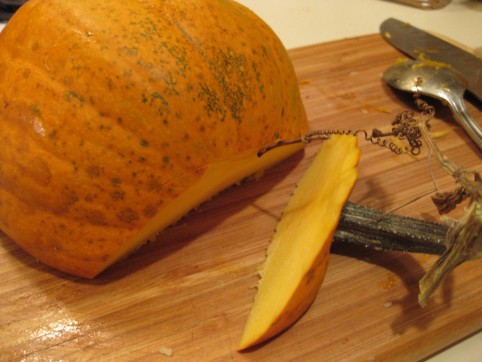
With a sharp knife, cut your pumpkin in half, then cut off the stem.

Cut off the stem

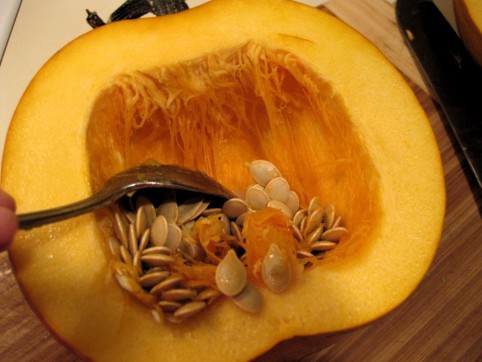
Scoop out the seeds and SAVE THEM! We’ll be roasting them while the pumpkin cooks.

Scoop out the seeds and save them for roasting.

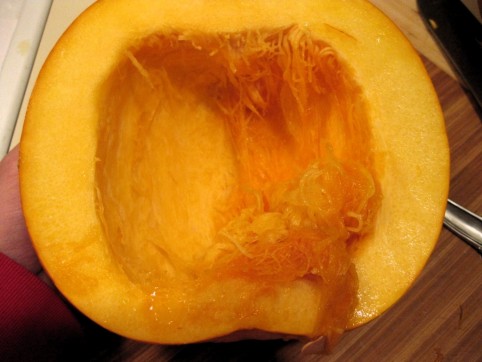
With a spoon and some elbow grease, scrape out the long stringy fibers. You have to really get in there with your spoon; attack that pumpkin!

Scoop out the stringy fibers

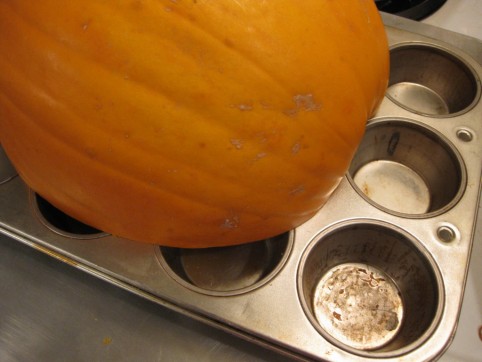
Set pumpkin cut-side down into a large baking pan with sides to contain the juice. If you don’t have a pan with sides large enough, then just bake them on cookie sheets, cut-side up. Or be creative and set them on something else, like a muffin tray to catch the juice!

Bake at 350* (or 375* — the temperature isn’t too important). You’ll bake it until the flesh is very soft, which usually takes about an hour, maybe more.

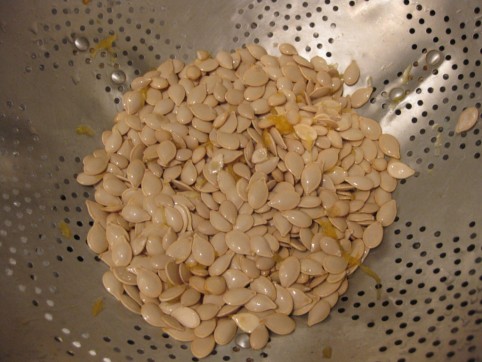
After you put your pumpkin in the oven, put the seeds into a colander. Rinse them and remove as much of the stringy orange stuff as you can.

Wash seeds & remove orange fibers

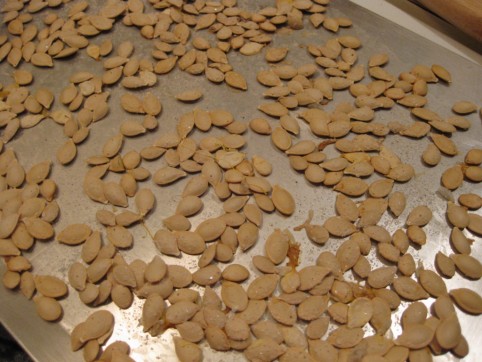
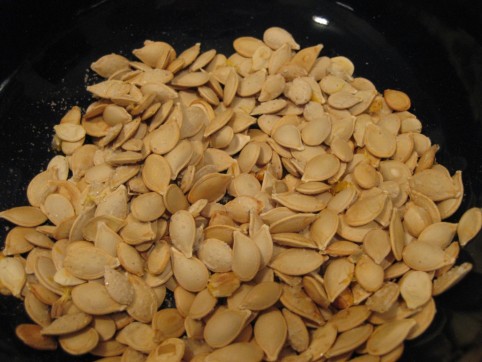
Spread them onto an un-greased cookie sheet and sprinkle them fairly liberally with salt. Bake them until they’re a very light golden color; you don’t want to over-bake them, but you do want them dry to the touch, and crunchy. This seems to take about 15 minutes for me, but the times may be different for you.

Spread on a cookie sheet and sprinkle with salt; cook till dry and crunchy

Eat!

Now, back to the pumpkin.

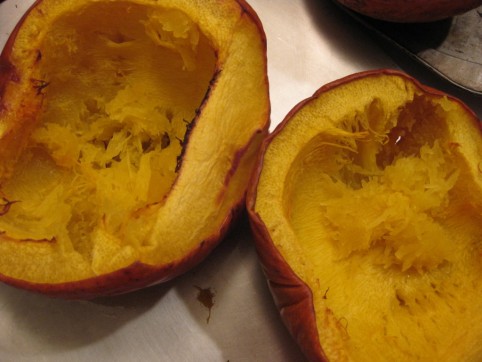
When the flesh is very soft, remove from the oven and let the pumpkin cool until it’s handle-able.

Bake till very soft

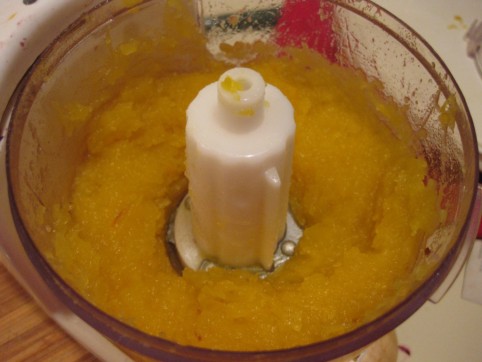
Scrape out the flesh, and discard (or compost) the skin-shell. Run the pumpkin flesh through a food processor or blender to improve the texture and break up stringiness. If it’s too dry to run through the blender, add a little water and blend; you can drain the water out (or cook it off) later.

Blend till smooth, adding a little water if needed

Since these pumpkins generally have quite a bit of water in their flesh, you’ll want to drain the puree after blending it. I like to dump the pumpkin puree into a colander and let that sit over a bowl overnight. You’ll be amazed at how much water drains out! Alternatively, you can just cook the water off instead of letting it drain away; just simmer the pumpkin puree, uncovered, in a pot over low heat until you’re satisfied with its consistency.

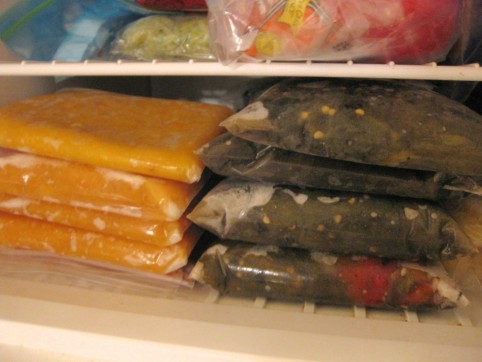
That’s it! Measure your puree into ½- or 1-cup portions and freeze into ziploc bags; I like to stack my bags neatly on a plate and freeze them so that they freeze into stackable shapes, like this:

Measure, stack, and freeze!

Nourishing Mixed-Herb Pesto

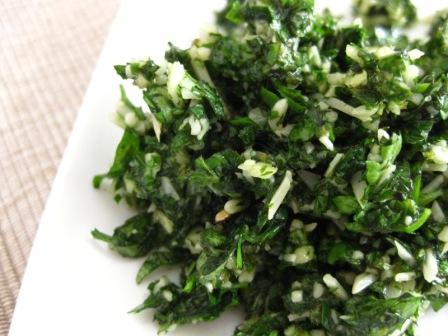
Oregano, parsley, & cilantro pesto

Pesto is such a versatile condiment — it’s wonderful over fish or chicken, on crackers, tossed with pasta, spread over eggs or sauteed zucchini, in a roasted vegetable sandwich, used as a pizza sauce, or straight off the spoon. And although basil pesto is the most common type, pesto can be made with any combination of herbs. In fact, I think I like mixed-herb pesto even better than basil-only — it has more layers of flavor! And don’t forget that herbs are mineral rich and packed with nutrition, and can definitely be thought of as a medicinal food.

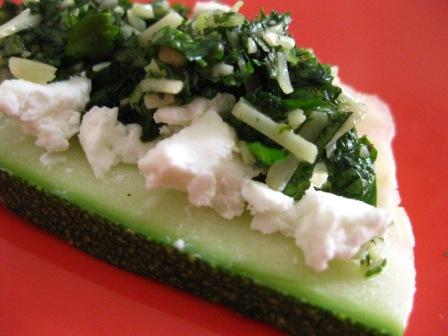
Make a healthy snack with goat cheese and mixed-herb pesto on a raw zucchini slice "cracker"

Use any combination of fresh herbs that you want; pesto is a great way to use up heaps of herbs at once, such as the cilantro sitting in the back of your fridge and the overabundance of oregano in your garden. It’s also a nice way to preserve those herbs for use later in the year; use ice cube trays to freeze pesto into small portions and thaw as needed over the winter.

One nice combination is oregano, parsley, and cilantro — this is probably my favorite. Use equal parts…or not! Just combine according to the amounts you have. I do suggest, however, that you go easy on the fresh sage if you choose to use it; it lends an overpowering (and not all that tasty) element. Also, mint is nice as an added “splash” but go easy on that too, since it can also overpower.

My basic pesto recipe is as follows, though you’ll probably find you don’t even need a recipe. Just gather a bunch of herbs, add a clove or two of garlic (start with less garlic and add more later if needed), add nuts, cheese, and salt, and then olive oil to form a paste.

Basic Herb Pesto

1 cup fresh herbs, packed

2 garlic cloves, small-medium size

3 Tbsp olive oil, approx.

3 Tbsp shredded parmesan cheese, approx.

1-2 Tbsp pine nuts or walnuts, approx. (optional)

Salt to taste

Put everything into the food processor and blend until a paste is formed.

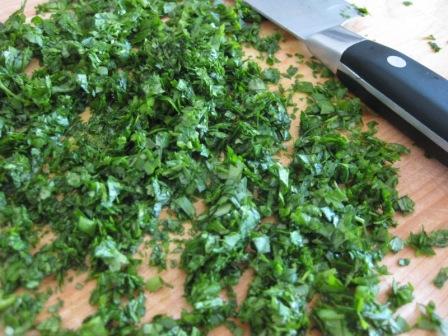
Instead of using the food processor, though, I like to make mine the old fashioned way using a knife and cutting board. If you use a nice sharp chopping knife, the task goes faster and is more fun than the food processor (at least for me — I get angry at my food processor when making pesto!). The key is definitely the sharp knife. Chop your herbs, garlic, and nuts as finely as possible, add the parmesan (chop it up too, if you like), and then add olive oil until a loose paste is formed. You can replace a little of the olive oil with water if you want. Add salt to taste. The texture will be more rustic than paste-like, but that’s not a bad thing. 😉

Making pesto without a food processor

Growing Fruit Trees From Seed: Peach, Plum, Nectarine, & Apricot

I’d always thought that growing fruit trees from seed was too much of a long-term proposition, and so I wouldn’t bother with it. And then three years down the road I’d still be thinking about fruit trees from seed — no closer to my dream orchard than I was three years prior.

Determined to put an end to this mental hangup, I began saving the pits from the most delicious local peaches and plums that I ate during the summer of 2008. I then followed the instructions in this great article, which takes you through the whole process:

Mother Earth News: “Growing Free Fruit Trees”

4-month-old Plum and Peach seedlings (in the foreground — plum on the left, peach on the right)

Now my baby fruit trees are about a year and a half old and I’m astounded at how big they are. These things are growing like weeds, and I need to seriously start considering where to plant them!

As a side note, I overwintered the baby trees in the black pots in the photos below, against the south side of the house, mounded up with dry autumn leaves. All survived the winter!

So if you’d like to embark on this fun little project, now is the time to begin saving your peach, plum, nectarine, and/or apricot pits. I let the pits dry on a shelf for several weeks (more like months, actually). To open the pit, use whatever tool you have the most success with (as outlined in the article), but the nutcracker I initially used broke clean in half before it cracked even one pit. So I got out the hammer and had no problem shattering pits out on the back sidewalk; surprisingly, none of the actual seeds got crushed in the process.

After a year and a half of growth, here’s what my trees look like:

1 1/2-year-old Plum trees

1 1/2-year-old Peach tree

***

Update 5/3/2012: The three-year-old peach trees have baby peaches on them! Click here for photos.

Update September 2016: Many of the trees died due to peach tree borer. The surviving trees are marauded by squirrels each year so that there are few peaches left. Here are some that survived this year! The peach I picked was picked too early I think, but otherwise the squirrels were going to get it. Its taste was ‘ok’ once it sorta ripened.

Peach tree from seed (c) The Herbangardener

Peach tree from seed (c) The Herbangardener

***


« Older posts Newer posts »

© 2025 The Herbangardener

Theme by Anders NorenUp ↑