Kitchen / Garden / Sanctuary - Urban Homesteading to Nourish Body + Spirit

Tag: eating wild plants (Page 3 of 4)

Springtime Dandelion Salad

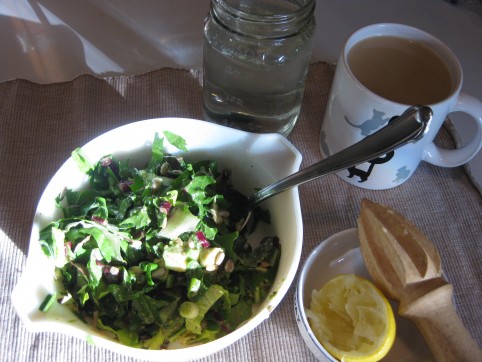
Light lunch: Dandelion salad & raspberry leaf tea with grassfed cream

Spring’s in the air! (…till Tuesday, at least, when it’s supposed to get down to -8!) It’s been shorts & t-shirt weather here — the robins have been chirping their summertime songs, and I opened all the windows yesterday to let the fresh air in. My body also seems to know that spring’s coming and it’s time to eat light, clean, liver-cleansing foods. I’ve been craving juicy oranges, fresh lemons, and bitter dandelion salads. Bitter is usually my least favorite taste, but I’ve been eating dandelion salads almost daily lately. Dandelions won’t be growing in the yard for another couple months yet, so I buy the greens at our health food store.

I’ve been really enjoying this particular salad:

dandelion greens mixed half and half with lettuce (sometimes I leave out the lettuce altogether)

green onions

avocado

sunflower seeds

fresh lemon juice and flax seed oil generously drizzled over, with salt & pepper to taste

Chop the greens up nice and small and eat the whole thing with a spoon!

Nourishing Mixed-Herb Pesto

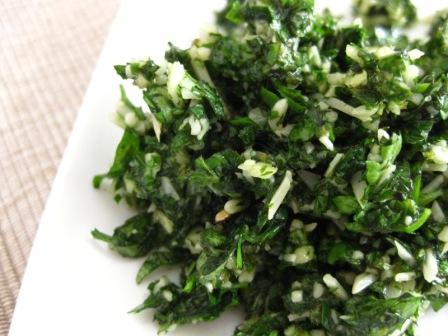
Oregano, parsley, & cilantro pesto

Pesto is such a versatile condiment — it’s wonderful over fish or chicken, on crackers, tossed with pasta, spread over eggs or sauteed zucchini, in a roasted vegetable sandwich, used as a pizza sauce, or straight off the spoon. And although basil pesto is the most common type, pesto can be made with any combination of herbs. In fact, I think I like mixed-herb pesto even better than basil-only — it has more layers of flavor! And don’t forget that herbs are mineral rich and packed with nutrition, and can definitely be thought of as a medicinal food.

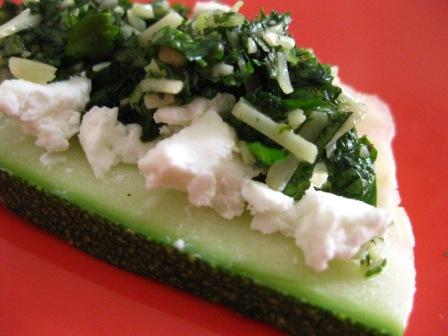
Make a healthy snack with goat cheese and mixed-herb pesto on a raw zucchini slice "cracker"

Use any combination of fresh herbs that you want; pesto is a great way to use up heaps of herbs at once, such as the cilantro sitting in the back of your fridge and the overabundance of oregano in your garden. It’s also a nice way to preserve those herbs for use later in the year; use ice cube trays to freeze pesto into small portions and thaw as needed over the winter.

One nice combination is oregano, parsley, and cilantro — this is probably my favorite. Use equal parts…or not! Just combine according to the amounts you have. I do suggest, however, that you go easy on the fresh sage if you choose to use it; it lends an overpowering (and not all that tasty) element. Also, mint is nice as an added “splash” but go easy on that too, since it can also overpower.

My basic pesto recipe is as follows, though you’ll probably find you don’t even need a recipe. Just gather a bunch of herbs, add a clove or two of garlic (start with less garlic and add more later if needed), add nuts, cheese, and salt, and then olive oil to form a paste.

Basic Herb Pesto

1 cup fresh herbs, packed

2 garlic cloves, small-medium size

3 Tbsp olive oil, approx.

3 Tbsp shredded parmesan cheese, approx.

1-2 Tbsp pine nuts or walnuts, approx. (optional)

Salt to taste

Put everything into the food processor and blend until a paste is formed.

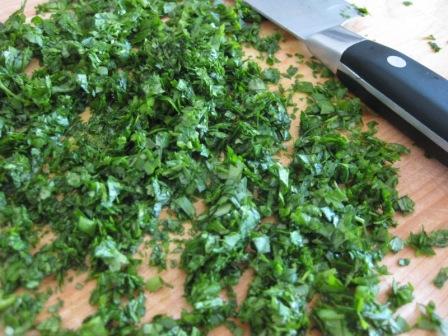
Instead of using the food processor, though, I like to make mine the old fashioned way using a knife and cutting board. If you use a nice sharp chopping knife, the task goes faster and is more fun than the food processor (at least for me — I get angry at my food processor when making pesto!). The key is definitely the sharp knife. Chop your herbs, garlic, and nuts as finely as possible, add the parmesan (chop it up too, if you like), and then add olive oil until a loose paste is formed. You can replace a little of the olive oil with water if you want. Add salt to taste. The texture will be more rustic than paste-like, but that’s not a bad thing. 😉

Making pesto without a food processor

Enjoying Wild Foods: Daylilies + Lamb’s Quarters

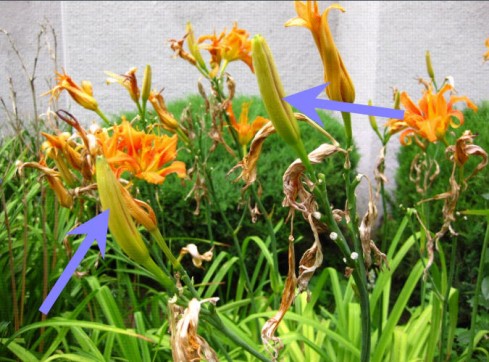
Daylily buds

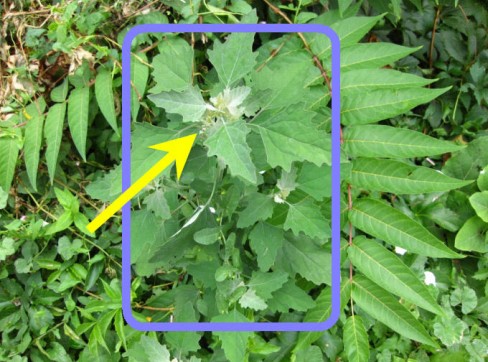
Now that it’s summer, there are lots of forage-able treats in the urban landscape, and today I wanted to highlight a couple of my favorites: Daylily flower buds and Lamb’s Quarters leaves. I often take walks on my lunch break through the neighborhoods near where I work, and munch on these, raw, as I encounter them (picking mindfully, of course). The daylily buds have an unusual, sort of mild spicy taste that grows on you, and the Lamb’s Quarters leaves taste very similar to spinach, and can be eaten either raw or cooked like spinach.

Just be sure to avoid plants growing near busy roadways or areas that are likely to have been sprayed with pesticides (like the grassy areas of parks).

Here’s what Alan Hall’s Wild Food Trailguide says about Daylilies:

Unopened flower buds, opened flowers, and withered flowers may be eaten. Unopened buds boiled in salted water for a very few minutes make an excellent cooked vegetable. Buds and opened flowers can be dipped in batter and fried like fritters. Both open and withered or dried flowers can be added to soups and stews, where they provide body and impart an interesting flavor. The flavor of dried and freshly collected flowers is somewhat different and they should be tried both ways. If flowers are dried for later use they should be soaked until soft in cold water before using. The softened dried flowers will have a slightly genatinous quality. The small tubers can be dug anytime during the period when the ground is unfrozen. Only firm, young tubers should be collected. After digging they should be washed clean of clinging earth and freed of small rootlets. Boiled in salt water they have a flavor reminiscent of sweet corn. They can be eaten raw as a salad and are sweet and crisp with a pleasant nutty flavor.

Lamb's Quarters leaves

Lamb’s Quarters is a member of the Goosefoot family and a relative of Quinoa. You’ll find it growing mainly in poor, disturbed soils and in other weedy areas.

Here’s what Alan Hall’s Wild Food Trailguide says about Lamb’s Quarters:

Lamb’s Quarters leaves make an excellent potherb that is considered by many people to be superior to spinach. And like spinach, it loses a great deal of bulk in cooking so an ample supply should be collected. Young plants are best, but this plant continues to put up new shoots that can be used well into summer. The leaves are not bitter, and the cooking water need not be changed. Seeds can be collected by rubbing them from the spikes into an appropriate container. They are available from the time they are dry in the fall until they drop, often well into winter. The seeds are extremely abundant and it is possible to gather several quarts in less than an hour. Winnow out the husks and trash, and then grind the seed into flour. Since the seeds are very hard, grinding can be difficult: the seeds slip away from the grinders in hand mills (although kitchen blenders work well). To get around this, it helps to boil them until they are soft, then mash up the softened seeds and allow them to dry out before grinding. The flour produced from the seeds is very black. It is good for making pancakes, muffins, etc., and can be used by itself or mixed with wheat flour. The mush produced by boiling seeds until they are soft can be eaten as a breakfast cereal or emergency food.

And don’t forget about Purslane! It’s another nutritious weed with a lovely mild lemon flavor that’s also growing abundantly at this time of the year.

The “Salad Taco”: A New Way to Eat Your Greens

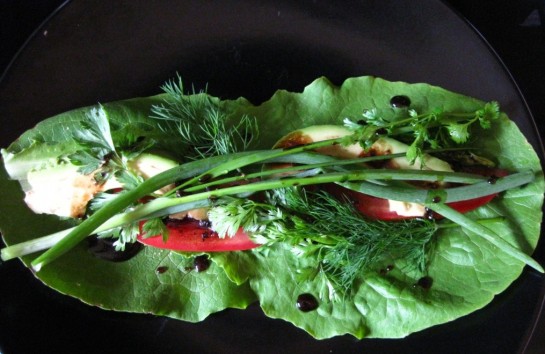
Salad Taco drizzled with balsamic vinaigrette. Ready to be folded up and eaten!

We’re all familiar with the taco salad. It’s present at almost every single potluck I’ve been to. But this is a salad taco, and if your kids don’t enjoy eating veggies, this might be a novel way to present salads. The salad taco idea came about because I like to forage in my garden, picking lettuce leaves and adding bits of whatever else is growing — onion tops, baby chard, cilantro, dill, oregano — and then folding it all up like a taco to munch on.

Today, though, I decided to give the whole thing a little more formality and class. I cut up some avocado and added tomato, along with some other garden goodies — dill, cilantro, and green onion. Drizzled with some homemade balsamic vinaigrette and then folded up and eaten like a taco, it was fantastic!

Apart from using your fingers as salad tongs (which was my preferred method as a kid), this seems like a more efficient way to consume a salad. And loads more fun than trying to use a fork to spear micron-thin lettuce leaves (not to mention a cherry tomato).

You could even take this idea to the ‘next level’ by doing a salad taco buffet at the dinner table — little bowls with different vegetables and toppings that you spoon onto lettuce leaves, and then drizzle with your choice of dressing.

Vegetable ideas: cucumbers, shredded carrots, radishes, tomatoes, green onions, red bell peppers, avocados, sprouts, fresh herbs.

Topping ideas: sunflower seeds, blue cheese, dried cranberries, chopped pears, toasted pecans, hard boiled egg, crumbled bacon, bits of ham, croutons, feta cheese, kalamata olives, black beans, raw cheddar cheese.

Dressing ideas:

– Balsamic Vinaigrette (Balsamic vinegar, olive oil, thyme, basil, salt, pepper)

– Blue Cheese Vinaigrette (Apple cider vinegar, olive oil, crumbled blue cheese, powdered dry mustard, salt, pepper)

– Greek (olive oil, lemon juice, oregano, garlic, salt, pepper)

– Salsa & Sour Cream for a Mexican-style dressing

Kids or not, this makes salad-eating way more fun! 😉

Jerusalem Artichoke Latkes for Hanukkah

Jerusalem Artichoke (Sunchoke) Latkes for Hanukkah

Today we’re making Latkes with a twist, just in time for Hanukkah (which begins this Friday night). I used my garden-grown Jerusalem Artichokes in place of the potatoes that would traditionally be used for latkes. I’m not Jewish, by the way, but I do like Jewish food, and I think it’s fun to get into the spirit of the holiday. 😉

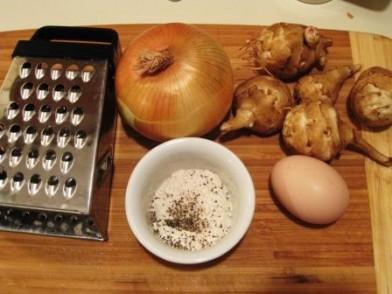
Jerusalem Artichokes (a.k.a. Sunchokes) are actually the edible tubers of a sunflower that’s native to North America. They’re kind of a lost vegetable, having been more popular in days gone by. Sunchokes are usually used in place of potatoes, but have a more pronounced, earthy flavor…and although they can be eaten raw, I prefer them cooked.

This year, I grew them in a small pot in the garden (though they do grow wild in fields). I’ve heard that once you plant them, it’s hard to get rid of them…so I just bought a small tuber from the Whole Foods produce section, broke it into pieces, and planted it. The sunflower grew very tall, and a few weeks after the first frost I dumped out the pot and harvested quite a few jerusalem artichokes. So easy! Anyway, that’s a post for another day. Onward with the recipe:
Jerusalem Artichoke (Sunchoke) Latkes

Jerusalem Artichoke (Sunchoke) Latkes

(Makes about 6 latkes / Ingredient measurements don’t have to be exact)

1/4 cup finely diced or grated onion

1 cup grated or shredded Jerusalem Artichoke, raw

1 large egg (or two small ones)

4 Tbsp flour (possibly more), divided — I used whole wheat

1/2 to 1 tsp salt, to your liking

1/4 to 1/2 tsp pepper, to your liking

Oil, to fry in

If you remember, go ahead and squeeze any extra liquid out of your shredded Jerusalem Artichokes. I forgot to do this and my latkes turned out fine, but I’ll try to remember to do it next time because extra liquid does make the oil splatter when the latke is placed in the pan.

Beat the egg(s) in a bowl, and mix in the Jerusalem Artichokes, onions, salt, and pepper. Mix in about 2 Tbsp of flour. You want to have enough flour in there so that the batter holds together after you form it into a little patty.

Pour enough oil (olive oil is traditional) into a frying pan so that it covers the bottom of the pan. Set the burner to medium, or a bit higher. To test the oil, drop a bit of batter in and if it sizzles, the oil is hot enough.

If the batter sizzles, the oil is hot enough.

If the batter sizzles, the oil is hot enough.

Form some of the batter into a little patty, and flatten slightly, like this:

Making a latke

If the latke batter holds together, it's ready to be cooked in the oil.

If the patty just falls apart in your hand, put it back in the bowl and add more flour to the mixture.You’ll notice that as the batter sits around, it will get more watery, so you will likely have to mix in another couple tablespoons of flour.

Slide the patty into the hot oil in the pan. Cook about 4-6 minutes, or until the bottom is golden. When you see the edges begin to brown, it’s time to check if the bottom is golden.

Cooking a Jerusalem Artichoke (Sunchoke) Latke

When the edges begin to brown, check to see if the bottom is golden.

If the latke isn’t browning, turn the heat up a little. If it’s browning too quickly, turn the heat down a little.

Turn the latke over when the bottom is golden brown.

Turn the latke over when the bottom is golden brown.

When the latke is done, place it on a plate lined with paper towels. Serve right away, or make the latkes earlier in the day and then warm them in the oven before serving.

Serve plain, or with sour cream, applesauce, or any other favorite condiment.

Happy Hanukkah!

This post is part of today’s Pennywise Platter Carnival over at The Nourishing Gourmet.
« Older posts Newer posts »

© 2025 The Herbangardener

Theme by Anders NorenUp ↑