Have you ever had Bubbies? It’s the brand against which all other pickles are judged, at least in our house! My hubby is a huge fan. And if you like garlic, you’ll probably appreciate Bubbies, too. They’re not made with vinegar, but rather are made the old-fashioned way, though lacto-fermentation in brine. (I have a Bubbie’s Bread & Butter Chips pickle recipe too, which is made with vinegar.)
So for my very first attempt at homemade pickles, I turned the Bubbies jar upside down, identified which spices were in there, selected what looked like a good lacto-fermented pickle recipe, and hoped for the best as I sacrificed a couple of humongous garden cucumbers for the Great Pickle Experiment.
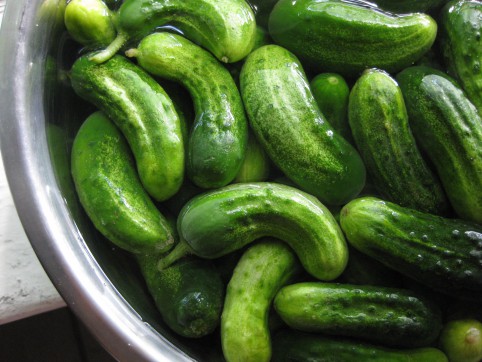
The results were shocking…in that I was shocked I had made something so tasty and convincing on the very first try. I certainly had expected the worst. In fact, I thought Hubby was being sarcastic when he tried the first one and told me they were awesome. He couldn’t stop talking about them! I was skeptical until I tried one, too. YO! Later, I did a taste test of my pickles compared to Bubbies; I actually liked mine even better! In the photo above, I used my large garden cucumbers, but to get the true Bubbies experience, go for the really small cukes; I find these at the farmer’s market, or at ethnic grocery stores. Go for organic if you can (which would be an upgrade from Bubbies, since theirs aren’t organic). Of course the really big cucumbers are fine to use, but because of their size, their insides won’t be quite as firm and crunchy as a smaller cucumber would be, and their skin will be a little tougher.
*****
Lindsey’s Bubbies Pickle Recipe:
1 gallon glass jar or ceramic crock
1/2 a gallon of warm water (tap water is fine)
A handful of fresh, clean grape leaves, oak leaves, or cherry leaves (optional — they supply tannins to keep the pickles crunchy) (UPDATE: raspberry & blackberry leaves work too, but have a stronger flavor than grape leaves)
3-4 lbs of cucumbers (small to medium is ideal, but if all you have is large, cut them into spears)
5-6 Tbsp non-iodized sea salt. I use Redmond RealSalt brand unrefined sea salt. (I usually prefer 6 Tbsp. Using 5 Tbsp of salt will yield a less salty pickle that my hubby prefers, however you may have to contend with more white film, or “kahm yeast,” on the surface of the brine during fermentation. More about kahm yeast in the instructions.)
2 – 3 heads of garlic, separated into cloves, peeled, & roughly chopped
3 Tbsp whole dill seed
2 Tbsp whole coriander seed
1 tsp whole mustard seed (brown or yellow, doesn’t matter)
1 tsp whole peppercorns
1 tsp fennel seed
1/2 tsp red pepper flakes
*****

Ingredients for Homemade Bubbies Pickles. My homegrown garlic was a little small, so I used 4 heads.
*****
Directions:
Rinse the cucumbers, making sure the blossoms are removed. Soak them in very cold water for a couple hours (if they’re not straight off the vine).

In a separate clean jar (not the one you’ll be using for the pickles), dissolve the salt into the 1/2 gallon of warm water. Set aside — this brine will be one of the last things you’ll add.
Into the clean, gallon jar/crock you’ll be using for the pickles, drop in the garlic, dill, coriander, mustard, peppercorns, fennel, and red pepper flakes.
Then, put the cucumbers into the jar. If you’ve sliced large cucumbers into spears, pack the spears vertically into the jar.

Pour the salt water solution (a.k.a. the brine) over the cucumbers.
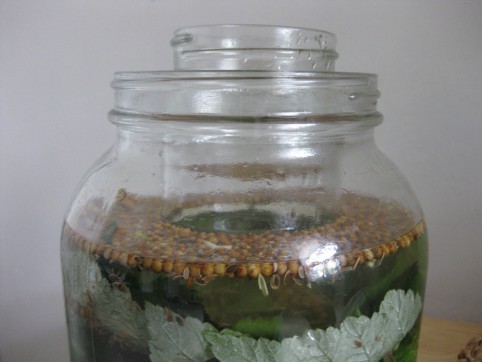
Now, place the cleaned grape/oak/cherry/raspberry/blackberry leaves into the jar. My jar has a somewhat narrow mouth, so the grape leaves form a nice plug at the top of the jar so the cucumbers (which will rise to the top after you pack them in) don’t go above the brine.


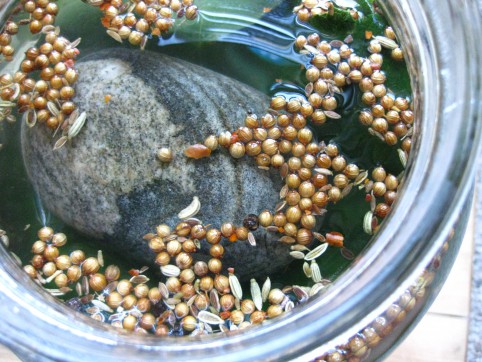
You want your cucumbers (and leaves) to be completely submerged in the brine at all times. If they’re sticking up above the brine, they’ll get moldy. If your jar has a wide mouth, you may need to use a couple of plates to keep everything submerged. Another idea is to nest a smaller glass jar into the opening of the larger jar to keep everything down. Or, use a scrubbed & sterilized rock.

Using nested jars to keep everything submerged.

Another idea: use a rock to keep everything submerged.
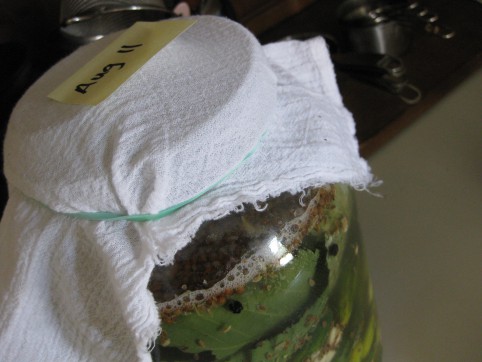
If the brine still doesn’t cover the cucumbers, make more brine solution using: 1 scant Tbsp sea salt to one cup of water. Cover your jar with its lid (loosely), or with a cloth to keep bugs & dust out. If you see a thin film of white scum growing on the surface of the water, just skim it off as often as you can, but don’t worry if you can’t get it all. This is “kahm yeast;” it won’t harm anything, but do try to keep up with it otherwise it can affect the flavor of your pickles.
Sometimes, during pickle making, some of your garlic cloves will turn blue. This is not a problem. The Colorado Extension Service website says this about blue garlic:
Blue, purple or blue-green garlic may result from immature garlic or garlic that is not fully dry, from copper pans, or from a high amount of copper in the water. Garlic contains anthocyanin, a water-soluble pigment that under acid conditions may turn blue or purple. A blue-green color also may develop in pickles made with stored red-skinned garlic. Except for blue-green color resulting from an abnormally high copper-sulfate concentration, such color changes do not indicate the presence of harmful substances.
Your pickles will be ready after 1-4 weeks — depending on the temperature in your house. Our pickles are usually ready after 10 days on the counter in our warm apartment (average of 80-85°F) in late summer. Every couple days, do a taste test of your pickles. They’re ready when they taste done to you! Once they taste done, transfer the jar into the fridge to slow fermentation. Once they’ve fermented and are in the fridge, you can remove the grape/oak/cherry/raspberry/blackberry leaves and you don’t need to worry as much about the pickles being completely submerged in the brine.
Enjoy! These will last months and months in your fridge. I once kept a batch around for 9 months and it was still good.
And the brine is good stuff too; I like to drink it straight. It’s full of beneficial bacteria and good for your digestion! Since it’s salty, it would be especially good after a workout.
*****


