Kitchen / Garden / Sanctuary - Urban Homesteading to Nourish Body + Spirit

Tag: food preservation (Page 4 of 6)

How to Make Beet Kvass

Beet kvass is a favorite at our house! It’s so easy to make and so good for your body, and we love the taste — salty, sour, very refreshing.

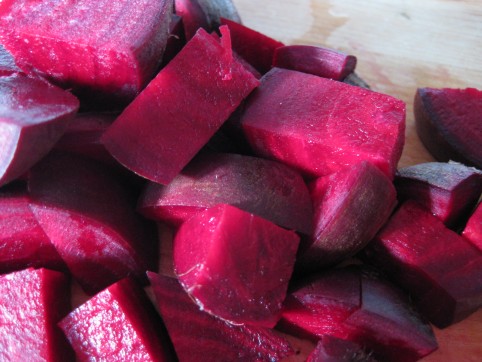
Beets are extremely nutrient rich and have long been valued as a blood tonic (and their doctrine of signatures would suggest this — they make everything look bloody after you’ve cut into them!). They are rich in iron, calcium, magnesium, phosphorus, carotene, B complex, copper, and vitamin C. Beets and their greens contain special substances that protect the liver and stimulate the flow of bile (Nourishing Traditions, p. 373). And drinking beet kvass is especially beneficial to digestion because it’s lacto-fermented and therefore contains beneficial enzymes and bacteria for your digestive tract. It’s an all-around health tonic, and according to p. 610 of Nourishing Traditions, beet kvass promotes regular elimination, aids digestion, alkalinizes the blood, cleanses the liver, and is a good treatment for kidney stones and other ailments.

Well, all I know is that it tastes good!

The recipe in Nourishing Traditions describes letting your beet kvass ferment for 2 days on the counter and then refrigerating it. However, I find it usually needs to ferment a lot longer than that. I let mine go a week or two on the counter, until the kvass is completely opaque — a deep, thick red that you can’t see through. I give it a taste, and if it’s sour with no hint of sweetness left, I know it’s done (though some may like to have that hint of sweetness). As with all fermentations, let it go until it tastes good to you, regardless of what the directions say.

Here’s my recipe:

Beet Kvass

8 – 10 ounces organic beets, scrubbed & coarsely chopped (I don’t bother to peel them)

1/4 cup whey* (optional)

1 Tbsp sea salt (I like unrefined sea salt because the minerals haven’t been taken out)

water

Place the salt into a 2-quart glass jar. Pour in a little warm water to dissolve the salt, and then add the beets and whey (if using). Fill the jar to the top with water. Stir and cover. Let sit at room temperature until the kvass tastes good to you — several days to a couple weeks, depending on your kitchen temperature and your tastes. Transfer to the fridge. If the kvass isn’t delicious, it may need a few weeks to “do its thing” in the fridge. I always find that my ferments taste even better when they’ve been shoved to the back of the fridge for a few weeks (or…er…months!).

And I have found that the whey is an optional ingredient, even though it isn’t listed as such in Nourishing Traditions. Feel free to leave it out; your kvass will take a little longer to ferment, but will be just as delicious!

When the liquid is nearly gone from your jar, you can fill it halfway again with water (no extra salt) and let it re-ferment if you want. Or you can save some kvass to add to your new batch as an innoculant, or you can juice your spent beet chunks! Or all of the above.
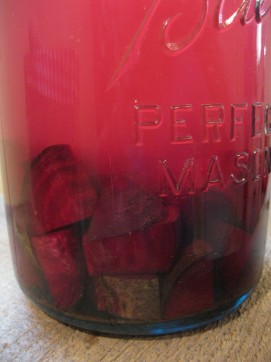
Starting a new batch of beet kvass
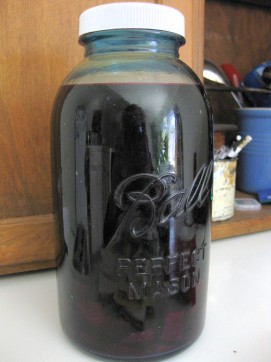
Beet kvass, finished and ready to drink

*****

*Whey: a clear yellowish liquid that can be drained off a fermented milk product like yogurt, buttermilk, or kefir. Whey will actually last for a couple months in your fridge. There are several ways to collect it:

– Easiest way: make kefir and let it over-ferment until curds and whey have separated. Spoon off the curds, and strain the whey through a fine mesh seive.

– Another way: Place a colander or seive over a bowl. Line the colander with a clean, damp tea towel, and pour yogurt into that. Leave for a day or two in your fridge to drain. You’ll then be left with whey in the bowl and “Greek yogurt” (or “yogurt cheese” if it’s really thick) in the colander. Both are great for making dips.

*****

Troubleshooting:

My ferments, including my kvass, sometimes get a white film (kahm yeast) on top during fermentation. It looks like this:
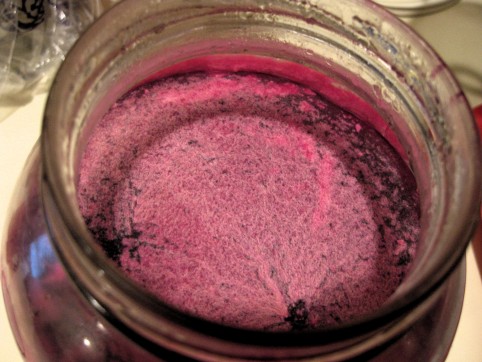
Kahm yeast is harmless, but you’ll want to try to keep it scraped off so it doesn’t affect the flavor of the kvass too much. I do find that my kvass gains a depth of flavor when it’s had this film on it, but if you let it go uncontrolled, it can make your kvass taste weird. Try to scrape as much of it off each day as you can.

*****

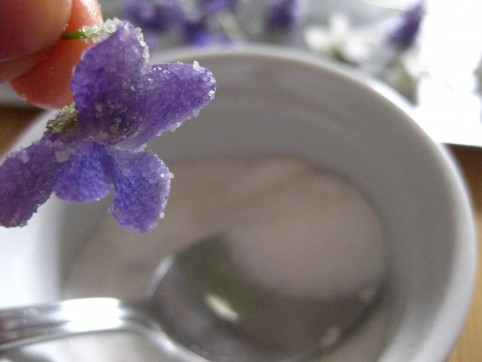
How To Make Candied Violets

Here’s an old fashioned spring project to do! Preserve those ephemeral little violet flowers for use as a garnish (on a coconut cake for Easter would be nice…) or for a lovely treat at any time of year — violets have a wonderful taste and will keep for months once they’ve been candied!

The process is simple, and not too time consuming. You can make this a more delicate project by painting eggwhite onto each flower with a paintbrush, and then dusting with fine sugar, but I think I’d only want to dedicate that kind of time if I were making these for a really special occasion!

Here’s what you’ll need:

Freshly picked violet flowers & leaves (having them very fresh will make the project go faster and prevent frustration!*)

Egg white (not beaten or frothed) (use eggs you trust since it’s raw)

Ordinary white granulated sugar (not powdered sugar)

Here’s what you do:

The flowers should be dry. No need to wash/dry them first — just pick them on a dry day and go for it. Dip each flower into the eggwhite. Give the flower a firm shake to get rid of any excess eggwhite. Hold it over a dish filled with sugar, and spoon the sugar over the flower until all surfaces are coated. Let the flowers dry on wax paper, parchment paper, or on a bed of sugar. (A plain baking sheet works too, but the eggwhite sticks, so you’ll have to carefully loosen the flowers with a metal spatula after they’re mostly dry.)

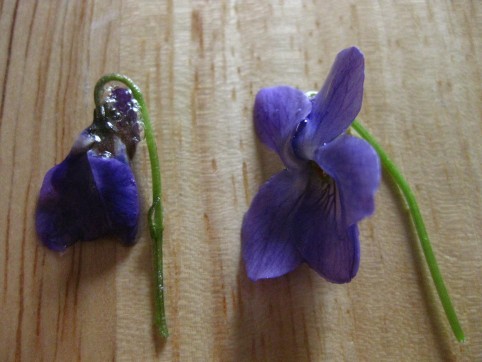
*The most important thing is to have fresh flowers (and leaves if you’re using them). Don’t pick the flowers, put them in a zip-top bag in the fridge for a few days, and then do the project; the flowers will have lost too much moisture and when you dip them in eggwhite, they’ll collapse. See photo below! Very fresh flowers will hold their shape even after being dipped in eggwhite.

Both have been dipped in eggwhite -- the flower on the left was in plastic in the fridge for a couple days, while the one on the right is fresh from the yard. Fresh is best!

That’s it! When they’re thoroughly dry (give them about 24 hours), store them in an airtight container. Room temperature is OK.

It’s Been Busy at the Homestead!

So busy!! Since quitting my job, I am so busy!! Busy doing the life I had been putting off for all that time. My, how good that feels.

**********

Here are some random pictures from yesterday & today:

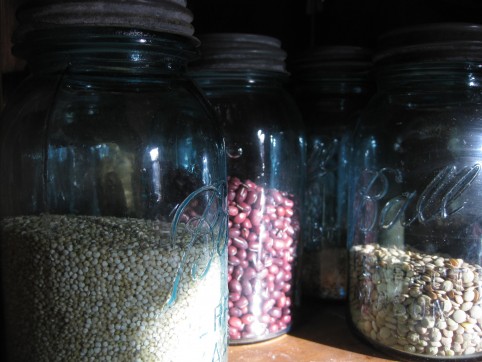
Inside the grain & legume cupboard in late afternoon. (I love the old fashioned jars — they’ve been in the family a long time, and they give me a homey feeling!)

**********

I just finished reading this inspiring book about how “the rest of the world” deals with diapers (hint: they don’t use ’em!) and how we westerners can have diaper-free babies, too. This is a must-read for new parents — or even better, before they become parents! Click here for a short synopsis of Natural Infant Hygiene (being diaper-free), written by the author of the book.

**********

The parsley in the kitchen window looks so pretty in the sun!

**********

Homemade organic applesauce ready for the freezer. I gobble this stuff up, especially when I warm it up on the stove and add cinnamon & cream!

**********

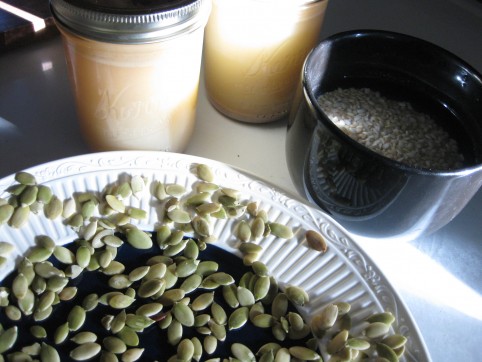
2 jars of freshly made chicken bone broth, cooked way down and concentrated…now ready to pop into the freezer. Also, brown rice that’s been soaked overnight and is ready to cook, and raw pumpkin seeds that were soaked overnight in salt water, and are drying. (I love to snack on them and add them to soaked oatmeal!)

**********

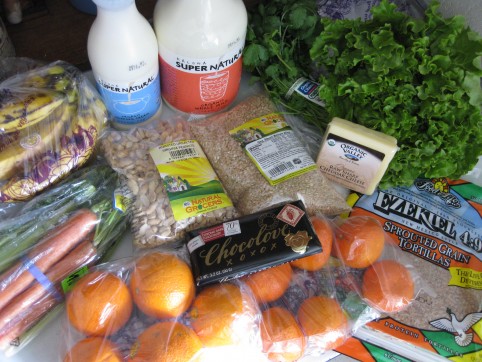
Went to the health food store yesterday (our favorite — Natural Grocers, aka Vitamin Cottage) and got some good stuff at reasonable prices. Everything’s organic except the chocolate and peanuts. Lettuce ($1.99), cilantro ($1.39), seedless tangerines ($1.79/lb on sale), Cara Cara oranges ($1.59/lb on sale), Food for Life sprouted grain tortillas ($2.65 for 6 large), raw cheddar ($3.49 on sale), peanuts ($2.33 for 1 lb), brown rice ($1.99 for 2 lbs, on sale), Kalona Supernatural whole milk ($3.69 for 1/2 gallon – to make kefir), Kalona Supernatural whipping cream ($5.79/quart), Chocolove 70% cocoa chocolate bar (the best-tasting brand and incidentally the cheapest…$1.49 on sale), and two “$1 grab-bags” — one with carrots and celery for juicing, and the other with 3 lbs of bananas at the perfect stage of ripeness to cut up and freeze for smoothies!

**********

Frozen banana slices for smoothies…ready to be transferred to a freezer bag:

**********

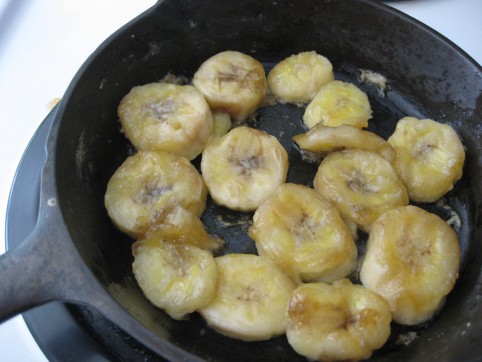
Then I made a delicious dessert of a sliced banana sauteed in coconut oil with a bit of maple syrup. A favorite!!

**********

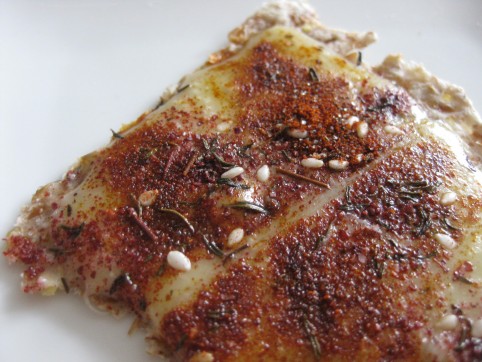
Also made a yummy snack (called a “cheese circle” in my family when I was little!) of cheese melted over a sprouted grain tortilla, topped with Penzey’s Zatar seasoning and Smoked Spanish Paprika. Dynamite! (I make these circles in a cast iron skillet, over medium-low heat, covering the skillet with a cookie sheet until the cheese is melted, then adding seasoning. And normally, I use only 1/4 or 1/2 of a big tortilla at a time!)

**********

What’s been keeping you busy lately?

After Halloween: Cooking Your Pumpkin and Roasting Its Seeds

I hope you had a happy Halloween! Mine was uneventful, but I did go on a wonderful bike ride through the neighborhoods on Halloween night to see the decorated houses, carved pumpkins, and kids trick-or-treating. I think I had a smile on my face the entire time. To boot, it was an unusually mild night with a few diehard crickets still going (usually it’s snowing here on Halloween!), and people were sitting out on their front porches, candy bowls beside them.

Anyway, last year I cooked our Halloween pumpkin and I wanted to share the process if you’re interested in doing the same thing. One thing to note about the generic jack-o-lantern pumpkins is that they’re very lacking in flavor. Bland! And watery! But after draining out the excess water (which we’ll address below), the blandness can be a good thing because you can then sneak the pumpkin puree into your cooking (or baking) without affecting the dish’s flavor very much.

Here’s what to do:

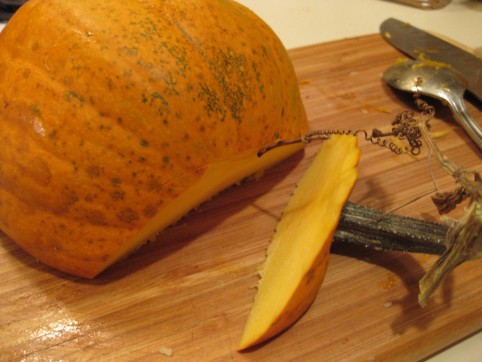
With a sharp knife, cut your pumpkin in half, then cut off the stem.

Cut off the stem

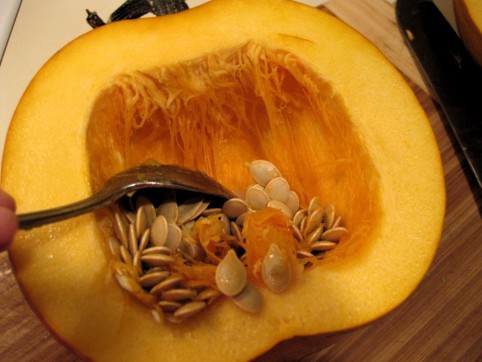
Scoop out the seeds and SAVE THEM! We’ll be roasting them while the pumpkin cooks.

Scoop out the seeds and save them for roasting.

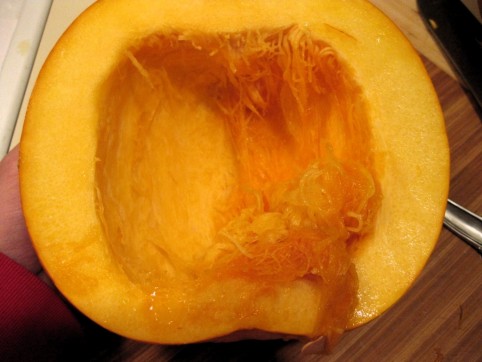
With a spoon and some elbow grease, scrape out the long stringy fibers. You have to really get in there with your spoon; attack that pumpkin!

Scoop out the stringy fibers

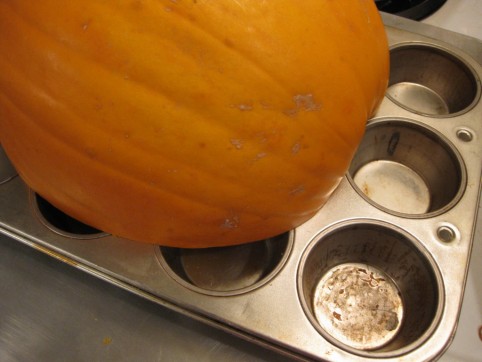
Set pumpkin cut-side down into a large baking pan with sides to contain the juice. If you don’t have a pan with sides large enough, then just bake them on cookie sheets, cut-side up. Or be creative and set them on something else, like a muffin tray to catch the juice!

Bake at 350* (or 375* — the temperature isn’t too important). You’ll bake it until the flesh is very soft, which usually takes about an hour, maybe more.

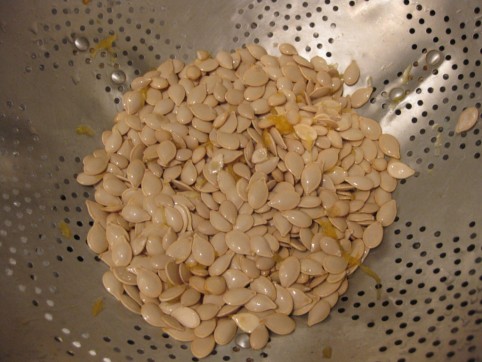
After you put your pumpkin in the oven, put the seeds into a colander. Rinse them and remove as much of the stringy orange stuff as you can.

Wash seeds & remove orange fibers

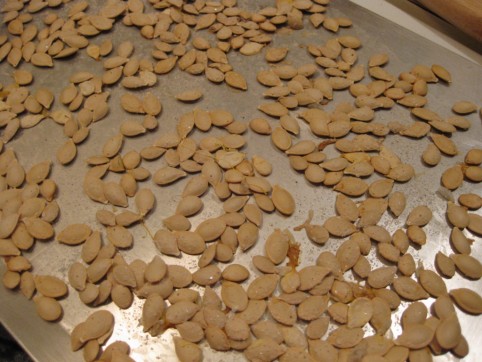
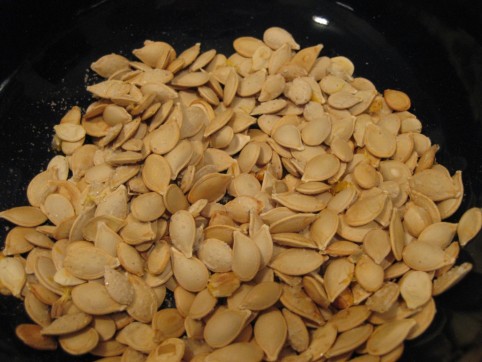
Spread them onto an un-greased cookie sheet and sprinkle them fairly liberally with salt. Bake them until they’re a very light golden color; you don’t want to over-bake them, but you do want them dry to the touch, and crunchy. This seems to take about 15 minutes for me, but the times may be different for you.

Spread on a cookie sheet and sprinkle with salt; cook till dry and crunchy

Eat!

Now, back to the pumpkin.

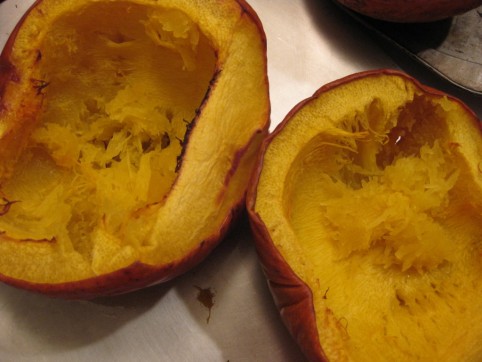
When the flesh is very soft, remove from the oven and let the pumpkin cool until it’s handle-able.

Bake till very soft

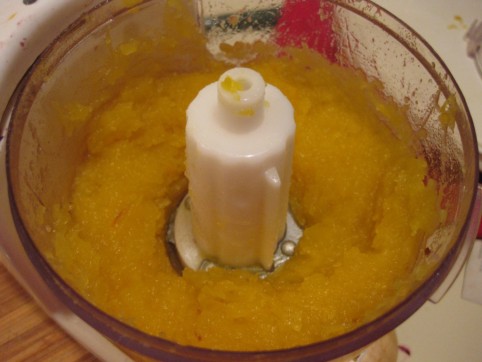
Scrape out the flesh, and discard (or compost) the skin-shell. Run the pumpkin flesh through a food processor or blender to improve the texture and break up stringiness. If it’s too dry to run through the blender, add a little water and blend; you can drain the water out (or cook it off) later.

Blend till smooth, adding a little water if needed

Since these pumpkins generally have quite a bit of water in their flesh, you’ll want to drain the puree after blending it. I like to dump the pumpkin puree into a colander and let that sit over a bowl overnight. You’ll be amazed at how much water drains out! Alternatively, you can just cook the water off instead of letting it drain away; just simmer the pumpkin puree, uncovered, in a pot over low heat until you’re satisfied with its consistency.

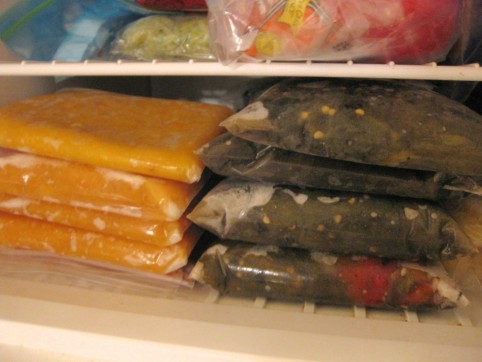
That’s it! Measure your puree into ½- or 1-cup portions and freeze into ziploc bags; I like to stack my bags neatly on a plate and freeze them so that they freeze into stackable shapes, like this:

Measure, stack, and freeze!

Wilted Cucumbers? Bake Them!

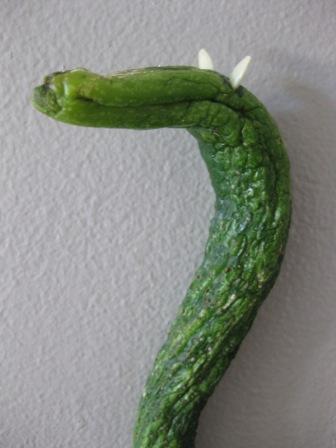
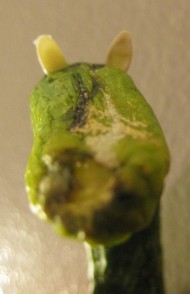
Ever wonder what to do with cucumbers that have begun to wilt and lose their crunch? Obviously the first thing you’d think of is to make a Loch Ness monster like the one below, right?

The Loch Ness Cucumber

I thought so.

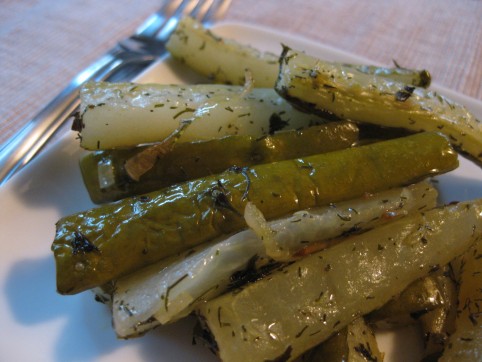
And although that’s fun — yes — the thing that really uses up those cukes is to bake them. This was originally a Julia Child recipe from Mastering the Art of French Cooking, but I’ve tweaked it somewhat to be simpler, with bolder flavors. I never thought to bake a cucumber until my mom made them last year; delicious! And a real bonus is that they freeze pretty well after baking. Thawed, they’re a little softer than the original out-of-the-oven ones, but that doesn’t bother you, right?

Try them out…I think they’re absolutely delicious! They have kind of a pickle-y flavor, yet gentle and buttery. This recipe makes a fair amount, but they do cook down to about half their original volume; and of course, feel free to cut the recipe in half.

Baked Cucumbers

3 lbs cucumbers

1/2 cup finely minced onion

1/4 – 1/3 cup wine vinegar (to your liking)

1/4 tsp sugar

1 1/4 tsp salt

1 Tbsp dry basil

1 Tbsp dry dill weed

4 Tbsp butter, melted

1/4 cup minced parsley (optional, for serving)

Preheat oven to 375*. Peel cucumbers if the skin is bitter. Cut them in half lengthwise and scoop out the seeds with a spoon. Cut into lengthwise strips 1/4″ to 1/2″ wide. Cut the strips into pieces that are 2″ long.

Mix all ingredients together, stirring well to evenly coat the cucumber pieces. Divide into two baking pans (I use two 9″x13″ glass pans) and bake, uncovered, for about an hour, tossing every 20-30 minutes. They should be tender, but still have a little crunch. Sprinkle with minced parsley (if desired), and serve. Mmmm!

« Older posts Newer posts »

© 2024 The Herbangardener

Theme by Anders NorenUp ↑