Kitchen / Garden / Sanctuary - Urban Homesteading to Nourish Body + Spirit

Tag: food storage (Page 1 of 4)

Bubbie’s Bread & Butter Chips Pickle Recipe

Hello! It’s been a while since I posted something, and I hope all is well on your end.

My original Bubbie’s pickle knockoff recipe is a popular one, and here is another one you may enjoy. If you like the taste, but not the price tag, of Bubbie’s Bread & Butter pickles, try this out. I think I like mine even better.

I have been enjoying these for a couple years now, and most often these days I will blend these into a sauce thanks to my gastroparesis and global dysmotility. I just dump everything into the blender, juice and spices and all, and what comes out is a tangy, delicious pickle sauce! I always peel my cucumbers for this recipe though, because I think it tastes better to not have the peels.


Bubbie’s Bread & Butter Chips pickle recipe

3 lbs cucumbers
½ cup thinly sliced onion (about half of a medium onion)
3 TBSP canning/pickling salt, or regular table salt
2 cups white vinegar
½ cup water
1 cup granulated white sugar
1 TBSP whole yellow mustard seeds
1 tsp celery seeds
¼ tsp ground turmeric

1. Peel the cucumbers, and slice them ¼-inch thick. Crinkle cut is fun, but you can use a normal knife too.

2. Place the cucumber and onion slices in a large bowl and toss thoroughly with the salt. Transfer them into a colander, and place the colander over a smaller bowl so that they can drain freely and won’t sit in the salty cucumber liquid.

3. Let them sit at room temperature for 1 – 2 hours.

4. Discard the salty liquid that has collected in the smaller bowl, and rinse the cucumbers and onions under running water. Give them a good rinse, but don’t be totally thorough.
Divide the cucumbers and onions between two quart-sized canning jars.

5. In a medium saucepan, combine the vinegar, water, sugar, mustard seeds, celery seeds, and turmeric. Bring to a boil, and then pour this hot mixture into the cucumber jars, filling them nearly to the top. Stick a butter knife into each jar and jostle the cucumbers, freeing any air bubbles. If necessary, top up the jar with any remaining hot vinegar mixture.
Secure the lids onto the jars, but you won’t actually be canning them. Keep the jars on the counter to cool (I leave them overnight).

6. Once cool, transfer to the refrigerator. They will keep for at least 6 months.

Kitchen Tip: Freeze your extra eggs

(c) The Herbangardener, Freeze eggs

Did you know? You can most certainly freeze eggs! I’ve never read about this handy tip but I’m sure others have done it. For the past year I’ve been freezing my extra eggs and they turn out great. I use them mostly in baking, but also for scrambled eggs or an omelet.

And let’s not think about Easter yet, but this is a great thing to do with the contents of the eggs you blow out for your Easter Egg Tree.

Here’s how I freeze them:

1. Crack egg into a small plastic container. Snap the top on and shake it until the egg is scrambled.

(c) The Herbangardener, Freeze eggs

2. With the top still on, place in the freezer till frozen solid.

3. Remove from the freezer, and let the container stand on the counter till it’s melted just enough to pop the egg-disc out.

(c) The Herbangardener, Freeze extra eggs

4. Place into a freezer bag. Thaw at room temperature whenever you need an egg!

(c) The Herbangardener, Freeze extra eggs

***

(c) The Herbangardener, Cat sniffs eggs

*****

How to Ripen Green Tomatoes

I got a question the other day about what to do with green tomatoes… well, let me tell you!

Green tomatoes are always part of the Autumn routine for us. Once picked, most of them ripen over the coming weeks, and some years we’re still eating homegrown tomatoes past Christmas!
*****

Here’s how I handle all the tomatoes that we pick before the first frost hits:

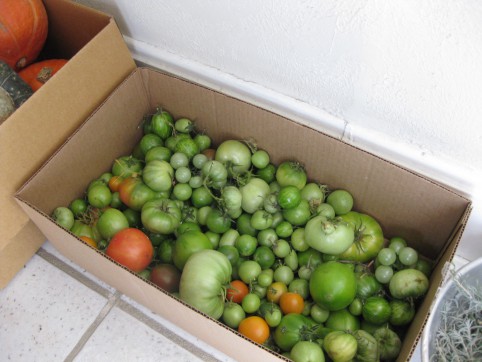
1. Usually I leave the tomatoes hanging out in an uncovered cardboard box for several days or a week. This is usually because I don’t get around to addressing them, but it also allows the close-to-being-ripe ones to ripen more fully.

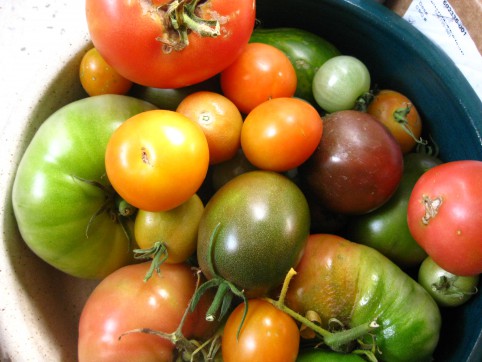
2. When I’m ready to deal with them, I gather a few cardboard boxes and some newspaper. I go through the tomatoes, separating ones that are showing signs of ripeness (light blushes of color or softening flesh) from the rest that are still very hard and green.

3. Put the ripening ones in their own box or paper bag, and check them every day or two. Or, leave them out on the counter.

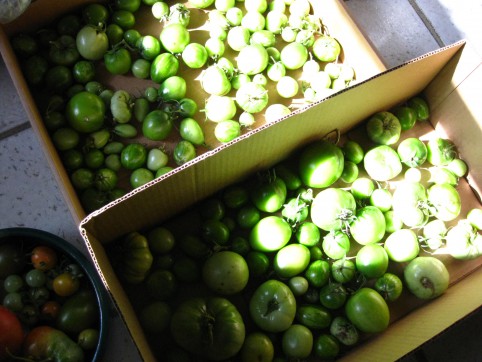
4. I put the rest into boxes — only one layer thick — and then lay some sheets of newspaper on top. Over the years I’ve evolved through several methods of green tomato storage, and this is the one I’ve settled on. It’s my favorite because it’s the easiest, with the fewest tomatoes lost to mold.

Methods I’ve used in the past include:

– I used to cut squares of newspaper and wrap each tomato individually — unwrapping, checking, and re-wrapping them each week, and marking with highlighter the ones nearing ripeness. This is not only an insane amount of work, but it’s also totally unnecessary. There are easier ways to get the same result.

– After I evolved away from that, I would use only one box and put multiple layers of tomatoes in the box, separated by sheets of newspaper. This was a little better, but still involved removing layers of tomatoes and newspaper, checking, and re-layering.

Store the tomatoes, only one layer thick, in boxes.

Cover them with newspaper.

5. Ok, so anyway, you’ll have multiple boxes with tomatoes only one layer thick. For this reason I like to use wide, shallow boxes. The boxes can be stacked as long as they’re supported by the sides of the box below and not resting on top of the actual tomatoes.

6. Keep your boxes in the coolest place in your house. Perhaps that’s a coat closet in your foyer, or in your basement. For us, it’s in the stairwell that leads from our apartment to our outdoor side entrance.

Store the boxes in the coolest part of your house. Check your tomatoes at least weekly.

7. Check your tomatoes at least weekly. It’s as easy as peeking under the newspaper. I like to move the nearly-ripe tomatoes to the top of the newspaper so that I can watch them and grab them when they’re ready.

8. Not all the tomatoes will ripen. Some are just too small and green to hold much promise of ripening, so this year I’m going to pickle them exactly the way I pickle cucumbers, using my trusty pickle recipe.

*****

*****

Do you have a good way of ripening your green tomatoes, or perhaps a good recipe that calls for green tomatoes?

*****

Autumn at the Homestead

*****

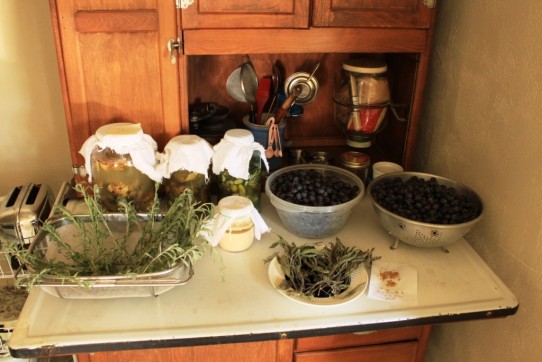
This could certainly be a scene from a rural farmhouse, but actually it’s right here in our own urban attic apartment!

There are pickles fermenting…12 lbs of wild grapes washed & de-stemmed & waiting to be made into jam or fruit leather…lavender drying for tea through the winter…a bubbling sourdough starter waiting to be used for whole wheat sourdough tortillas or pancakes…sage drying…and heirloom Black Russian tomato seeds drying for next year.

♥~ You don’t necessarily need a farm to have a homestead! ~♥

*****

« Older posts

© 2025 The Herbangardener

Theme by Anders NorenUp ↑