Kitchen / Garden / Sanctuary - Urban Homesteading to Nourish Body + Spirit

Tag: frugal (Page 2 of 12)

Kitchen Tip: Freeze your extra eggs

(c) The Herbangardener, Freeze eggs

Did you know? You can most certainly freeze eggs! I’ve never read about this handy tip but I’m sure others have done it. For the past year I’ve been freezing my extra eggs and they turn out great. I use them mostly in baking, but also for scrambled eggs or an omelet.

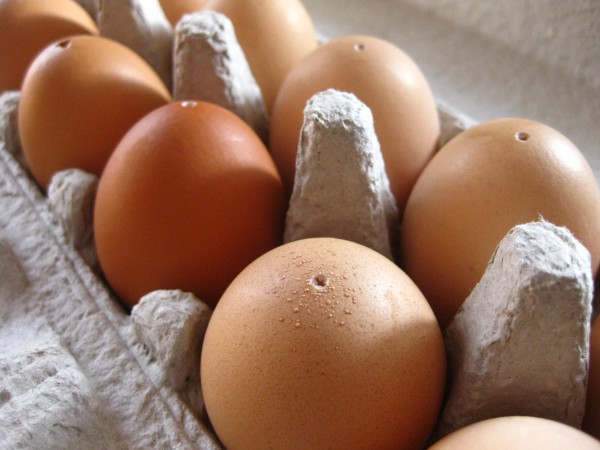
And let’s not think about Easter yet, but this is a great thing to do with the contents of the eggs you blow out for your Easter Egg Tree.

Here’s how I freeze them:

1. Crack egg into a small plastic container. Snap the top on and shake it until the egg is scrambled.

(c) The Herbangardener, Freeze eggs

2. With the top still on, place in the freezer till frozen solid.

3. Remove from the freezer, and let the container stand on the counter till it’s melted just enough to pop the egg-disc out.

(c) The Herbangardener, Freeze extra eggs

4. Place into a freezer bag. Thaw at room temperature whenever you need an egg!

(c) The Herbangardener, Freeze extra eggs

***

(c) The Herbangardener, Cat sniffs eggs

*****

Make an Easter Egg Tree

What a dear holiday Easter is. I love the sweet, cheerful decorations, the colors of early spring, the smell of hyacinth.

Back in late January, I had clipped some aspen branches and brought them into the house. They’ve been such a nice touch of nature to have around, carrying on with their life cycle of blooming and leafing out, content in just a vase of water.

So naturally, our indoor aspen tree needed some Easter eggs. I do have some blown-out-and-dyed eggs from several years ago, and this year I blew out some brown eggs, which are beautiful just as they are.

***

To make your egg tree:

Clip a few branches and place them in a vase of water or sand.

Blow out some eggs by piercing both ends with a sharp implement like nail scissors or a needle or an old-fashioned ice pick; blow the innards into a bowl.

A nice way to hang each egg is to get a length of thin branch and cut it into short bits, 1/2″ or 1″ (2cm) long (or use part of a match stick or toothpick). The branch I used was from an elm tree.

Cut about 12″ (30cm) of thread, and tie a double knot on the branch bit. The knot doesn’t have to be completely centered on the branch. It helps to start a knot with the thread, and then slip the branch piece into it.

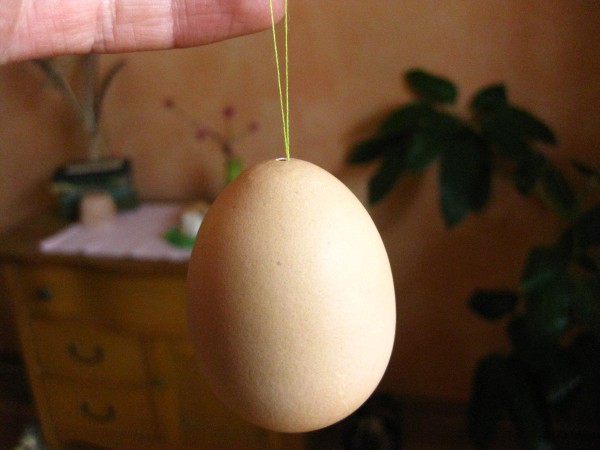
Slip your branch bit all the way into the top hole of the egg.

Hang it like this. Tie off the thread about 3″ (7cm) above the egg.

Then decorate your little egg tree! Don’t worry, your cat will help you.

*****

Japanese Squash and Soba Soup

This soup is incredible; I could hardly stop eating it. It’s light and different and so flavorful, and it’s quick to make.

It’s based upon this recipe from Martha Stewart Living magazine, except I leave out the tofu — and even the soba noodles could easily be optional, as they add more in the way of texture and filler, rather than flavor. The real flavor is from the broth, squash, mushrooms, and scallions. Just like that it is absolutely delicious, and would be a good Paleo dish to add to your repertoire.

Japanese Squash & Mushroom Soup

5 cups water (for out of this world soup, use bone broth — either beef or chicken bones simmered for many hours in water)

3/4 oz dried kombu seaweed (kelp)

1/3 cup dried bonito flakes, lightly packed

2 Tbsp soy sauce, plus more for seasoning (I highly recommend Ohsawa Organic Nama Shoyu!)

1 lb kabocha, buttercup, or butternut winter squash, peeled and cut into 1/2″ dice

3 1/2 oz shiitake mushrooms, sliced if large

8 oz soba noodles, preferably 100% buckwheat (feel free to cut down to 4 oz, or even leave these out altogether)

Scallions, thinly sliced for garnish

***

Boil water and kombu together in a large saucepan. Remove from heat, stir in bonito flakes, and let sit 5 minutes.

Pour through a fine sieve into a bowl, and return liquid (it’s now called “dashi”) to pan. Discard solids, or save only the kombu to reuse.

Add the soy sauce, squash, and mushrooms to the dashi. Bring to a boil over high heat, and then reduce heat, cover, and simmer for about 10 minutes or until the squash is tender. Stir it now and then if you think of it.

While the soup is cooking, cook the soba noodles separately. This is important since 100% buckwheat soba, especially, will turn its cooking water murky and starchy-slimy. So, bring water to a boil (salted or not, your choice) and cook the soba according to the package, about 7 or 8 minutes. Don’t overcook it. When it’s done, drain and rinse in cold water — to stop the cooking and rinse away the starch.

Ladle the soup into bowls, add the soba noodles, and top with scallions. Serve with soy sauce at the table in case anyone would like to add more.

Eat!! Yum!!

*****

Sand + Jar = Candle holder

***

The other day I found my baptism candle in some old stuff.

I tossed it in the trash — no need to keep that.

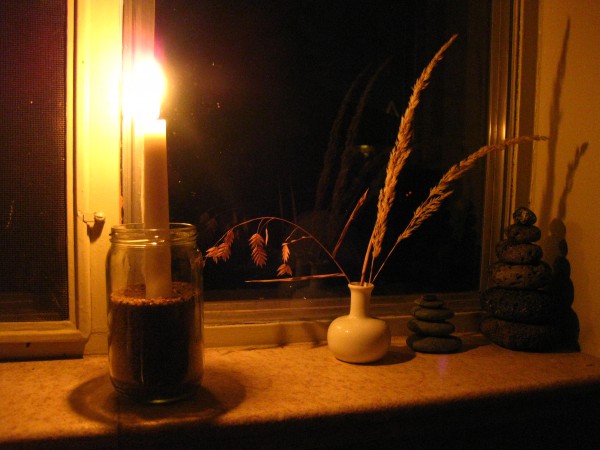
But then the next day I had a cool idea for a candle holder, so I poured some sand into a jar and fished my candle back out of the garbage.

I’ve never liked tapers because they’re so tippy and drippy, but this holder is the solution! The sand keeps them stable no matter how thin or wide they are, and it catches all the wax drippings.

Now I’m sure this idea has been thought up before by someone, somewhere — but I’ve never seen it done.

And so now that I’ve found a good way to hold tapers, I’m going to use them a lot more because they seem to give off more light than pillars or tea lights — maybe because there’s less wax in the way.

And I do like the simple aesthetic of the sand and the jar and the warm glow of a candle…

*****

Classic Pumpkin Pie

***

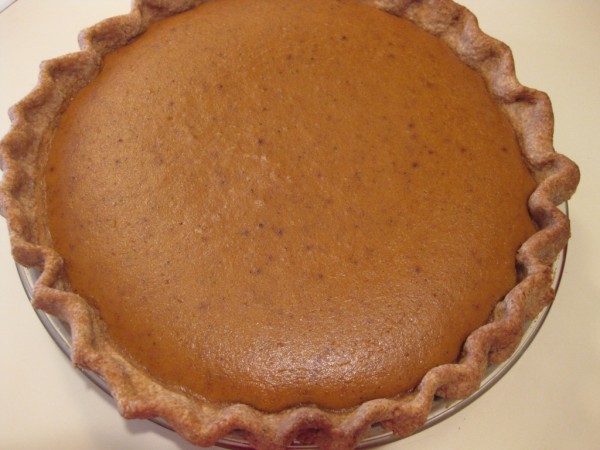
With an eye toward Thanksgiving this week, here’s my own recipe for classic pumpkin pie, along with my own crust recipe.

Neither recipe is the most decadent you’ll find out there because heavy, fatty things don’t agree with me. So if you’re wanting to make a pumpkin pie that’s on the lighter side, try this one. I make it every Thanksgiving. The crust is not really rich and flaky, and probably won’t wow any chefs out there, but it is humble and it does the job. I like it.

***

Lindsey’s Classic Pumpkin Pie

Rounded 2/3 cup of rapadura (or white or brown sugar)

1/2 tsp salt

1 tsp, heaping, of cinnamon

1/2 tsp, heaping, of powdered ginger

1 tsp allspice

1/4 tsp ground cloves

1/4 tsp nutmeg

2 eggs, beaten

3/4 cup whole milk

3/4 cup half-n-half (light cream)

1 15-oz can Libby’s pumpkin (or 2 cups cooked pumpkin or winter squash, pureed, and cooked down if too watery — the healthfood store brands of canned pumpkin are way too watery. I learned my lesson to use Libby’s!)

1 9-inch pie shell (recipe below)

***

Preheat oven to 425°.

Mix sugar, salt, and spices in a small bowl.

Beat the eggs in a large bowl, then stir in pumpkin, sugar-spice mix, and the milk and half-n-half. Mix until thoroughly combined, but don’t get overzealous (like, don’t do what I did once and overbeat with egg beaters — it beats too much air in, and makes a souffle-type thing!)

Pour into unbaked pie shell.

Bake at 425° for 15 minutes, and then reduce temperature to 350° and bake 40-50 more minutes until a knife inserted into the center of the pie comes out clean.

Cool on a wire rack for at least 2 hours.

♦♦♦♦♦

Lindsey’s Not-Too-Rich 9″ Pie Crust

2 cups flour (whole wheat, or white, or a combo)

1 Tbsp sugar

Scant 1/2 tsp salt

6 Tbsp cold butter, cut into pieces (salted or unsalted, either is fine)

Ice water (you’ll use about 3/4 cup)

***

In a medium bowl, combine flour, sugar, and salt. Cut in cold butter.
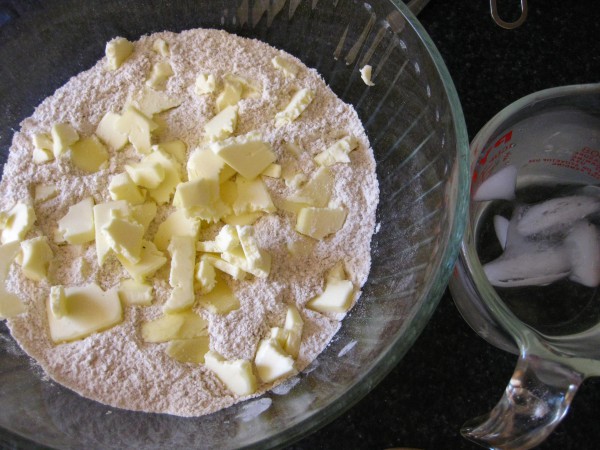
I like to use my fingers to rub in the butter and blend until the mixture resembles coarse crumbs.

Mix the ice water in, 1 Tbsp at a time, stirring lightly with a fork after each addition, until a dough is formed. (3/4 cup is about 12 Tbsp.) Try not to overwork the dough. Small bits of butter will be visible — this is what you want.
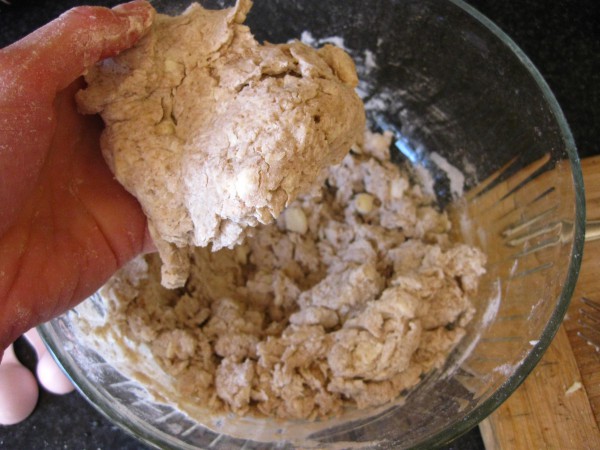
When a good, workable dough is formed — not too dry, not too sticky — wrap in cellophane and refrigerate until ready to use.

When ready to roll out, lightly flour your work surface and rolling pin.

Roll into a circle. Transferring to your pie plate is made easier by folding the dough in half and draping it over your rolling pin.

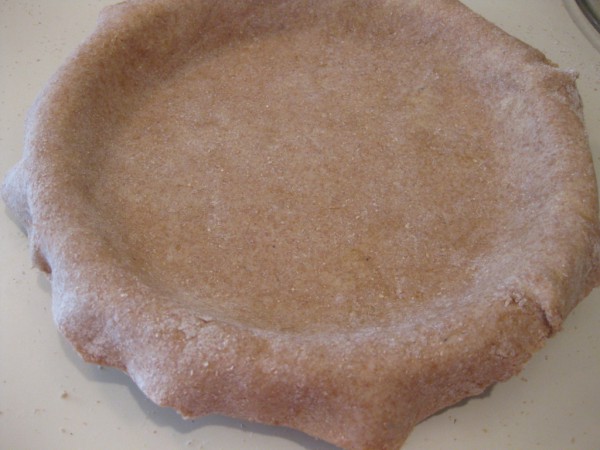
Trim off any excess dough, but leave enough extra around the edge to fold under and crimp with three fingers, as in the photo below.

If you do have a little extra dough, you could use a cookie cutter to cut out a little something-or-other (a maple leaf, for example) that you can bake and then place on top of your finished pie as decoration.

*****

« Older posts Newer posts »

© 2025 The Herbangardener

Theme by Anders NorenUp ↑