Kitchen / Garden / Sanctuary - Urban Homesteading to Nourish Body + Spirit

Tag: frugal (Page 5 of 12)

Minestrone Soup

Minestrone - a variation on the recipe below

This soup is delicious. I sometimes alter the recipe depending on what I have on hand, so feel free to play around.

The recipe makes a pretty large pot. Cut the amounts back if you like!!

Minestrone Soup

1/4 cup olive oil

1 large onion, chopped

1 large carrot, cut into 1/2″ dice

2 ribs celery, cut into 1/2″ slices

3 cloves garlic, finely chopped

2 small zucchini, cut into 1/2″ dice

1/2 lb potatoes, cut into 1/2″ dice

4 cups shredded green cabbage

4 – 6 cups chopped kale or swiss chard (1/4 – 1/2 lb)

28 oz canned chopped tomatoes with their juice (or feel free to use fresh tomatoes!)

2 to 3 tsp salt-free Italian herb seasoning

4 1/2 cups vegetable broth (but homemade grassfed beef bone broth is delicious too!)

1 1/2 cups cooked Great Northern beans (or 1 15-oz can, drained)

Salt/pepper to taste

***

*It helps to have everything chopped and ready before starting*

In a very large pot, heat the olive oil and add the onion. Cook, stirring, until softened.

Add carrots, celery, and garlic. Cook, stirring for 4 minutes.

Add the zucchini and potatoes. Cook, stirring, for another 4 minutes.

Add cabbage and kale (or chard) and cook till cabbage is wilted.

Add the tomatoes with their juice, the veggie broth, and the Italian seasoning.

Simmer, covered, for one hour.

In a blender or food processor, puree half the beans with some liquid from the soup. Stir the puree along with the remaining beans into the soup.

Simmer, uncovered, for 15 minutes. Salt + pepper to taste.

*****

Make Your Own Sushi

We love sushi at our house, though we don’t often go out for it. Actually though, I prefer to make my own — because then I know the source of the fish (which I think is important if you’re eating it raw). And of course it’s also much cheaper to make your own at home. It’s simple and fun, too!

Let’s begin!

To make one batch of sushi rolls, you’ll need the following. This can easily be multiplied. Today we’ll be making a Raw Salmon-Avocado Roll. But you can fill your sushi roll with anything! That’s part of the fun!

***

You’ll need:

1 sheet of toasted nori seaweed

1/4 cup raw sushi rice or short-grain rice + 1/3 cup water. (This will make enough rice to fill one sheet of nori. To fill about 4 sheets of nori, use 1 cup rice + 1 1/4 cups water.)

half an avocado

about 2 ounces of raw salmon from a company you trust (I always use Lars Larson Trophy Salmon — they’re a Colorado company selling wild, line-caught Alaskan salmon that they process and freeze right on their boat.)

soy sauce to serve with sushi (Nama Shoyu raw soy sauce is our hands-down favorite)

***

1. Cook your sushi rice. You do want to get the actual sushi rice/short-grain rice because you need that sticky texture for your sushi to turn out right. Combine the 1/4 cup rice with 1/3 cup water in a saucepan. Salt the water. Bring to a boil and cover the saucepan. Turn to a very low simmer and cook for 25 minutes. Don’t lift the lid at all during that time.

It’s best to cook the rice right before you plan to make the sushi. Fresh rice gives the best results.

2. While the rice is cooking, slice your avocado and salmon.

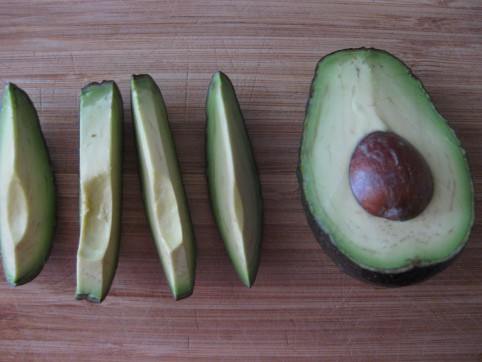
Halve the avocado, then cut into slices

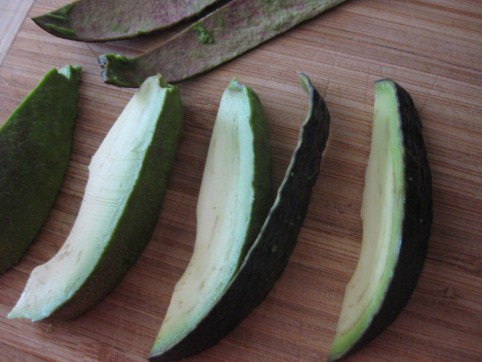
Peel the slices

I like to buy the pre-toasted Nori sheets

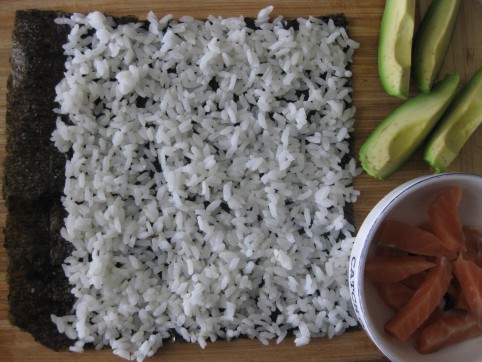
3. Let the rice cool a little and then spread it all out onto your sheet of nori, except for 1″ at the end.

4. Arrange your salmon and avocado down the middle.

5. Wet your fingers with water, and moisten the entire 1″ strip of nori that you didn’t cover with rice. This will be your glue and will hold your roll together.

6. Beginning at the opposite end (not the moistened strip), roll your sushi up. It’s effortless; you don’t need any fancy bamboo sushi rollers or plastic wrap or any other tool. Just your hands! (I threw away my sushi roller many years ago; I found that it just got in the way.)

7. Your roll will end up seam side down, and while you slice it, the gentle pressure will help glue the seam shut.

8. Slice the roll. To get nice clean slices without squashing the roll, work with a nice sharp knife. Wetting it first also helps, as does cleaning it off under running water after every couple of slices.

9. Arrange on a plate and eat it up!

*****

“Make” Your Own Brown Rice Chips or Crackers

Have you ever bought brown rice crackers? They’re surprisingly expensive, and often have unnecessary ingredients and are wastefully packaged.

So I’ve devised a very easy way to make my own. We love them! They’re nice and crunchy — great for dipping, or just eating plain.

1. Purchase a package of Food for Life Brown Rice Tortillas from your local health food store. (The above 12 oz. package of 6 large tortillas was $2 at my local store.)

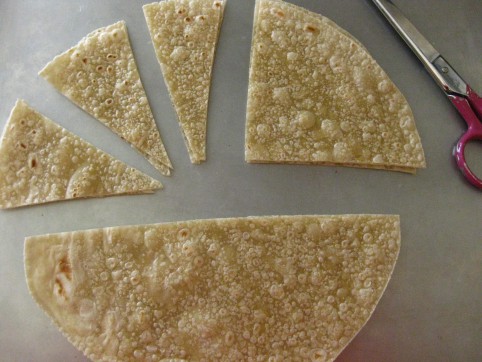
2. Cut the tortillas into triangular wedges or rectangular strips.

3. Arrange them on a cookie sheet.

4. They’re yummy just plain like this, but if you’d like to add salt (or any type of fun seasoning blend — Penzeys Spices is my favorite place to go crazy with seasonings!), just brush the top of each strip lightly with water and sprinkle with salt. (The salt will adhere surprisingly well after baking.)

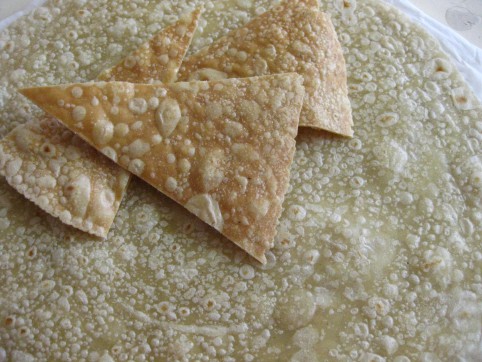
5. Bake at 275°F for 30-35 minutes until lightly golden and crispy-crunchy (and no longer leathery). You’ll probably need to add another 5-10 minutes to that bake time if you brushed them with water first.

6. Let them cool, and then store in an air-tight container (at room temperature is fine). Done!

***

Three perfectly baked brown rice chips, against a raw brown rice tortilla, so you can see the color difference.

*****

Decorating!

A couple weekends ago, my mom and I were admiring some beautiful wreaths and swags at the local garden center; they smelled so good, and were so Christmasy! There really is nothing like the real thing when it comes to greenery at Christmas… and really, there’s nothing like the real thing with just about anything in life, I’ve decided.

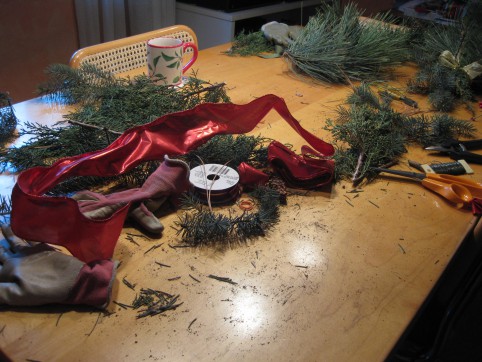
But instead of buying them, we wanted to make our own — and so yesterday we did. Across the street and through the snow we went, clippers and bags in hand, to the park across the way. We gave some of the trees a ‘light pruning’ while filling bags with fragrant boughs, then cleared off their dining room table, turned on some Christmas music, brewed tea, and got to work.

We learned quickly that gloves are a must for a project like this!

Our creations began to take shape, and we admired each other’s work, exclaiming how that wreath and those swags were even better than the ones we could’ve bought. And how they were totally local, totally fresh, and totally free. What satisfaction to make something so beautiful! They smell incredible, too — something I didn’t really expect from city pine trees. Like a mix of fresh Christmas trees and wood smoke.

Here’s the wreath my mom made for the front of their house. Isn’t it beautiful!! I love how she added pine cones and some bare lilac branches.

Here’s the swag I made for inside our apartment:

A miniature one for the bathroom:

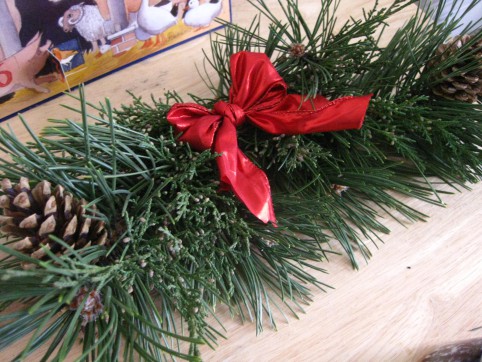
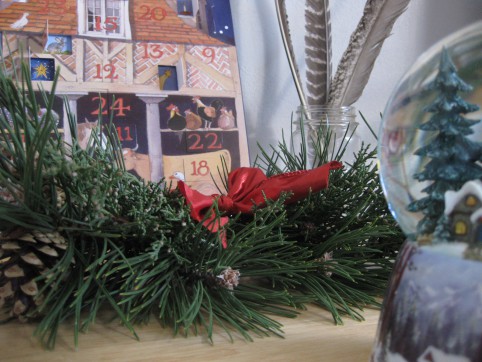
And a table centerpiece:

I love fresh winter greenery in the house!

*****

Nightcaps

Except in storybooks, you don’t really hear about nightcaps much, do you? But if you’re a cold sleeper like I am, they’re so helpful! I began wearing one to bed during the winter a couple years ago, and couldn’t believe the difference it made! So I wear one each night and stay a lot warmer now.

Do you ever wear a nightcap to bed on cold winter nights?

*****

« Older posts Newer posts »

© 2024 The Herbangardener

Theme by Anders NorenUp ↑