Did you see the moon last night at dusk? This year’s Frost Moon is on December 2nd, so there are a couple more nights to enjoy it. I just love seeing the black, leafless tree tops silhouetted against a rising moon in a dusky sky. It was a special treat last night on my bike ride home from work!
Tag: holiday (Page 10 of 10)
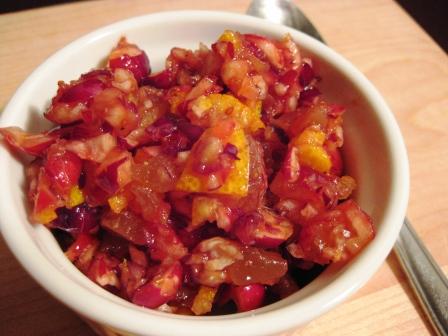
Sorry I don’t have a better picture of my very favorite Cranberry Relish! I make this all autumn long, while fresh cranberries are easily obtainable. For the Thanksgiving table, it’s a great thing to make a day (two days is even better!) ahead of time since the relish seems to mellow out as it sits for a while.
It’s a bright, zingy surprise on the palate, which is a nice contrast to the creamier, cooked tastes of most other traditional dishes on the table. I love it!
Update: Okay, here’s a better picture of it! 🙂
Cranberry Mandarin Ginger Relish
1 12-oz bag fresh, raw cranberries, washed and picked through
1 good-sized mandarin orange or tangerine, well-washed, seeded and cut into 1″ dice (rind and all)
1/4 cup sugar (I like rapadura or sucanat)
1/2 cup coarsely chopped crystallized ginger
1/4 cup orange marmalade
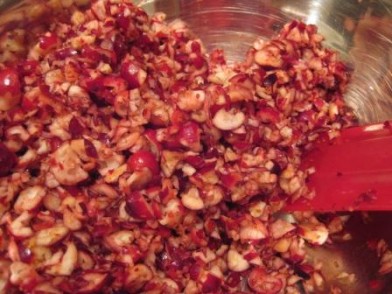
In a food processor, pulse the cranberries until they’re chopped (but not too fine!). Empty them into a bowl.
Next, put the mandarin chunks into the processor and pulse until the pieces of rind are about the same size as the cranberries. You don’t want a cranberry-orange paste…you want to be able to differentiate the ingredients with both your eyes and your palate.
Mix the mandarin with the cranberries, and then mix in the rest of the ingredients. This can be eaten right away, but I find that letting it sit a little while (a couple days in the fridge) allows the flavors to blend and mellow. I sometimes like to add toasted pecans to garnish the top right before serving.
Happy Thanksgiving!
Do you have any nice plans? The Hubby and I are going over to my parents’ house; we’re bringing a nice salad, the pumpkin pie, and the eggnog. I’m looking forward to a nice, low-key afternoon of good food and good company. A day off from work is okay too! 😉
When Kimi at The Nourishing Gourmet posted her recipe for Old Fashioned Caramel Corn (using only unrefined sweeteners), I made it that very night. I almost never eat caramel corn, but it just looked like it would hit the spot. And Oh. My. Goodness. it was good! Actually I kind of messed up the recipe and only measured out 1/2 a cup of popcorn instead of 3/4 cup. So my popcorn was much more caramel-coated, but I decided I liked it that way. (I mean, hubby and I ate almost the entire pot in one sitting, so I’d say it was okay!) It’s a real treat!
Here’s my variation on Kimi’s awesome recipe…decreasing the amount of popcorn, adding salt, and eliminating the “oven step.”
Caramel Corn
10 cups popcorn (about 1/2 a cup unpopped)
1/2 cup butter
1 cup rapadura sugar
1/4 cup honey
1/4 tsp sea salt
1/2 tsp baking soda
1 tsp vanilla
First, pop the popcorn. We don’t have either a popcorn maker or a microwave, so we pop ours the old fashioned way in a pot on the stove. It’s easy! Here’s how I do it:
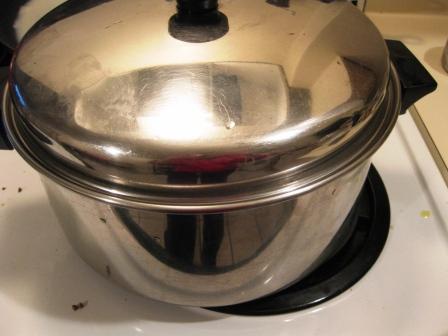
1. Get a large pot with a lid that fits. Pour enough oil (I use coconut oil, or sometimes olive oil) into the pot to thinly coat the bottom. Turn the burner onto Medium-high heat (keep at Medium if using olive oil). Put some popcorn into the pot, and put the lid on. I usually use about 1 Tbsp oil for every 1/4 cup un-popped corn.
2. Now, just start sliding the pot back and forth over the burner, holding the lid on with both hands. You’ll want to keep it moving almost constantly. Stay with it, and soon you’ll hear the popcorn start to pop. Just as with microwave popcorn, take the pot off the heat once you hear the popping slow down — you don’t want to burn it. Voila! Easy!
Now, to make the caramel corn:
Melt the butter in a saucepan, and add rapadura, honey, and salt. Simmer for 5 minutes, stirring frequently.
Put the popcorn into a large bowl or pot, with plenty of room to stir.
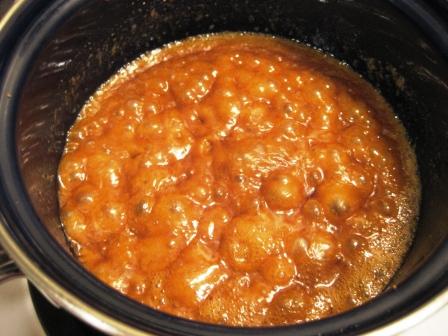
After simmering for 5 minutes, remove saucepan from heat and add the vanilla and baking soda. Stir until well mixed. The baking soda will make the mixture foam up, like this:
Once the mixture foams up, pour it over the popcorn without delay and begin stirring the popcorn right away until it’s all coated. That’s all! You may want to give it a few more stirs as it cools to break up any large chunks…but other than that, you’re done! This may just be the best caramel corn you’ve ever had. You can also bag it up once it cools, and give to friends…but good luck making it last that long. 🙂

While visiting the Blue Mountains in Australia a few years ago, I was introduced to the concept of Christmas in July. This “holiday” is more of just a marketing ploy (“Book your holiday brunch NOW!”), but it’s kind of neat because southern hemisphere dwellers can experience a northern-style Christmas with decorations, carols, snow, roaring fires, and eggnog. While I love all these things during the winter — and winter sounds pretty good during the oppressive scorch of mid-summer — I can’t seem get into the Christmas spirit in July. However, I have been able to choke down this eggnog ice cream — ya know, in honor of the season (*smirk*).
Click “Continue Reading” for the recipe…