*****
Tag: parsley (Page 1 of 3)
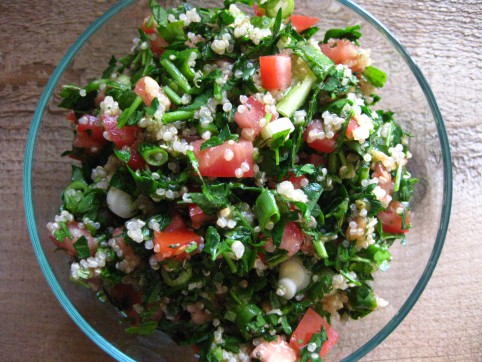
One of my all-time favorite foods, ever! This is my mom’s famous recipe.
***
And since my diet has gone essentially low fat vegetarian, which is presently all my body will handle, this stuff is my mainstay. I plow through an entire batch all by myself every 2 or 3 days! And since I can’t eat much oil at all, I change up the dressing to be only a small drizzle of oil, and tons of lemon juice, and I’ve grown to really love it this way!
Also, tabbouleh is normally made with bulghur. I always make it with quinoa now since I love the taste of it and it’s more nutritious and also a complete protein — but bulghur is of course delicious too!
***
Mom’s Tabbouleh
1/2 cup uncooked bulghur or quinoa*
1-2 cups chopped tomatoes — (2 cups = about 1 lb) (I always make it with 2 cups of tomatoes now, but if you do, you may need to increase the amounts of lemon juice and olive oil slightly)
2 cups finely chopped parsley — chop first and then measure (about 1 medium-large bunch parsley…but do measure it first)
1/2 cup chopped green onion or 1/3 cup finely chopped white onion
1 level Tbsp dried mint, crushed (or 2 Tbsp fresh mint, finely chopped)
1/4 – 1/3 cup fresh lemon juice
1/3 cup olive oil
Salt (about 1 to 1 1/2 tsp), or to taste
Pepper to taste
***
Cook the 1/2 cup bulghur or quinoa* (1/2 cup grain to 1 cup boiling water + dash of salt; cover, simmer till water’s absorbed, about 20 minutes). Cool it to room temperature. If I’m in a hurry, I’ll put the hot quinoa into the freezer to cool it quickly.
Mix everything together in a big bowl. But if you don’t think you’ll eat all of it within a day or two, mix the dressing separately, and add it to the tabbouleh right before you eat a helping of it. That way the tabbouleh will stay fresh several days longer in your fridge.
Enjoy!
*****
*Cooking quinoa:
Be sure to rinse the quinoa well to remove bitter saponin residue. The quick way to cook it is to boil your water (ratio of 1 cup grain to scant 2 cups water), add some salt, add quinoa and cover, simmering until the water is absorbed, about 20 minutes.
However, if you’re able to plan ahead enough, it’s much better, healthwise, to soak your quinoa for at least 12 hours to make it more digestible — the way traditional cultures do. Soaking grains neutralizes phytic acid (which binds to essential minerals like calcium, magnesium, iron, and zinc, and blocks their absorption) as well as enzyme inhibitors in the grain. Soaking also breaks down difficult-to-digest proteins and encourages the production of beneficial enzymes which in turn increases the vitamin (especially B vitamin) content of the grain.
So…
To soak quinoa: Thoroughly rinse 1/2 cup of dry quinoa to remove bitter saponin residue. Put 1 Tbsp of lemon juice or vinegar into a measuring cup and fill to the 1/2 cup mark with warm water, then mix with the quinoa in a bowl. Cover and let sit at room temperature for at least 12 hours, or up to 24. When you’re ready to cook, rinse and drain the quinoa well, and place in a saucepan. Add a scant 1/2 cup of water, and a little salt. Bring to a boil and simmer, covered, until all the water is absorbed, about 20 minutes. Cool, and proceed with the recipe.
*****
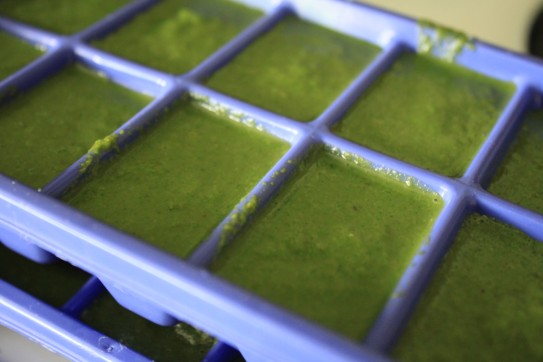
Green smoothie frozen concentrate made with lettuce, spinach, and lambsquarters.
So I peeked into my remaining three bags of lettuce from the garden this year, and discovered that they were starting to go south and needed to be used right away. I separated out the slimy leaves, washed the rest, and had an idea! I’ll make green smoothie frozen concentrate cubes!
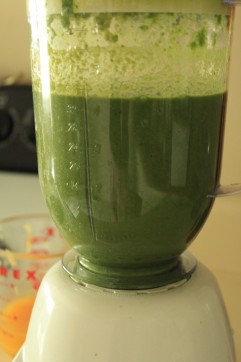
To make the concentrate:
1. Pour some kefir, water, juice, or watered-down yogurt into a blender. You won’t need too much — just enough to get everything to blend together smoothly.
2. Add lots of greens. Ideas are: lettuce, spinach, beet greens, chard, lambsquarters, purslane, mint, parsley, cilantro, edible flowers, etc. (Kale is the only one I don’t like in a shake, but if you do, go for it!)
3. Start the blender and let it run until you have a uniform slurry.
4. Pour into ice cube trays and freeze.
To use:
When you’re ready to make a green smoothie, thaw out some cubes; I usually use 2 cubes when I make a shake for myself. Add the green liquid to your blender containing the rest of your smoothie ingredients — I like to use fruit and kefir with some ground flax seed and vanilla extract. Blend & enjoy. Yum!!
*****
If you’re curious about green smoothies, you might check out the book Green for Life by Victoria Boutenko, or the related website. My friend Sasha recommended this book to me, and I loved it! While I don’t agree with absolutely everything in the book, I’m glad I read it.
*****
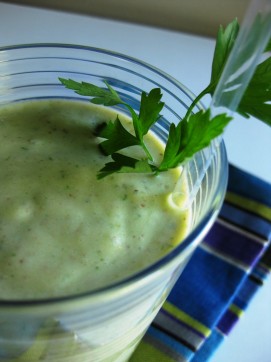
Mmmmm, these green smoothies are a lush-tasting way to sneak more veggies into your diet — and the time is now, since it’s spring and salad greens are in season!
There are so many variations to this concept — please be creative and dream up your own! — but here’s how I make mine:
Green Smoothie
kefir (or yogurt thinned with water)
banana pieces (pretty much essential for adding some sweetness)
apple pieces, or any other fruit
spinach leaves and/or lettuce leaves and/or cucumber slices (or two green smoothie frozen concentrate cubes!)
several fresh mint leaves or parsley sprigs
vanilla extract
ground flax seed
First, add kefir and your greens and mint leaves to the blender and blend thoroughly. Add everything else, blend thoroughly, and enjoy!
*****

I was inspired today by this post about raw vegetable juices over at Wooly Moss Roots. I’ve never been into juicing because separating the fiber from the juice just doesn’t seem natural, and it’s not the ideal way to consume vegetables according to what I’ve read. But then I’ve also read that as long as juicing is used in addition to your regular consumption of fruits and vegetables, it can actually be a very good way to boost your intake of vitamins and minerals. I can certainly see both sides of the story.
We actually have a juicer already (it came with my Hubby), so today I decided to go for it. I used some kitchen scraps that would’ve otherwise gotten tossed (cilantro and parsley stems, a mandarin orange with very tough membranes, and spent beet chunks from making beet kvass), as well as a carrot and some celery. It turned out pretty well! I was especially thrilled to be juicing the last drops of lacto-fermented, enzyme-rich goodness out of those beets! (I’ll share my beet kvass recipe soon. We love beet kvass in this household!)
Remembering that all those vitamins and minerals would probably need some fat in order to be absorbed properly, I added some grassfed whipping cream in a ratio of about 3 or 4 parts juice to 1 part cream.
OH YEA.
The cream was the key. Better nutrient absorption, better taste!
I even felt a sort of…uplift…after drinking this raw veggie juice. And I loved how it was such a clean, light way to start the day!
What’s your opinion about juicing? If you juice, what are your favorite veggie combos?
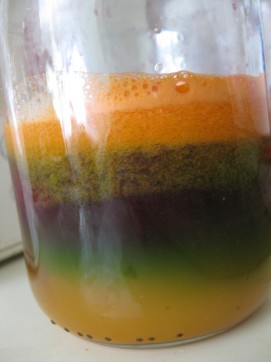
Pretty layers of juice!


