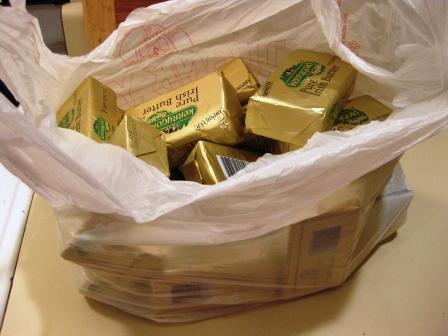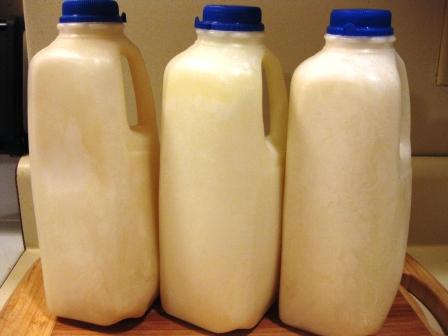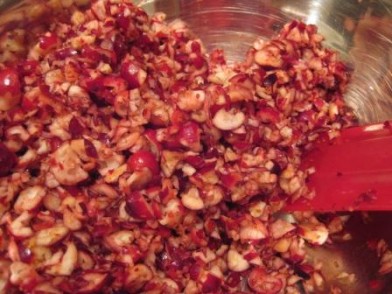
Ingredients for raw cat food, ready to be mixed.
Several months ago, as I dug deeper into researching nutrition and nourishing foods for myself and my family, I started getting suspicious about the bagged cat food we were feeding the family cat. Feeding her dried kibbles day after day seemed similar to feeding someone nothing but breakfast cereal (high-heat processed “meal-in-a-bag”), and I wondered how much nourishment our precious Liz was really getting.
As I began my research, I realized that the pet food industry has done a really great job of tricking us into thinking that all we need to do is buy bags of their “nutritionally complete” food and our pets will be set for life.
But as you might imagine, optimum nutrition cannot be obtained from something in a bag, no matter how good the brand may be. And although there are some good, responsible manufacturers out there, much of the pet food sold is made from very low-quality (read: “scary”) ingredients including animal parts that are left over from the meat packing industry, and sick animals that are not fit for human consumption. It’s garbage, really, that they are hawking to us…under the guise of “complete nutrition” for our precious animal companions. Just do a google search on “what’s really in pet food” to read all the gory details. (Or not! 🙂 )
Pets need real food, just as the rest of the family does. In the wild, the ancestors of today’s cats and dogs ate raw meat, gnawed on bones, and ingested the stomach contents of their prey (which rounded out their diet with small amounts of plant matter). Bagged/canned pet food is a new invention; elderly members of my family remember simply feeding their pets “scraps from whatever the family ate.” Many people out there (including myself) feel that processed pet foods cause disease in our pets, just as processed foods cause disease in humans.
And while some premium brands of pet food might list some wonderful, whole-food ingredients on the label, the fact is that the food has been highly processed with heat, which kills or denatures many of the beneficial components of each ingredient, such as enzymes, amino acids, beneficial bacteria, and heat-sensitive vitamins.
So after realizing that Liz probably wasn’t getting a whole lot of health-promoting benefits from her food, I began experimenting with raw, homemade cat food. Admittedly, I was a little reluctant to do the whole homemade pet food thing, and there were some rough patches of trial and error while I was getting the recipe just right so that Liz would be excited about eating it. Right now, half of her diet is homemade raw food, and half is kibbles-from-a-bag (we usually feed Katz-n-Flocken brand, purchased at the local health food store). Even with just half of her diet being the homemade food, we have seen definite improvements in her energy level (she is 9 years old, but has gotten that kitten energy and playfulness back), and her coat is also more lustrous. Now that I’ve finally gotten her “custom recipe” ironed out, I would like to ease her into eating a 100% homemade-food diet.
And yep, it’s more work, and if your cat only tolerates straight meat and doesn’t like the addition of grains or eggs (which are much cheaper than meat!), it will probably be a little more expensive than a good quality bagged food. However, I really do believe the benefits are worth it.
Here’s my cost breakdown for Liz’s raw-meat-only diet:
The supplements and vegetables add a small cost, of course, but in terms of the main ingredient (turkey) … 2lbs of turkey (mixed with 10-20% vegetables) makes about 43 rounded tablespoon-sized biscuits. Liz is a 10-lb cat, and if she were eating a 100% home made diet of turkey (and other meats & fish), she would eat about 3.5 – 4 biscuits a day. This means that the 43 biscuits would last about 10-14 days. I stock up when the natural, antibiotic-free turkey is on sale for $3/lb, but normally it is $6/lb. This means that it could cost anywhere between $3 and $6 a week to feed Liz a 100% raw turkey diet. At most, that would be less than a dollar a day! Of course, variation in meats is highly recommended, but this is just to give you an idea. And if your cat likes grains in their food, then you can certainly stretch your meat further and the meals would be less expensive. To me, though, this is actually not expensive — and besides, Liz is SO worth it! 🙂
If you’d like to read further, this is a good article to begin with: Trends in Home-Prepared Diets for Pets.
Of the books I read on this subject, these were my two favorites:
Dr. Pitcairn’s Complete Guide to Natural Health for Dogs & Cats, by Richard Pitcairn, DVM, PhD
Herbs for Pets, by Mary Wulff-Tilford & Gregory Tilford
This is also a very interesting book:
Pottenger’s Cats, by Francis M. Pottenger, M.D. (For a concise synopsis of the book, click here.)
Here are two other books that have information on feeding a homemade diet:
Cat Care, Naturally, by Celeste Yarnall
The New Natural Cat, by Anitra Frazier
Armed with information and ideas from the books mentioned above, I have finally developed a recipe that Liz really likes. Each cat is different and each one will have likes and dislikes. Liz doesn’t like grains or eggs added to her food. Her stomach, like mine, doesn’t do well with overly rich foods. She enjoys beef but barfs it up immediately, so she doesn’t get beef anymore. She tries to like lamb, but just can’t bring herself to eat it, so we pretty much feed her just raw turkey and chicken (frozen for at least 2 weeks to kill any nasties), as well as fresh and canned wild salmon. Of course, a variety of meat and fish is recommended, but if your cat is picky, do the best you can! Luckily if your cat won’t eat a particular meat concoction you’ve developed, you can enjoy it instead! (Thus my recipe for Italian-Style Lamb Meatloaf!)
One trick I’ve learned is that replacing about 1 teaspoon of the fat in the recipe with bacon grease is a great way to make the raw food more appealing, if your cat is having trouble loving it.
Also, if you decide to “go homemade” then that’s wonderful! But if you don’t, that’s okay too. If you decide not to go homemade, one thing you CAN do is give your kitty some healthful table scraps that s/he really enjoys: meat, fish, eggs, cream, cheese, fruits, and vegetables. (Liz loves corn and edamame, and can never have enough cantaloupe!) I think that our modern-day veterinarians have led us astray in telling us not to give table scraps to our animals. I think it’s a wonderful treat for them, and also much more nourishing to their bodies than kibbles or canned food. And it’s what household pets have lived on for hundreds of years!

Liz
Here’s my recipe:
Lindsey’s Basic Homemade Cat Food Recipe
1 lb ground turkey or chicken or a 15-oz can of salmon with juice. (You can feed the meat either raw or cooked, but raw is definitely the preferred choice. I buy organic or at least humanely-raised, no-antibiotic meat. It costs me about $5 to $6 a pound, but if it’s on sale, I stock up! I also freeze mine for at least 2 weeks to kill any bacteria.)
1 1/2 tsp KAL brand Bone Meal (comes from bones of New Zealand cattle)
1 tsp Healthy Powder *see end of post for Healthy Powder recipe
1 or 2 Tbsp fat (I use olive oil, coconut oil, butter, or a mix. Replacing about 1 teaspoon of fat with bacon grease will often make biscuits more appealing to your kitty!)
300-400 IU vitamin A, crushed to a fine powder
1/3 of the contents of a Taurine capsule (optional if feeding raw meat, but I usually add it anyway)
Contents of 1 vitamin E capsule
10%-20% vegetables (optional). I just eye the amount, compared to the amount of meat that’s in the bowl. For Liz, I use very finely shredded raw zucchini (frozen works too), or steamed & mashed winter squash or carrots, or cooked organic corn (since she loves corn). Vegetables aren’t actually necessary, if the cat won’t tolerate them. Unless your cat loves veggies, you’ll probably have to chop them very finely or puree them in order to sneak them in. Other vegetable ideas are potatoes, cauliflower, broccoli, peas, green beans, etc.
Fish Oil: No matter what kinds of meat I’m using, I also squeeze in a few capsules of good quality fish oil (Carlson’s brand is nice) or add about 1/4 – 1/2 teaspoon of Blue Ice Royal Fermented Cod Liver Oil/Butter Oil blend flavor-free gel (I definitely prefer & recommend Blue Ice brand Fermented Cod Liver Oil/Butter Oil blend. The Weston A. Price Foundation website has good information about that, here.)
I mix all this up (with my hands…it’s easier), and drop by tablespoon-sized scoops onto a cookie tray, and freeze. Once frozen, I transfer the “biscuits” into a freezer bag.
Each day, we take a couple biscuits out of the freezer and put them into a small tupperware container in the fridge. By the next morning, they’ve thawed and are ready to eat. We generally feed one biscuit in the morning, and one later in the day (although if we were feeding her 100% on the home made food, we’d likely feed 3.5 – 4 biscuits a day). At the morning feeding, we then transfer a couple more biscuits from the freezer to the fridge, so they’ll be ready for the next day.

Meat "biscuits" ready to be put into the freezer
My recipe above does not include grains or eggs because Liz doesn’t like those in her food. But your cat might! Below is one of the actual recipes from Dr. Pitcairn’s Complete Guide to Natural Health for Dogs & Cats:
Dr. Pitcairn’s Poultry Delight
1 cup dry millet (3 cups cooked) (cook in chicken broth for more flavor)
2 large eggs
2 lbs (4 cups) ground turkey or chicken (or lean chuck, lean heart, lean hamburger, liver, giblets, fish, or other lean meats)
1 Tbsp Healthy Powder *see below for Healthy Powder recipe
1 Tbsp Animal Essentials Calcium, or a rounded 1 ½ tsp of powdered eggshell, or 2 tsp KAL brand bone meal
4 Tbsp fat: butter, lard, olive oil, virgin coconut oil, or a combo
10,000 IU vitamin A
100-200 IU Vitamin E
1 tsp fresh vegetable with each meal (optional)
500 mg taurine (optional)
Bring 2 cups of water to a boil. Add the millet; cover, simmer 20-30 minutes or until the water is absorbed. You may need to add a little more water during cooking. When millet is soft, stir in the eggs to let them set a bit from the heat. Mix in the remaining ingredients. Yields about 8 cups. Each day, feed Small cats about 2/3 cup…Medium cats, 1 cup..Large cats, 1 2/3 cups.
*Dr. Pitcairn’s Healthy Powder
2 cups nutritional yeast
1 cup lecithin granules
1/4 cup kelp or alfalfa powder
1/4 cup KAL brand bone meal or 5 tsp eggshell powder
1,000 mg ground vitamin C
Mix together and store in the fridge or freezer.
One final word — if your cat doesn’t seem to like the homemade food, don’t despair. In Dr. Pitcairn’s book, there’s a great chapter (“Helping Your Pet Make the Switch”) about introducing homemade food and what to do if your pet turns up its nose!
I do hope you’re inspired, as I have been, to incorporate some nourishing foods into your pet’s diet — or if you already feed home cooked meals, please leave a comment and tell us more about that! I’d love to hear feedback from people who have made the switch!
*****


