Kitchen / Garden / Sanctuary - Urban Homesteading to Nourish Body + Spirit

Tag: recipes (Page 11 of 18)

Israeli Cucumber-Tomato Salad

I love eating this light, fresh Israeli staple dish almost every day now that the tomatoes, cucumbers, onions, and parsley are so abundant in the garden. In fact, preparing and eating this particular salad brings me so much joy because almost all of its ingredients come from our garden. I close my eyes and savor each bite, knowing I’m nourishing my body with the very freshest, purest food possible, and that feels so good! Our homegrown vegetables seem so alive and life-giving! I’m very grateful to have them.

Using quality ingredients in this salad will make it shine!…fresh, flavorful vegetables, good olive oil, freshly squeezed lemon juice, unrefined sea salt and freshly ground pepper.

The ingredient amounts below are approximate, and I never measure when making this salad. Adjust the recipe to your liking!

Israeli Cucumber-Tomato Salad

Makes 1 large salad or two small side salads

1 large tomato, chopped (roughly equal to the amount of cucumber used)

1/2 a cucumber, chopped (roughly equal to the amount of tomato used)

1/4 cup chopped fresh parsley (approximately!)

2-4 Tbsp green onion (or substitute a smaller amount of red or white onion), finely chopped

1-2 Tbsp freshly squeezed lemon juice (about half a lemon)

2 Tbsp olive oil

Sea salt / freshly ground pepper to taste

Combine the tomato, cucumber, parsley, and onion; the proportions are up to you, but the recipe gives a rough idea. Drizzle the olive oil and lemon juice over the salad just before serving; I love the zingy taste of lemon so I use equal parts lemon juice and olive oil, but it’s more common to use 1 part lemon juice to 2 parts olive oil.  Add salt & pepper to taste!

For packed lunches, I like to mix up the tomatoes, cucumbers, parsley, onion, and ground pepper the night before, and then pack the olive oil and lemon juice in a small glass jar, adding that — along with the salt — at the last minute.

I love mine plain, but you can also serve this with rustic crackers or toasted pita bread.

For a nice variation, add Feta cheese and Kalamata olives! Or, add some cooked quinoa for protein to make it more of a main dish.

Delicious Crustless Zucchini Pie

This is another favorite zucchini recipe of mine, and right now is the perfect time to make it, with fresh basil and massive amounts of zucchini coming out of the garden. It’s an easy one-dish wonder, and I love to eat it any time of day — leftovers are great for breakfast! I also like to freeze slices of the pie and pull them out in mid-winter for a nice treat.

Zucchini Pie

3 cups grated zucchini

1 small onion, chopped

1 cup whole wheat flour

1 cup grated provolone or mozzarella cheese

3 eggs, beaten

1/4 cup olive oil

1/4 cup grated parmesan cheese

2 Tbsp fresh basil, chopped (use more if you like!)

1 tsp baking powder

1 tsp salt

1/2 tsp black pepper

Preheat oven to 350 degrees. Toss everything into a large bowl and mix it up well! Pour into an oiled, 10″ round pie plate (or similar baking vessel, like an 8″x8″ pan). Bake 45 to 50 minutes or until golden brown and a butter knife inserted into the middle comes out clean. Cool 10-15 minutes before slicing.

So easy! Enjoy!

Nourishing Mixed-Herb Pesto

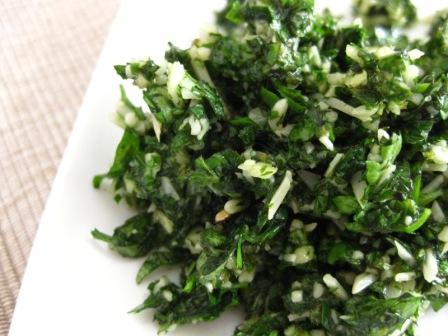
Oregano, parsley, & cilantro pesto

Pesto is such a versatile condiment — it’s wonderful over fish or chicken, on crackers, tossed with pasta, spread over eggs or sauteed zucchini, in a roasted vegetable sandwich, used as a pizza sauce, or straight off the spoon. And although basil pesto is the most common type, pesto can be made with any combination of herbs. In fact, I think I like mixed-herb pesto even better than basil-only — it has more layers of flavor! And don’t forget that herbs are mineral rich and packed with nutrition, and can definitely be thought of as a medicinal food.

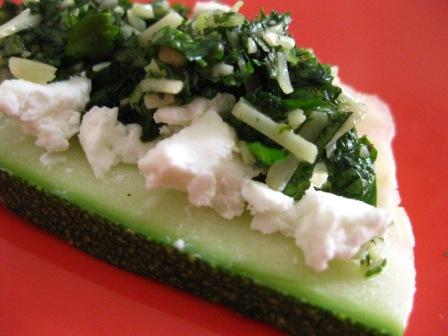
Make a healthy snack with goat cheese and mixed-herb pesto on a raw zucchini slice "cracker"

Use any combination of fresh herbs that you want; pesto is a great way to use up heaps of herbs at once, such as the cilantro sitting in the back of your fridge and the overabundance of oregano in your garden. It’s also a nice way to preserve those herbs for use later in the year; use ice cube trays to freeze pesto into small portions and thaw as needed over the winter.

One nice combination is oregano, parsley, and cilantro — this is probably my favorite. Use equal parts…or not! Just combine according to the amounts you have. I do suggest, however, that you go easy on the fresh sage if you choose to use it; it lends an overpowering (and not all that tasty) element. Also, mint is nice as an added “splash” but go easy on that too, since it can also overpower.

My basic pesto recipe is as follows, though you’ll probably find you don’t even need a recipe. Just gather a bunch of herbs, add a clove or two of garlic (start with less garlic and add more later if needed), add nuts, cheese, and salt, and then olive oil to form a paste.

Basic Herb Pesto

1 cup fresh herbs, packed

2 garlic cloves, small-medium size

3 Tbsp olive oil, approx.

3 Tbsp shredded parmesan cheese, approx.

1-2 Tbsp pine nuts or walnuts, approx. (optional)

Salt to taste

Put everything into the food processor and blend until a paste is formed.

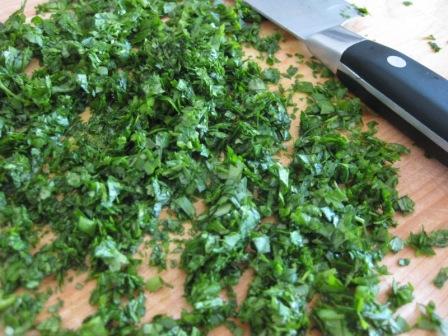
Instead of using the food processor, though, I like to make mine the old fashioned way using a knife and cutting board. If you use a nice sharp chopping knife, the task goes faster and is more fun than the food processor (at least for me — I get angry at my food processor when making pesto!). The key is definitely the sharp knife. Chop your herbs, garlic, and nuts as finely as possible, add the parmesan (chop it up too, if you like), and then add olive oil until a loose paste is formed. You can replace a little of the olive oil with water if you want. Add salt to taste. The texture will be more rustic than paste-like, but that’s not a bad thing. 😉

Making pesto without a food processor

Delicious Chocolate-Orange Macaroons

Well it’s obviously been far too long since I’ve posted a recipe from one of my favorite food groups. So here!

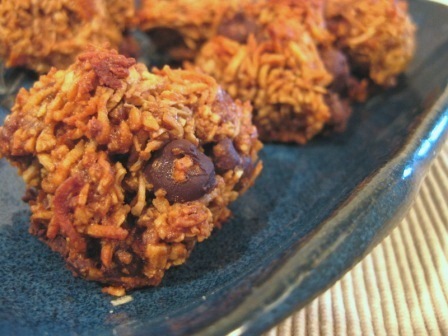
You should definitely try out these macaroons sometime — they’re delicious! I made mine with granulated coconut sugar, which darkens the color of the macaroons as you can see in the picture above. They’re also gluten free if you make them with arrowroot powder instead of whole wheat flour. In fact, I prefer them with arrowroot because of the crunchy-edge-soft-center texture that results!

Chocolate-Orange Macaroons

2 cups unsweetened dried coconut, shredded

2/3 cup sugar (granulated coconut sugar or sucanat are health-minded choices…but use white sugar if it’s important that they be white, like typical macaroons)

1/4 cup arrowroot powder* OR whole wheat flour

1 Tbsp fresh orange zest

1/8 teaspoon salt

1/4 tsp almond extract

2 egg whites, unbeaten (I like to freeze egg whites for times like this)

2 tablespoons coconut oil or unsalted butter, melted

1/4 cup chocolate chips

Preheat oven to 350 degrees F.

In a large bowl, mix the coconut, sugar, flour, orange zest, and salt. Stir the almond extract into the egg whites. Then mix the egg whites and coconut oil into the dry coconut mixture. Stir well. Now, mix in the chocolate chips.

Either generously oil your cookie sheet, or line it with parchment paper (the macaroons will be easier to remove from parchment). Form tablespoons of dough into balls and place onto the cookie sheet; they won’t really expand, so you can place them pretty close together. Bake about 10 minutes or until they’re firm to the touch and lightly browned on the bottom.

Cool before serving, and enjoy!

**********

*Curious about arrowroot? It’s actually not a refined product despite the look of it. It’s the dried, powdered root of a tropical plant that only grows in tidal flats where sea minerals are available. It’s therefore rich in trace minerals and in calcium ash (calcium chloride), which makes it very easily digestible. In addition, the calcium ash in arrowroot is very important for maintaining the proper acid-alkali balances in the human body. Its downside is the price — it’s $5.35 for a 1lb 4oz bag at our local health food store.

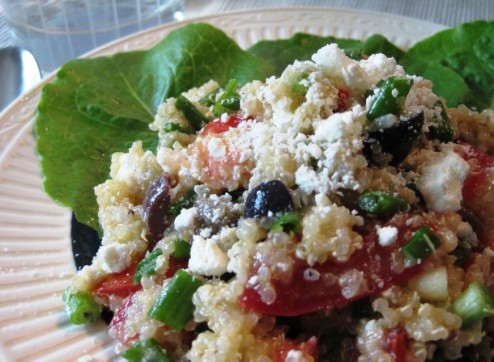
Quinoa Salad, Greek Style

This is a recipe that my best friend Sonja gave me a long time ago; it was one of our very favorite things to eat. I love it! It’s a light, refreshing dinner choice which is great for this time of the year because it doesn’t require use of the oven. Heck, you could even cook the quinoa in your solar oven (you have built one, right? ;-)) and you wouldn’t even need the stove, either! It would also be a great meal to take on a picnic.

Quinoa Salad, Greek Style

1 cup uncooked quinoa

2 tomatoes, chopped

1 cucumber, diced

3/4 cup chopped green onions

Scant 1/2 cup olive oil

6 Tbsp freshly-squeezed lemon juice

6 ounces feta cheese, crumbled

Black or Kalamata olives, chopped (as many as you like…I usually use between 1/2 and 1 cup)

Lettuce, torn into pieces (use as much as you like, though not too much — it’s not meant to be the main ingredient)

Salt + Pepper to taste

Cook the quinoa* and cool it to room temperature. If I’m in a hurry, I’ll put my hot quinoa into the freezer to cool it quickly.

Then, gently stir everything else — except the lettuce — into the quinoa. I leave the lettuce out until I’m ready to serve the salad, and then I stir it in. That way, I can store the leftovers for a day or two and not have to worry about wilted, soggy lettuce. You could also leave the lettuce out altogether, and just serve the salad on a bed of lettuce leaves, as in the picture above.

This salad is best served on the day you make it. Enjoy!

***

*Cooking quinoa:

Be sure to rinse the quinoa well to remove bitter saponin residue. The quick way to cook it is to boil your water (ratio of 1 cup grain to scant 2 cups water), add some salt, add quinoa and cover, simmering until the water is absorbed, about 20 minutes.

However, if you’re able to plan ahead enough, it’s much better, healthwise, to soak your quinoa for at least 12 hours to make it more digestible — the way traditional cultures do. Soaking grains neutralizes phytic acid (which binds to essential minerals like calcium, magnesium, iron, and zinc, and blocks their absorption) as well as enzyme inhibitors in the grain. Soaking also breaks down difficult-to-digest proteins and encourages the production of beneficial enzymes which in turn increases the vitamin (especially B vitamin) content of the grain.

So…

To soak quinoa: Thoroughly rinse 1 cup of dry quinoa to remove bitter saponin residue. Put 2 Tbsp of lemon juice or vinegar into a measuring cup and fill to the 1 cup mark with warm water, then mix with the quinoa in a bowl. Cover and let sit at room temperature for at least 12 hours, or up to 24. When you’re ready to cook, rinse and drain the quinoa well. Place in a saucepan. Add a scant 1 cup of water, and a little salt. Bring to a boil and simmer, covered, until all the water is absorbed, about 20 minutes. Cool, and proceed with the recipe.

*****

« Older posts Newer posts »

© 2025 The Herbangardener

Theme by Anders NorenUp ↑