Kitchen / Garden / Sanctuary - Urban Homesteading to Nourish Body + Spirit

Tag: recipes (Page 16 of 18)

Halloween Treat: Caramel Corn

'Better For You' Caramel Corn

'Better For You' Caramel Corn

When Kimi at The Nourishing Gourmet posted her recipe for Old Fashioned Caramel Corn (using only unrefined sweeteners), I made it that very night. I almost never eat caramel corn, but it just looked like it would hit the spot. And Oh. My. Goodness. it was good! Actually I kind of messed up the recipe and only measured out 1/2 a cup of popcorn instead of 3/4 cup. So my popcorn was much more caramel-coated, but I decided I liked it that way. (I mean, hubby and I ate almost the entire pot in one sitting, so I’d say it was okay!) It’s a real treat!

Here’s my variation on Kimi’s awesome recipe…decreasing the amount of popcorn, adding salt, and eliminating the “oven step.”

Caramel Corn

10 cups popcorn (about 1/2 a cup unpopped)

1/2 cup butter

1 cup rapadura sugar

1/4 cup honey

1/4 tsp sea salt

1/2 tsp baking soda

1 tsp vanilla

First, pop the popcorn. We don’t have either a popcorn maker or a microwave, so we pop ours the old fashioned way in a pot on the stove. It’s easy! Here’s how I do it:

1. Get a large pot with a lid that fits. Pour enough oil (I use coconut oil, or sometimes olive oil) into the pot to thinly coat the bottom. Turn the burner onto Medium-high heat (keep at Medium if using olive oil). Put some popcorn into the pot, and put the lid on. I usually use about 1 Tbsp oil for every 1/4 cup un-popped corn.

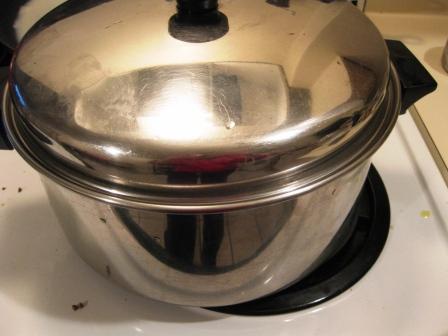
making popcorn without a popcorn maker

making popcorn without a popcorn maker

2. Now, just start sliding the pot back and forth over the burner, holding the lid on with both hands. You’ll want to keep it moving almost constantly. Stay with it, and soon you’ll hear the popcorn start to pop. Just as with microwave popcorn, take the pot off the heat once you hear the popping slow down — you don’t want to burn it. Voila! Easy!

Now, to make the caramel corn:

Melt the butter in a saucepan, and add rapadura, honey, and salt. Simmer for 5 minutes, stirring frequently.
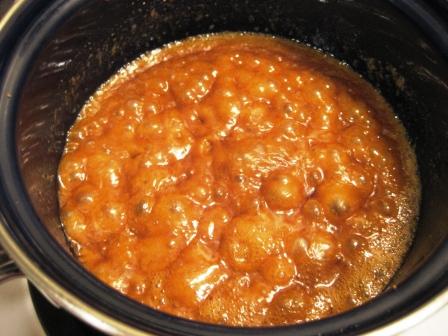
caramel corn

Put the popcorn into a large bowl or pot, with plenty of room to stir.

After simmering for 5 minutes, remove saucepan from heat and add the vanilla and baking soda. Stir until well mixed. The baking soda will make the mixture foam up, like this:

better-for-you caramel corn

Once the mixture foams up, pour it over the popcorn without delay and begin stirring the popcorn right away until it’s all coated. That’s all! You may want to give it a few more stirs as it cools to break up any large chunks…but other than that, you’re done! This may just be the best caramel corn you’ve ever had. You can also bag it up once it cools, and give to friends…but good luck making it last that long. 🙂
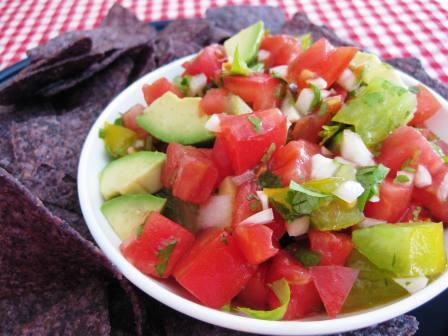
Salsa Fresca: Fresh Salsa with Avocado

Pico de Gallo: Fresh Salsa with Avocado

This recipe is one of our favorite summertime treats, and with all the tomatoes, onions, and jalapenos we harvested, we’re still enjoying it into the fall. If the garden has been good to us, we don’t have to buy anything except the avocados and chips!

Ingredient amounts are pretty flexible — and everyone likes their salsa different, so use this as a guide and let your own preferences take charge!

Salsa Fresca with Avocado

3-4 cups chopped fresh tomatoes

1/2 cup onion, finely diced

1-2 jalapenos, minced

2-3 cloves garlic, minced

1/4 cup chopped cilantro (measured after chopping)

2 Tbsp lime juice

Salt to taste – start with about 1 tsp and go from there

2 avocados, diced (1 avocado is fine, too – or none! Though 2 avocados lend a wonderful richness.)

Gently mix together all ingredients. Taste and adjust ingredient amounts. Ideally, the salsa should sit for at least 30 minutes to allow the flavors to blend, but ours is usually gone by then. 🙂 Serve with tortilla chips.

Warm Cookies for a Chilly Autumn Afternoon

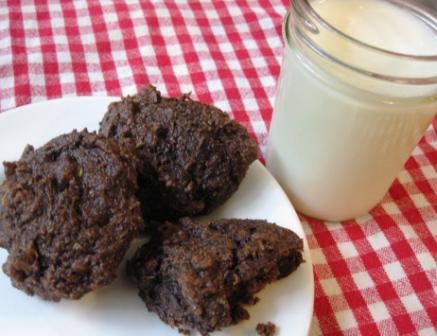
Chocolate Zucchini Cookies

It sure has been cold here lately. We’ve had temperatures down into the teens, with our first snow storm a few days ago. This is highly unusual, and most of the leaves haven’t had a chance to turn colors yet, and are now hanging limply from their branches, frozen! Kinda sad!

It’s the perfect time, therefore, to bake some Chocolate Zucchini Cookies and have a glass of milk.

(Click below to continue reading…)

Continue reading

Philosophy Friday: Recipe Paralysis

Philosophy Friday: Recipe Paralysis

Geez, where has the week gone? Friday already! I hope you’ve had a nice week!

I opened the fridge today and noticed that one of my yellow zucchinis had just hours of life left, and needed to be used then and there. I thought about the dozens and dozens of zucchini recipes I’ve collected over the years. I thought about opening my overflowing recipe binder and looking through all those recipes…assessing each one, deciding if it sounds appealing…determining if I have all the ingredients…etc.

I can easily spend an hour looking through multiple recipe books, comparing ingredients and methods, trying to decide what I should do with the food in my fridge. Does this sound familiar to you? Maybe it’s only me. Sometimes, I get totally paralyzed by my recipes.

(Click below to continue reading…)

Continue reading

Philosophy Friday: I Just Ate Cake for Dinner

Lindsey's Zucchini Cake with Spiced Frosting

Dinner: Lindsey's Zucchini Cake with Spiced Frosting

Well, I was trying to ‘get it together’ all week and post something, but it just didn’t happen. Not that I really did anything this week, because I didn’t. My visions of recovering from my surgery included getting a whole bunch of reading done, writing lots of posts for my blog here, writing letters, organizing my photos on the computer, and re-doing my recipe binder. And I have done precisely none of that! (Click below to continue reading…)

Continue reading

« Older posts Newer posts »

© 2024 The Herbangardener

Theme by Anders NorenUp ↑