Kitchen / Garden / Sanctuary - Urban Homesteading to Nourish Body + Spirit

Tag: recipes (Page 4 of 18)

Minestrone Soup

Minestrone - a variation on the recipe below

This soup is delicious. I sometimes alter the recipe depending on what I have on hand, so feel free to play around.

The recipe makes a pretty large pot. Cut the amounts back if you like!!

Minestrone Soup

1/4 cup olive oil

1 large onion, chopped

1 large carrot, cut into 1/2″ dice

2 ribs celery, cut into 1/2″ slices

3 cloves garlic, finely chopped

2 small zucchini, cut into 1/2″ dice

1/2 lb potatoes, cut into 1/2″ dice

4 cups shredded green cabbage

4 – 6 cups chopped kale or swiss chard (1/4 – 1/2 lb)

28 oz canned chopped tomatoes with their juice (or feel free to use fresh tomatoes!)

2 to 3 tsp salt-free Italian herb seasoning

4 1/2 cups vegetable broth (but homemade grassfed beef bone broth is delicious too!)

1 1/2 cups cooked Great Northern beans (or 1 15-oz can, drained)

Salt/pepper to taste

***

*It helps to have everything chopped and ready before starting*

In a very large pot, heat the olive oil and add the onion. Cook, stirring, until softened.

Add carrots, celery, and garlic. Cook, stirring for 4 minutes.

Add the zucchini and potatoes. Cook, stirring, for another 4 minutes.

Add cabbage and kale (or chard) and cook till cabbage is wilted.

Add the tomatoes with their juice, the veggie broth, and the Italian seasoning.

Simmer, covered, for one hour.

In a blender or food processor, puree half the beans with some liquid from the soup. Stir the puree along with the remaining beans into the soup.

Simmer, uncovered, for 15 minutes. Salt + pepper to taste.

*****

Classic Gingerbread

Here’s a recipe that I love. It’s for gingerbread, which is so warming and comforting when it’s chilly and gray outside. Serve it with tea or coffee, and a dollop of freshly whipped cream if you like, or just a simple powdered sugar heart, for Valentine’s Day — or any day!

The secret ingredient is dark, stout beer; don’t leave it out! Just as wine gives depth to sauces, the caramel-like flavor of dark beer adds the depth needed to make this cake really awesome!

Classic Gingerbread

3/4 cup dark, stout beer (such as Guinness or something fairly similar)

1/2 tsp baking soda

2/3 cup molasses

3/4 cup sucanat or brown sugar, slightly rounded

1 1/2 cups whole wheat flour, plus extra to dust pan

2 1/2 Tbsp dried ground ginger (yes, tablespoons!)

1/2 tsp baking powder

1/2 tsp salt

1/4 tsp cinnamon

1/4 tsp finely ground pepper

2 eggs

1/3 cup coconut oil, melted

***

Preheat oven to 350°. Grease and flour an 8″x12″ pan (or an 8″x8″ if you like).

In a medium saucepan, bring the stout beer to a boil, and simmer for several minutes to allow the alcohol to dissipate. Do be present in the room while the beer is on the heat, since it can (will!) rise and spill over the sides of the pan very quickly! Remove beer from the heat and stir in the baking soda. When the foaming subsides, stir in the molasses and sucanat/brown sugar, and stir till dissolved. It will likely still be quite foamy; that’s OK.

In a separate bowl, mix together all of your dry ingredients.

Pour the beer mixture into a large bowl and whisk in the eggs and oil.

Then whisk the dry ingredients into the beer in three parts — after each addition, stirring vigorously until batter is totally smooth.

Pour the batter into your pan and tap against the counter a few times to dislodge any large air bubbles.

Bake on the center rack until a toothpick stuck into the center comes out clean, about 35 minutes (slightly longer if you use an 8″x8″ pan).

Cool the cake, slice, decorate, and enjoy!

*****

Cranberry-Pumpkin Muffins

I had a recipe request for these muffins after their photo appeared in a post a few days ago. When I made them I was going off two separate recipes, but I do remember what I did, so I wrote it out and am posting it here. Normally my rule is to make a recipe at least twice before posting it here, but I’m throwing caution to the wind today. It’s a pretty basic muffin recipe and hopefully there’s not much that could go wrong! Let me know how you go with it!

Also, the above photo shows these muffins with homemade cranberry sauce on the tops, which is not in the recipe. (With the sauce, they were maybe a little too cranberry — but feel free to add it!)

Cranberry-Pumpkin Muffins

Makes 12 muffins

1 1/2 cups whole wheat flour

3/4 cup sugar (I like rapadura)

1/2 tsp baking powder

1/2 tsp baking soda

1/4 tsp salt

1 tsp ground ginger

1/2 tsp cinnamon

1/4 – 1/2 tsp allspice

1 cup pumpkin puree

2 eggs

1/4 cup butter or coconut oil, melted

1 cup whole cranberries (fresh or frozen)

***

Preheat oven to 350°.

Mix all the dry ingredients together in a bowl.

Mix all the wet ingredients together in another bowl, except for the cranberries. (If you’re using coconut oil it helps to have the rest of the wet stuff at room temperature so that the melted coconut oil won’t solidify when it comes into contact with the other stuff.)

Combine dry and wet, taking care not to over-mix. Then when they’re incorporated, mix in the cranberries.

Fill muffin cups nearly all the way to the top.

Bake for about 20-30 minutes OR until a toothpick stuck into the center of a muffin comes out clean.

*****

Make Your Own Sushi

We love sushi at our house, though we don’t often go out for it. Actually though, I prefer to make my own — because then I know the source of the fish (which I think is important if you’re eating it raw). And of course it’s also much cheaper to make your own at home. It’s simple and fun, too!

Let’s begin!

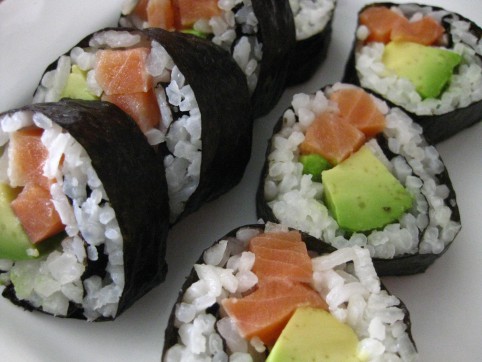
To make one batch of sushi rolls, you’ll need the following. This can easily be multiplied. Today we’ll be making a Raw Salmon-Avocado Roll. But you can fill your sushi roll with anything! That’s part of the fun!

***

You’ll need:

1 sheet of toasted nori seaweed

1/4 cup raw sushi rice or short-grain rice + 1/3 cup water. (This will make enough rice to fill one sheet of nori. To fill about 4 sheets of nori, use 1 cup rice + 1 1/4 cups water.)

half an avocado

about 2 ounces of raw salmon from a company you trust (I always use Lars Larson Trophy Salmon — they’re a Colorado company selling wild, line-caught Alaskan salmon that they process and freeze right on their boat.)

soy sauce to serve with sushi (Nama Shoyu raw soy sauce is our hands-down favorite)

***

1. Cook your sushi rice. You do want to get the actual sushi rice/short-grain rice because you need that sticky texture for your sushi to turn out right. Combine the 1/4 cup rice with 1/3 cup water in a saucepan. Salt the water. Bring to a boil and cover the saucepan. Turn to a very low simmer and cook for 25 minutes. Don’t lift the lid at all during that time.

It’s best to cook the rice right before you plan to make the sushi. Fresh rice gives the best results.

2. While the rice is cooking, slice your avocado and salmon.

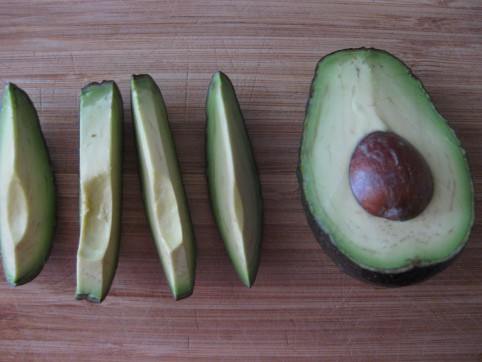
Halve the avocado, then cut into slices

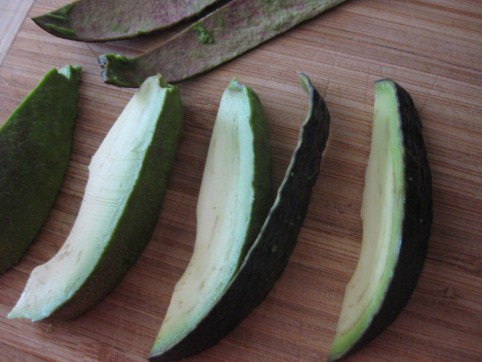
Peel the slices

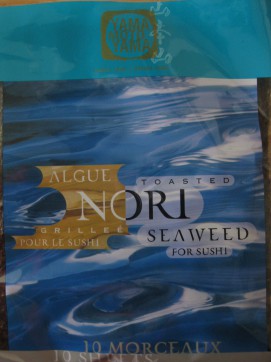
I like to buy the pre-toasted Nori sheets

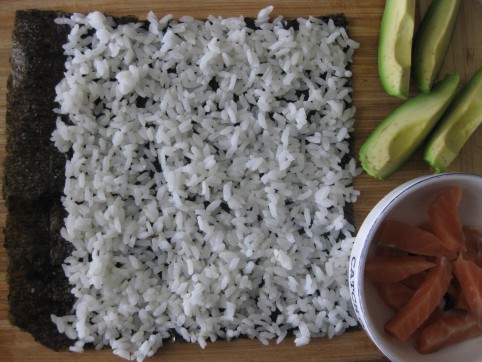
3. Let the rice cool a little and then spread it all out onto your sheet of nori, except for 1″ at the end.

4. Arrange your salmon and avocado down the middle.

5. Wet your fingers with water, and moisten the entire 1″ strip of nori that you didn’t cover with rice. This will be your glue and will hold your roll together.

6. Beginning at the opposite end (not the moistened strip), roll your sushi up. It’s effortless; you don’t need any fancy bamboo sushi rollers or plastic wrap or any other tool. Just your hands! (I threw away my sushi roller many years ago; I found that it just got in the way.)

7. Your roll will end up seam side down, and while you slice it, the gentle pressure will help glue the seam shut.

8. Slice the roll. To get nice clean slices without squashing the roll, work with a nice sharp knife. Wetting it first also helps, as does cleaning it off under running water after every couple of slices.

9. Arrange on a plate and eat it up!

*****

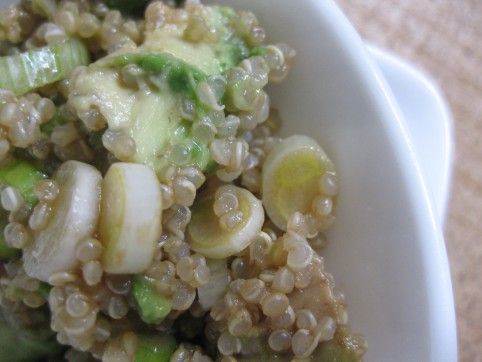
Avocado-Quinoa-Scallion Salad!

I have to share with you this totally awesome little salad I made up the other day! So good!!! Everything is to taste; I use roughly equal quantities of quinoa and avocado (though a little heavier on the quinoa). And we use Nama Shoyu because in our opinion it’s so much better tasting than any other soy sauce or tamari out there!

***

cooked quinoa

chopped avocado

sliced scallions

Nama Shoyu raw soy sauce

red wine vinegar

***

« Older posts Newer posts »

© 2024 The Herbangardener

Theme by Anders NorenUp ↑