Kitchen / Garden / Sanctuary - Urban Homesteading to Nourish Body + Spirit

Tag: recipes (Page 7 of 18)

Chicken-Foot Bone Broth


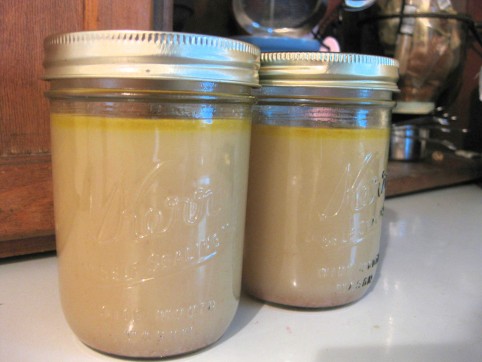
Chicken feet! In this post, I mentioned that I’d found pastured chicken feet at the farmer’s market, and how excited I was about that! (I bought them from the good folks at Cottonwood Creek Farms — their pastured chickens are awesome…if you’re in Colorado, definitely support these local farmers!) I made chicken-foot bone broth from them, and WOW. It’s incredible stuff. I was amazed at the amount of gelatin that ended up in the stock…three or four times the gelatinousness of Jello! A delicious, rich broth…rich without being fatty.

Calcium-rich bone broth (stock) is a staple in my kitchen; I make sure it’s always in my freezer. It adds so much nutrition to a dish, and the taste is incredible. It’s the cook’s secret weapon! Lentils made with homemade bone broth instead of water is an entirely different experience (and one of my all-time favorites!). I like to simmer down my bone broth till it’s really concentrated and delicious; it’s both easier to store — taking up less space in the freezer — and adds a deeper flavor to whatever I use it in. I could dilute the concentrate once I thaw it out, but usually I just use it straight.

And so, Why bone broth? Well I will tell you. Well actually I’ll let Sally Fallon tell you. She’s the author of one of my favorite cookbooks that I sometimes mention here, Nourishing Traditions.

“Meat and fish stocks are used almost universally in traditional cuisines — French, Italian, Chinese, Japanese, African, South American, Middle Eastern and Russian; but the use of homemade meat broths to produce nourishing and flavorful soups and sauces has almost completely disappeared from the American culinary tradition.

Properly prepared meat stocks are extremely nutritious, containing the minerals of bone, cartilage, marrow, and vegetables as electrolytes, a form that is easy to assimilate. Acidic wine or vinegar added during cooking helps to draw minerals, particularly calcium, magnesium and potassium, into the broth.

It was Dr. Pottenger who pointed out that stock is also of great value because it supplies hydrophilic colloids to the diet. Raw food compounds are colloidal and tend to be hydrophilic, meaning they attract liquids. Thus, when we eat a salad or some other raw food, the hydrophilic colloids attract digestive juices for rapid and effective digestion. Colloids that have been heated are generally hydrophobic — they repel liquids, making cooked foods harder to digest. However, the proteinaceous gelatin in meat broths has the unusual property of attracting liquids — it’s hydrophilic — even after it has been heated. The same property by which gelatin attracts water to form desserts, like Jello, allows it to attract digestive juices to the surface of cooked food particles.”

*****

 *****

Below is the Chicken Stock recipe straight from Nourishing Traditions. Nowadays I stray from the recipe — no longer bothering to weigh or measure — and often leave the veggies out to achieve a truer chicken flavor. Sometimes I’ll add the veggies too, but never the carrots since I dislike the sweetness they impart.

Anyway, I simply dump some bones (usually chicken backs, feet, or the carcass from a whole chicken) into my crock pot, fill with cold water according to how many bones I have (this is all very unscientific — you’ll get a feel for it quickly). I tend to add less water than is called for in the original recipe because I like a very concentrated stock with lots of flavor. To the water, add a tablespoon or two of vinegar. Turn on your crock pot and let it simmer away for about 24 hours. I’ve also done this on the stove many times, but I definitely prefer the crock pot.

When it’s done, I pour everything through a strainer, reserving the bones and picking off any meat for another use. I like to munch on the ends of the bones (which will be very soft by then) — a great calcium & mineral supplement. Pour into jars (leaving at least an inch of head space if you’ll be freezing them), and place in the fridge so the fat can harden on the surface; if there’s lots of fat I’ll skim some off, but I do like to leave at least some. Use, or transfer to the freezer. (As a side note, I’ve noticed a big difference with stock made from pastured chickens — much less fat, much more gelatin!)

*****

Nourishing Traditions Chicken Stock

1 whole free-range chicken or 2-3 lbs of bony chicken parts, such as necks, backs, breastbones, and wings

gizzards from one chicken (optional)

feet from the chicken (optional)

4 quarts cold filtered water

2 Tbsp vinegar

1 large onion, coarsely chopped

2 carrots, coarsely chopped

3 celery stalks, coarsely chopped

1 bunch parsley

If you are using a whole chicken, cut off the wings and remove the neck, fat glands and the gizzards from the cavity. By all means, use chicken feet if you can find them — they are full of gelatin. (Jewish folklore considers the addition of chicken feet the secret to successful broth.) Even better, use a whole chicken, with the head on. These may be found in Oriental markets. Farm-raised, free-range chickens give the best results. Many battery-raised chickens will not produce stock that gels.

Cut chicken parts into several pieces. Place chicken or chicken pieces in a large stainless steel pot with water, vinegar, and all vegetables except parsley. Let stand 30 minutes to 1 hour. Bring to a boil, and remove scum that rises to the top. Reduce heat, cover and simmer for 6 to 24 hours. The longer you cook the stock, the richer and more flavorful it will be. About 10 minutes before finishing the stock, add parsley. This will impart additional mineral ions to the broth.

Remove whole chicken or chicken pieces with a slotted spoon. Remove meat and reserve for other uses, such as chicken salads, enchiladas, sandwiches, or curries. (The skin and smaller bones, which will be very soft, may be given to your dog or cat.) Strain the stock into a large bowl and reserve in your refrigerator until the fat rises to the top and congeals. Skim off this fat and reserve the stock in covered containers in your refrigerator or freezer.

 *****
 

Gluten-Free Coconut-Cream Bliss Cookies

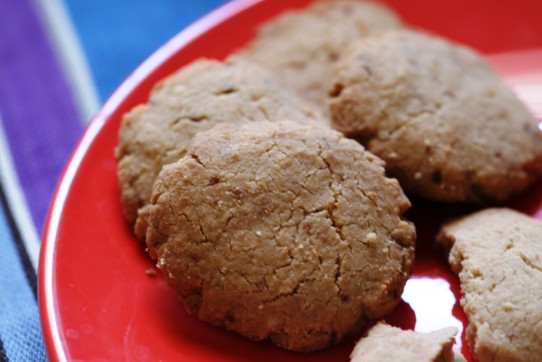
I think it’s time for a cookie recipe, and these are absolutely divine! They’re made with coconut cream concentrate (from Tropical Traditions, a favorite company of mine). CCC has the same fat & calorie content as nut butters do, so I like to use it in place of those sometimes. Plus it’s a delicious way to take advantage of the health benefits of coconut.

Lindsey’s Gluten-Free Coconut-Cream Bliss Cookies

1 1/2 cups coconut cream concentrate*

1/2 cup plain yogurt or kefir

1 1/4 cups arrowroot powder

Rounded 1/2 cup sucanat

1/2 tsp salt

1 tsp vanilla extract

1 tsp almond extract

*****

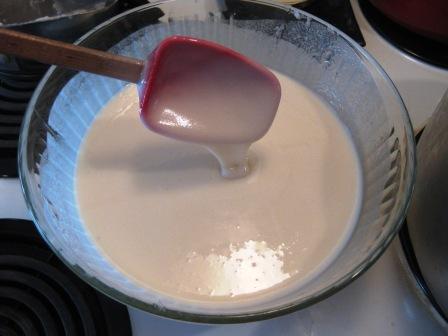
Heat the coconut cream concentrate over low heat until softened or melted.

Then melt the coconut oil over low heat; remove from heat and mix in the vanilla and almond extracts.

In a large bowl, mix the arrowroot with the sucanat and salt.

Add the coconut cream concentrate and coconut oil to the arrowroot.

Mix until well combined.

The dough should be very nice and workable, not overly sticky. If it’s sticky, add more arrowroot.

Form dough into tablespoon-sized balls and place on a greased cookie sheet (or for easier cookie removal, use parchment paper). Flatten each ball with the palm of your hand or the bottom of a glass.

Bake at 325° for 20-30 minutes or until they hold together and are very lightly browned on the bottom.
Cool a bit and remove from the cookie sheet while still warm. If they cool down and then seem to be glued to the cookie sheet, place them back into the oven to warm up again, and then they’ll be easy to remove.

*****

* Coconut Cream Concentrate is dried coconut meat which has been ground very finely into a butter, the way nuts would be ground into nut butter. You can cook and bake with it, mix it with water into coconut milk, put it in smoothies, spread it on a tortilla with honey & cinnamon, or eat it plain. The Concentrate will arrive separated into two layers, and you’ll need to mix them first before you use it.

To do that, unscrew the lid and put the jar into a pan of barely simmering water.

Keep the heat as low as it’ll go. This will take a while — you’ll know it’s ready when you stir the concentrate and no chunks remain.

Once it’s smooth, stir it up completely.  (I like to dump it all into a big bowl, which makes stirring easier. Then I pour it back into its jar.)

Transfer the jar to the fridge to solidify. Once it’s solidified, you can remove it from the fridge and store at room temperature. It’ll stay mixed in all but the hottest weather.

Warm your concentrate very gently in a pan of water set on the lowest heat.

Once it's melted and smooth, pour into a bowl and mix until combined. Pour back into the jar and transfer to the fridge to solidify.

Crunchy Kale Chips – A New Favorite!

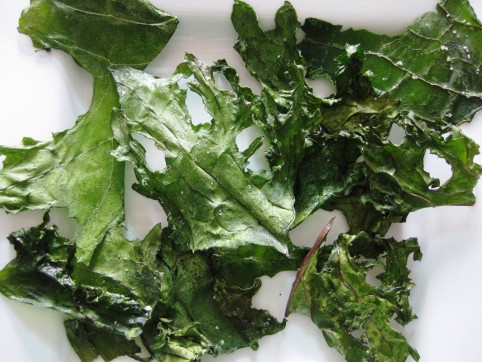
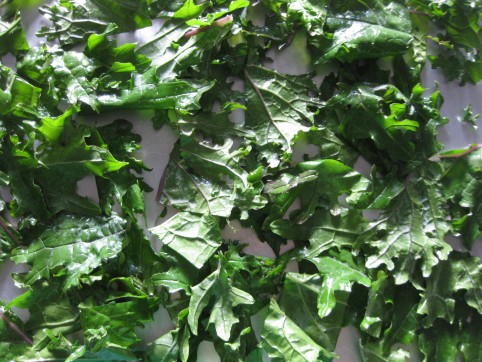
Kale chips fresh from the oven

I admit that I don’t love kale. It’s not a green that I crave the way I do others, but there are ways to prepare it that can really make it downright delicious. And it’s so full of nutrition! But best of all it self-seeds itself in my garden pathways, so it’s always there in abundance when we need it, all throughout the spring and summer.

Here’s my new favorite way to eat it. I LOVE these chips!! They have the salty, satisfying crunch of potato chips.

Crunchy Kale Chips

1/2 lb kale, ribs removed and leaves cut into 2″ pieces

Generous 1/4 tsp sea salt

1 Tbsp olive oil, on the generous side

Preheat your oven to 250°F  (120°C). Wash the kale if needed, and dry it well. Toss in a large bowl with salt and oil. Spread on cookie sheets in a single layer (you can crowd them together and overlap a bit). Bake 20-25 minutes until crunchy. The kale should remain a bright, deep green. If it begins to brown, it’ll taste slightly bitter.

Store in an airtight container if you don’t eat the whole batch right then and there!

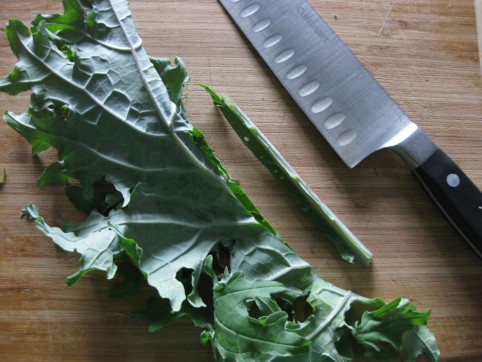
De-rib the big leaves by folding in half and cutting the rib away.

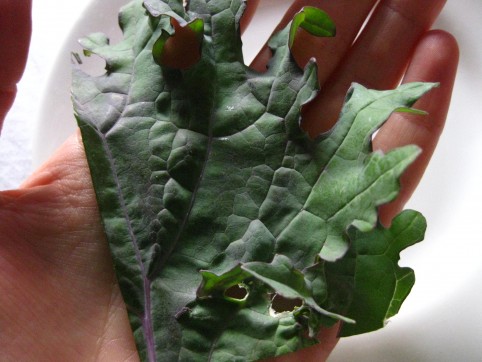
Cut into 2" pieces.

Arrange in a single layer on cookie sheets.

Make Your Own “Green Smoothie Frozen Concentrate”

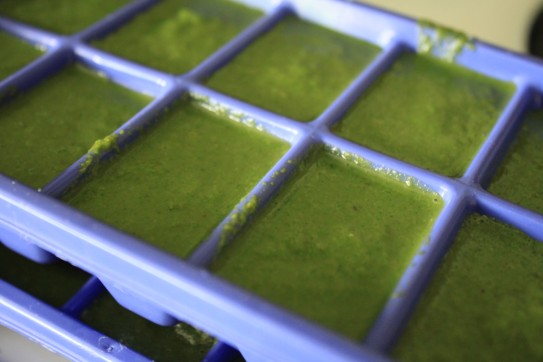
Green smoothie frozen concentrate made with lettuce, spinach, and lambsquarters.

So I peeked into my remaining three bags of lettuce from the garden this year, and discovered that they were starting to go south and needed to be used right away. I separated out the slimy leaves, washed the rest, and had an idea! I’ll make green smoothie frozen concentrate cubes!

To make the concentrate:

1. Pour some kefir, water, juice, or watered-down yogurt into a blender. You won’t need too much — just enough to get everything to blend together smoothly.

2. Add lots of greens. Ideas are: lettuce, spinach, beet greens, chard, lambsquarters, purslane, mint, parsley, cilantro, edible flowers, etc. (Kale is the only one I don’t like in a shake, but if you do, go for it!)

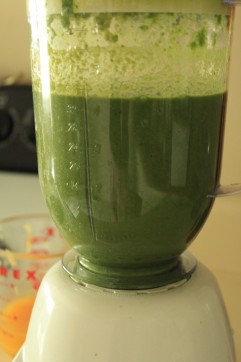
3. Start the blender and let it run until you have a uniform slurry.

4. Pour into ice cube trays and freeze.

To use:

When you’re ready to make a green smoothie, thaw out some cubes; I usually use 2 cubes when I make a shake for myself. Add the green liquid to your blender containing the rest of your smoothie ingredients — I like to use fruit and kefir with some ground flax seed and vanilla extract. Blend & enjoy. Yum!!

*****

If you’re curious about green smoothies, you might check out the book Green for Life by Victoria Boutenko, or the related website. My friend Sasha recommended this book to me, and I loved it! While I don’t agree with absolutely everything in the book, I’m glad I read it.

*****

Easy Greek Spanakopita

Spanakopita is one of my favorite things to eat. It’s a very easy dish to put together, and everyone loves it!

Spanakopita

1 pound (or more!) fresh spinach (feel free to substitute some of the spinach with chard, kale, turnip greens, or arugula) OR, frozen spinach — maybe a 10 oz. package? Maybe more? It doesn’t have to be exact.

5 oz feta cheese, crumbled

1/2 cup fresh dill (chopped and then measured)

3 green onions, chopped

2 eggs

salt/pepper to taste

1/4 to 1/3 cup olive oil

phyllo dough (thawed overnight in the fridge)

1. Steam spinach till it wilts. Run under cold water to stop cooking process. Squeeze spinach and drain. Chop the cooked spinach into small pieces.

2. Mix spinach, feta, dill, green onions, eggs, salt, and pepper in a large bowl.

3. Brush the bottom of an 8×8 pan with olive oil (9×13 also works). Brush the top of a sheet of phyllo with oil and place in pan. Fold phyllo over to fit in pan. Repeat until you have 6-8 layers of phyllo (more or less, depending on how thick you want the crust).

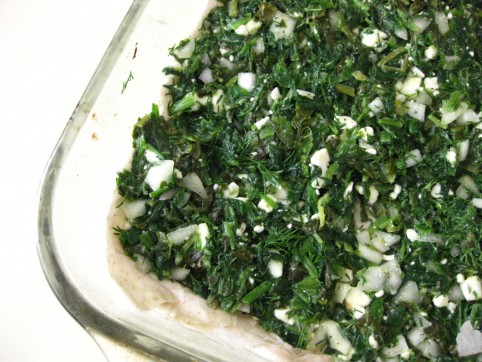
4. Spread the spinach mixture on top of the phyllo crust.


5. Brush the top of a sheet of phyllo with oil and place on top of spinach. Repeat till you have 6-8 layers, or however many layers you’d like. Finish by brushing the top layer of phyllo with oil.

6. Cut your unbaked spanakopita into squares or triangles with a sharp knife.

7. Bake in a preheated 350F oven until golden brown on top, about 30-50 minutes.

*****

« Older posts Newer posts »

© 2025 The Herbangardener

Theme by Anders NorenUp ↑