Kitchen / Garden / Sanctuary - Urban Homesteading to Nourish Body + Spirit

Tag: summer cooking (Page 1 of 3)

Cooking with Borage Leaves — Borage Burritos and Green Smoothies

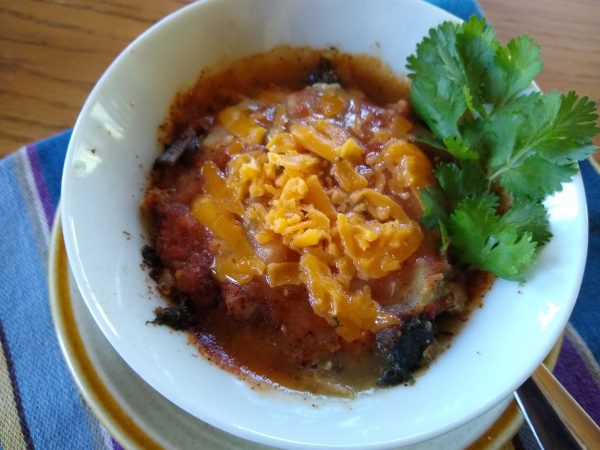
Borage Burrito Bowl

This year in my garden, borage is coming up everywhere!

It’s a prolific self-seeder and I could always use it as green manure in my compost pile — but the bees love its flowers, which is reason enough to leave it alone.

I’ve had some bad luck with cabbage and cauliflower this year, and other crops have been inexplicably stunted while others have been growing normally. There’s always an element of mystery to the garden from year to year…I’ve noticed for years that there’s always a crop that fails and it’s just a question of which one it’ll be.

Borage is certainly not one of my failing crops this year. So in the spirit of eating what’s being effortlessly provided to me, I’ve gotten brave, picked those prickly leaves, and done some experimentation.

Now borage flowers are also edible, and they’re nice to nibble on while out in the garden, but I have mountains of borage leaves and I wanted to see if they could be a real, true, edible crop for me. And my conclusion is Yes.

I’ve been using the leaves in two ways — raw, in green smoothies, and steamed, added to other dishes.

***

Raw leaves:

I start each day with a green smoothie, heavy on the greens. I have always used cilantro, parsley, or a combo of the two, but I’ve been loving the borage as my green. Cilantro and parsley are strong flavors, but the borage is wonderfully mild, and I love its fresh cucumber taste. And even better than cucumbers, there’s no hint of bitterness whatsoever. The prickles on the leaves get pulverized, and there is no hint of mouth or throat irritation, which I had wondered about.

The raw borage leaves also freeze well and can be added to the smoothie directly from the freezer.

I use a good handful of borage each morning, and sometimes also some cilantro:

***

Steamed leaves:

Borage leaves of any size can be steamed, but I like the small and medium size rather than the giant ones with larger prickles. The prickles do cook down into pretty much nothing (and they don’t irritate your mouth or throat when eaten), but even still I like the smaller leaves a little better.

I chop my borage leaves, and since I have Gastroparesis, I steam them for over an hour so they’re very, very tender.

If you don’t have a compromised stomach, feel free to steam them for a more normal length of time.

The color and taste of the steamed borage reminds me of steamed nettles. Dark color… mild taste… nothing exciting, but perfect for stirring into another dish that already has its own bold flavors, like minestrone soup, a vegetable stew, chili, maybe a lentil salad, or…Borage Burritos!

***

Borage Burritos (or Burrito Bowl)

Borage leaves, chopped and steamed

Brown rice or Millet, cooked

Your favorite jarred green chile sauce

Your favorite jarred salsa

Mexican-style seasoning, like Penzey’s Southwest, Fajita Seasoning, Arizona Dreaming, etc

Shredded cheese (or avocado bits)

Fresh cilantro

Corn or flour tortilla (optional)

***

Combine the steamed borage leaves with an equal amount of cooked brown rice or millet.

(I like brown rice cooked very soft, so I use 1 cup rice to 3 cups water, cooked for 2 hours. I cook millet with that same 1:3 ratio, cooked for 1 hour.)

Stir in the green chile sauce, salsa, and Mexican seasoning to taste.

Heat up until nice and hot.

Stir in shredded cheese, sprinkle on cilantro.

Serve in a bowl, or wrapped in a warm corn or flour tortilla (which you can smother with more green chile sauce and cheese if you like).

***

*****
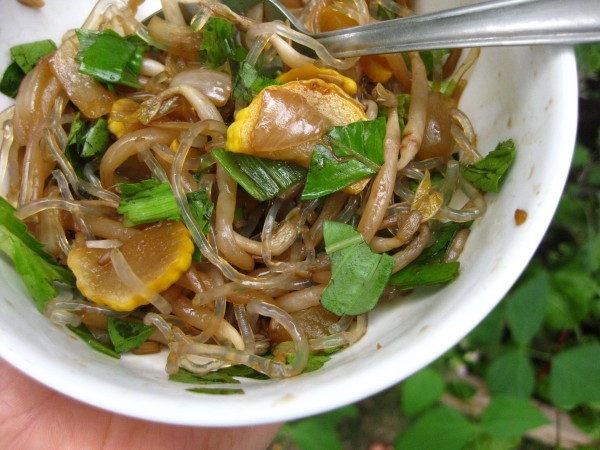
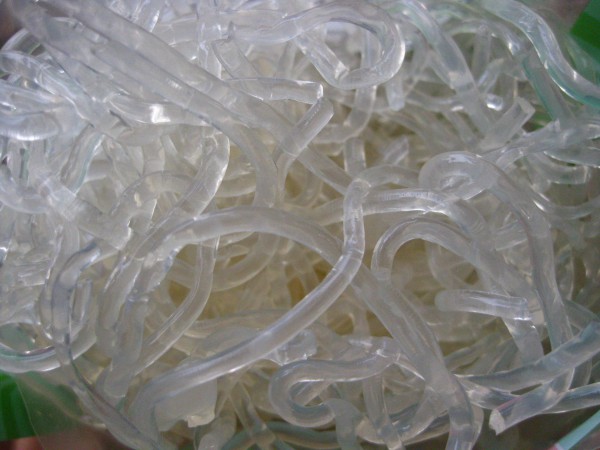
Kelp Noodles!

Have you tried kelp noodles? I just tried them for the first time this week and I like them! They have an unexpected crunchy texture and, somehow, a completely neutral taste. They’re also a raw food, and made only of seaweed. I mixed them into my solar-cooked “stir fry” for breakfast this morning, yum. I like the fact that they’re made from kelp, so they add iodine and trace minerals to my meal. My still-delicate tummy also gave them a thumbs up, as far as digestibility goes.

They cost about $3.50 at our local health food store.

Have you tried them? How do you like to eat them??

***

The stir fry was delicious by the way — I love making those because you can toss anything in and it always comes out great. This time it was: Bean sprouts, yellow squash, onions, garlic, Nama Shoyu soy sauce, and a tiny bit of sesame oil…steamed in the solar oven…and served over kelp noodles…topped with more Nama Shoyu, fresh Thai basil, culantro (or you can use cilantro which is similar), and chopped green onion tops.

***

*****

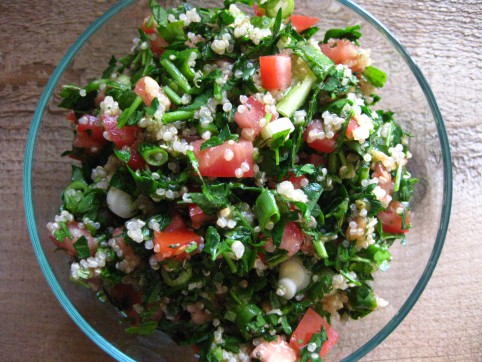
Classic Tabbouleh

One of my all-time favorite foods, ever! This is my mom’s famous recipe.

***

And since my diet has gone essentially low fat vegetarian, which is presently all my body will handle, this stuff is my mainstay. I plow through an entire batch all by myself every 2 or 3 days! And since I can’t eat much oil at all, I change up the dressing to be only a small drizzle of oil, and tons of lemon juice, and I’ve grown to really love it this way!

Also, tabbouleh is normally made with bulghur. I always make it with quinoa now since I love the taste of it and it’s more nutritious and also a complete protein — but bulghur is of course delicious too!

***

Mom’s Tabbouleh

1/2 cup uncooked bulghur or quinoa*

1-2 cups chopped tomatoes — (2 cups = about 1 lb) (I always make it with 2 cups of tomatoes now, but if you do, you may need to increase the amounts of lemon juice and olive oil slightly)

2 cups finely chopped parsley — chop first and then measure (about 1 medium-large bunch parsley…but do measure it first)

1/2 cup chopped green onion or 1/3 cup finely chopped white onion

1 level Tbsp dried mint, crushed (or 2 Tbsp fresh mint, finely chopped)

1/4 – 1/3 cup fresh lemon juice

1/3 cup olive oil

Salt (about 1 to 1 1/2 tsp), or to taste

Pepper to taste

***

Cook the 1/2 cup bulghur or quinoa* (1/2 cup grain to 1 cup boiling water + dash of salt; cover, simmer till water’s absorbed, about 20 minutes). Cool it to room temperature. If I’m in a hurry, I’ll put the hot quinoa into the freezer to cool it quickly.

Mix everything together in a big bowl. But if you don’t think you’ll eat all of it within a day or two, mix the dressing separately, and add it to the tabbouleh right before you eat a helping of it. That way the tabbouleh will stay fresh several days longer in your fridge.

Enjoy!

*****

*Cooking quinoa:

Be sure to rinse the quinoa well to remove bitter saponin residue. The quick way to cook it is to boil your water (ratio of 1 cup grain to scant 2 cups water), add some salt, add quinoa and cover, simmering until the water is absorbed, about 20 minutes.

However, if you’re able to plan ahead enough, it’s much better, healthwise, to soak your quinoa for at least 12 hours to make it more digestible — the way traditional cultures do. Soaking grains neutralizes phytic acid (which binds to essential minerals like calcium, magnesium, iron, and zinc, and blocks their absorption) as well as enzyme inhibitors in the grain. Soaking also breaks down difficult-to-digest proteins and encourages the production of beneficial enzymes which in turn increases the vitamin (especially B vitamin) content of the grain.

So…

To soak quinoa: Thoroughly rinse 1/2 cup of dry quinoa to remove bitter saponin residue. Put 1 Tbsp of lemon juice or vinegar into a measuring cup and fill to the 1/2 cup mark with warm water, then mix with the quinoa in a bowl. Cover and let sit at room temperature for at least 12 hours, or up to 24. When you’re ready to cook, rinse and drain the quinoa well, and place in a saucepan. Add a scant 1/2 cup of water, and a little salt. Bring to a boil and simmer, covered, until all the water is absorbed, about 20 minutes. Cool, and proceed with the recipe.

*****

Gazpacho & Garden Shopping List

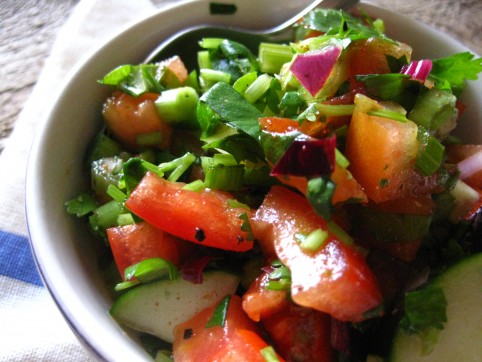
I love this time of the year because meals can be made almost entirely out of the garden! Today I made one of my faaaaaavorite dishes, Gazpacho. How can a combination of vegetables taste so good?!

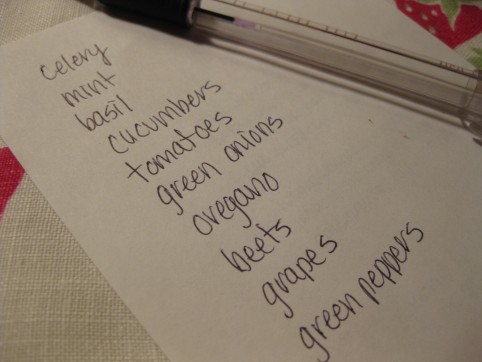
And since the gazpacho used up almost all the produce I picked last week at my garden, I was really tickled to be writing up a “shopping list” for the things I need to get when I go back in the next couple days. Going shopping in one’s own garden is way too much fun!

Dashboard Croutons & Other Car Cookery Ideas

Up here in our little 3rd floor attic Homestead In The Sky, the summers are sweltering. We forgo almost all oven use during these months, relying instead on the solar oven or the stovetop (see my Baking Cookies on the Stove post). Or, sometimes, the car. Actually we don’t have a car anymore — the old ’71 Jeepster finally reached a point where putting more money into it wouldn’t make sense. (Don’t worry, we gave it to someone who could completely appreciate it and at least part it out.) The last year we had it, it wasn’t running — but it served as a really handy oven during the summer months.

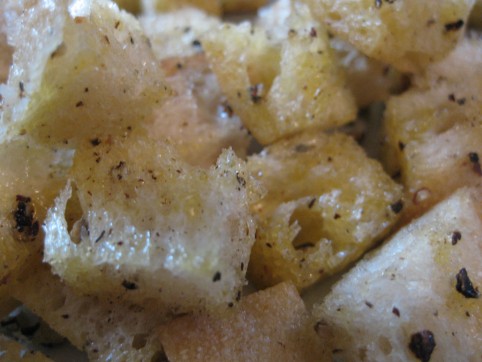
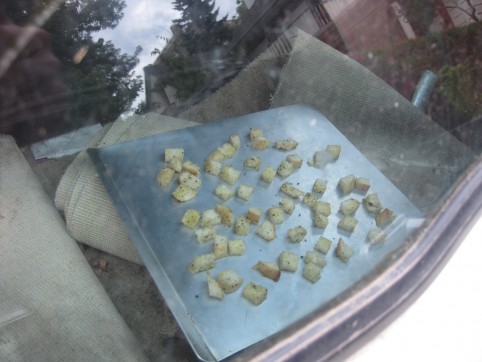
I made croutons that turned out great. They made the car smell really good too.

To cook things in your car, just park it in a sunny place where the interior will get nice n’ hot. Slide your cookie sheet of croutons (or whatever else) onto your dashboard or back seat, and check on it every now and then. This is a very fun way to cook!

The back seat works, too...


Need to dehydrate some food? Use the car! Cook something at low heat? Use the car!

Making fruit leather? The car! Roasting pumpkin seeds? Car!

Bet those kale chips would even work in the car, too.

If you go to work and park in a hot parking lot, put your lunch container on the dashboard in the morning, and it’ll be warm for you at lunchtime.

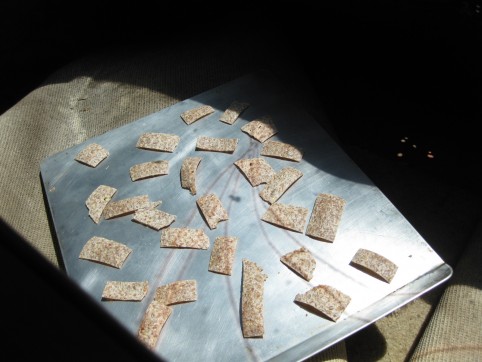
Another thing I like to do is make crackers out of sprouted grain tortillas, like these:

Cut them up and spread on a cookie sheet. Bake in your car till very lightly browned and crunchy (or in an oven or solar oven at about 250°). Be careful that they don’t get too brown or else they won’t taste as good.

*****

I bet there are so many other fun car-cooking ideas out there too — do you have any to share??

*****

« Older posts

© 2024 The Herbangardener

Theme by Anders NorenUp ↑