Kitchen / Garden / Sanctuary - Urban Homesteading to Nourish Body + Spirit

Tag: traditional foodways (Page 9 of 9)

Nourishing + Frugal: Homemade Applesauce

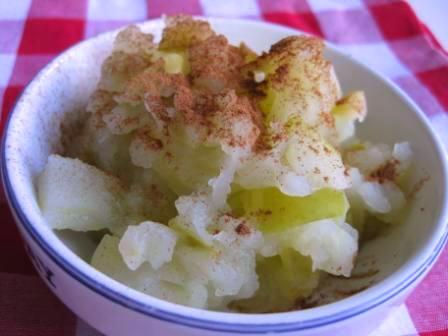
Homemade Applesauce with Cinnamon

Homemade applesauce is one of my favorites for breakfast or a snack! And it’s SO EASY TO MAKE! Organic applesauce from the store is pretty pricey (especially at the rate I go through it), and the taste and texture just don’t compare with homemade.

We’re lucky to have a local health food store that puts out their markdown organic produce in $1 grab-bags. So when they put out bags of organic apples, I snatch ’em up to make applesauce. That means I can make 3 or 4 lbs of organic applesauce for only a dollar!

Here’s how I make my applesauce:

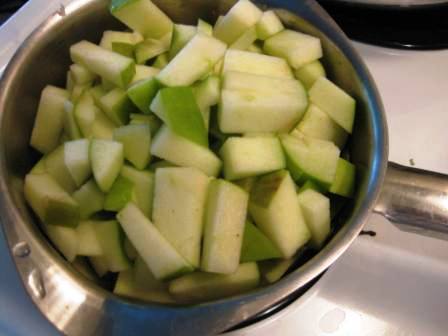
1. Dice the apples into small pieces. I leave the peel on for texture and nutritional value.

2. Place the pieces in a saucepan with a dash of salt (optional) and a small amount of water. For 2 or 3 chopped apples, I usually put in about 1/4 cup of water.

Homemade applesauce

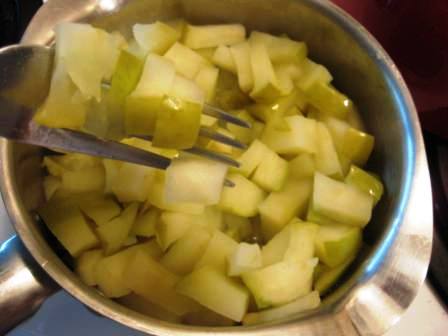
3. COVER the pan, bring to a boil, and turn the burner down to low. Cook the apples until they’re very soft, stirring once or twice. This shouldn’t take long…maybe 10 or 15 minutes.

Homemade applesauce

4. When they’re very soft and can easily be mashed with a fork, dump them into a colander to drain off excess water.

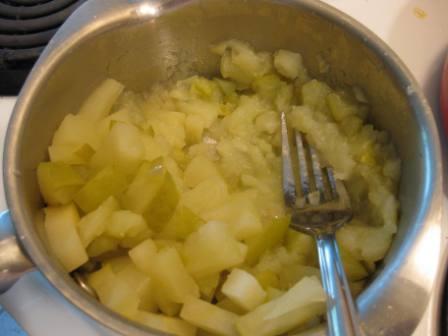
5. Return the apples to the pan, and mash them against the side of the pan with a fork. You could also run them through a food processor, but I really like the chunky texture of hand-mashed applesauce.

Homemade applesauce

6. I enjoy my applesauce just plain, or sometimes with 1/2 & 1/2 (or cream) and a sprinkle of cinnamon. So delicious! Use your imagination…try toasted nuts on top for a more substantial meal. Or you could also make applesauce bread!

7. The applesauce doesn’t last that long in the fridge — maybe 5 days, tops. However, this applesauce freezes quite well, and I’ve also canned it with pretty good results (I prefer the freezer, though).

This post is part of Pennywise Platter Thursday over at The Nourishing Gourmet.
Enjoying Wild Foods: Purslane

Purslane Salad with Tomatoes and Cucumbers

Garden Salad with Purslane, Tomatoes, and Cucumbers

Once you discover the world of edible wild plants, you realize that there’s food everywhere! Even in the asphalt jungle of an urban environment.

Purslane is a very common weed that I often see growing in sidewalk crevices or in barren, disturbed soil. It’s extremely nutritious, so I was happy to find it growing near our apartment recently.

Continue reading

Make Your Own Pickled Grape Leaves

Ingredients for making pickled, lacto-fermented grape leaves

Have you ever eaten Dolmas (or “Dolmades”)? I absolutely love them! Dolmas are a delicious Turkish finger food made by stuffing pickled grape leaves with a filling made from rice, onion, parsley, olive oil, spices, and various other things. Sometimes they’re also made with meat.

A couple years ago, I created my own recipe for Dolmas that doesn’t use rice, but rather shredded zucchini, as the main filling. I ought to make that recipe more often, since it’s one of my favorite things to eat! I’ll post my recipe for Zucchini Dolmas soon (UPDATE: here’s the recipe), but today I’m going to show you how to make your own pickled grape leaves — which you’ll need for the Dolmas. (You can also just buy pickled grape leaves in a jar, which is what I used to do, until I recently discovered how much cheaper and more fun it is to make my own!)

Grape leaves are plentiful and ubiquitous, so you shouldn’t have much trouble finding them. If you don’t have your own grape vine, just take a walk down any random alley, and you’ll probably find at least one vine spilling out over someone’s fence. (You could ask first before picking of course, but if the vine is trailing into the alley — or hanging over a public sidewalk — it’s in the public domain.) The grape leaves I collected were from a vine in my alley. Choose leaves that are young enough to be tender, but large enough to stuff with filling, and clip the stem close to the leaf.

The grape leaves we’ll be making are pickled by way of lacto-fermentation, rather than vinegar. Lacto-fermentation is a traditional way of preserving fruits & vegetables by harnessing the power of lactobacilli bacteria, which are present on the surface of all living things. The bacteria convert plant starches & sugars into lactic acid, which is the preservative. The lactobacilli themselves also improve the vegetable’s digestibility, as well as boost its vitamin and enzyme levels.

Pickled Grape Leaves

24 grape leaves

1 Tbsp sea salt

4 Tbsp whey* (if you don’t have whey, use an additional 1 Tbsp salt)

2 cups water, filtered if you have it

Wash the leaves well, and stack them neatly together.

Put water, salt, and whey in a big bowl and stir. Soak the leaves in the liquid for about an hour, weighting them down with a plate.

Soak the leaves for about an hour, weighted down with a plate.

Soak the leaves for about an hour, weighted down with a plate.

Roll up the leaves and stuff them into a pint jar. Pour in enough liquid to cover the leaves, but leave 1 inch of space between the liquid and the top of the jar. Cover tightly, and leave on the counter for about 3 days. Then, transfer to the fridge, where they’ll keep for quite a while. I had mine in the fridge for about 10 days before using them.

* Whey is the clear, yellowish liquid strained off when making yogurt or cheese. Don’t use powdered or commercial concentrated whey!

Pickled grape leaves

Recipe courtesy of Nourishing Traditions by Sally Fallon.

Welcome!

Welcome to The Herbangardener! Thanks for stopping by!

This site is dedicated to nourishing the body + spirit through backyard organic gardening, traditional foodways, and homesteading in the heart of the city.

I wish I could describe my own homestead as “four lovely acres in the country, with a fruit orchard, vast gardens of veggies & flowers, a flock of chickens, and a cow.” That would be my dream!

My current living situation, though, is slightly less picturesque — I live in a drafty, one-bedroom attic apartment in the middle of the city. It’s not quite my dream, but in spite of all the asphalt and traffic, it’s still my homestead.

You can create a homestead no matter where you live! I’ve discovered that it’s as much a mindset as it is a physical setting — maybe even more so.

It’s time to revolutionize our gardens, reclaim our kitchens, and re-establish simple, balanced living.

You can do this wherever you are — even if your garden is just a pot of parsley in the kitchen window!

Growing and cooking our own food no longer holds the stigma it once did. In fact, not only is it in vogue now — it’s also a wonderful way to nourish both body and spirit, especially when we’re not able to achieve the part about simple, balanced living.

At my little urban homestead (which I share with my dear & wonderful hubby), I love playing with new ideas and learning new things, which I write about on this site. I also love gardening! For years, I’ve had an organic veggie garden in my parents’ backyard (five 4’x8’ raised beds). The neat thing is, my garden gives more than just vegetables — it provides satisfaction and enjoyment, and a deep sense of peacefulness when I’m near it. I feel so proud when I’m able to nourish my family with foods that I’ve lovingly grown and prepared with my own hands!

And so I warmly invite you to join me here at The Herbangardener, as we strive to create our own homestead-sanctuaries no matter what our present living situation may be!

Newer posts »

© 2024 The Herbangardener

Theme by Anders NorenUp ↑