Welcome back!
For an introduction to the series, and the pre-/post-surgery homeopathic regimen I created, visit Part 1: Homeopathy.
For Part 2 today, I’ll be showing you how to make Herbal Wound-Healing Oil and an Antiseptic Herbal Wash. You can make these and keep them on hand for cleansing and healing any type of wound.
One thing: Be careful when applying the Wound-Healing Oil to burns or infected areas, because they may heal over “too quickly,” sealing in heat and bacteria. For these situations, make sure the burn has completely cooled, or that the infection has first been treated with a good antimicrobial preparation.
For me…since the incisions were on my foot (where there’s a higher risk of post-surgical infection because of decreased circulation), I conservatively used only the Antiseptic Herbal Wash until the wounds had completely closed up and there was no sign of infection. At that point, I no longer needed to use the Antiseptic Herbal Wash…and began to then use the Wound-Healing Oil.
Herbal Wound-Healing Oil

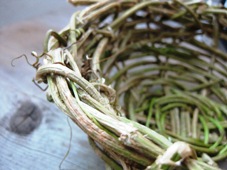
Wound-Healing Oil infusing on a sunny windowsill
Making herbal oils is easy because you don’t really need any special ingredients or equipment. Herbal oils can be made by either hot infusion or cold infusion. For a hot infusion, equal amounts of herbs and oil (often olive oil) are simmered over low heat for a few hours.
Cold infusion is a much slower process whereby you pack a clear glass jar with herbs and oil and let it stand for several weeks, often in the sun. Sunlight encourages the herbs to release their active constituents into the oil. Cold infusion is the best method for fresh plant material, especially for more delicate parts such as flowers. Since my herbs were fresh, and I was using delicate calendula flower petals, I chose the cold infusion method. Olive oil is very good for cold infusion because of its resistance to turning rancid. The intensity of sunlight and the length of time the herbs are infused will affect the strength of the end product. For a stronger oil, strain out the first batch of herbs, add a new batch of fresh ones, and infuse again for another few weeks.
Cold Infusion Step 1: Gather your plant material — either dried or fresh, or a mix of both. I used all fresh plants this time (fresh is almost always better). Any medicinal plant will work, and you may use just one type, or a mix. For my Wound-Healing Oil, I chose a mix of antiseptic, skin-healing, and bone-healing plants:
Sage (leaves) – antiseptic
Yarrow (leaves) – antiseptic, heals wounds, anti-inflammatory
Thyme (leaves) – antiseptic (contains Thymol, a very potent germ killer)
Comfrey (leaves) – heals wounds, assists with bone fusion (it’s also known as “Knitbone”)
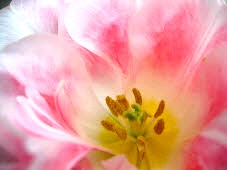
Calendula (flower petals) – antiseptic, heals wounds, anti-inflammatory
Step 2: Chop the herbs into little pieces. Stuff them into a clear glass jar that has a lid. Pour olive oil into the jar until it completely covers the herbs. You may need to poke around with a spoon to get the oil to seep down to the bottom of the jar. If there’s any plant material above the oil, it will probably mold, so try to pour enough oil in to cover everything. I had a little mold growing on the surface of the oil after a few weeks (probably on a plant piece that wasn’t submerged), but I just scooped it up and threw it away. No harm done.
Step 3: Screw on the lid, and place the jar in a spot where it’ll get plenty of sunshine, but where it won’t be disturbed. (Again, if any herb pieces are washed out of the oil and onto the side of the jar, they’ll get moldy. It’s not a big deal, but if they get moldy you should scoop them out.) Leave it there for at least 2 weeks, but preferably 4 weeks or longer.

Wound-Healing Oil. Twice infused for a total of 6 weeks, strained, and ready to use.
Step 4: Set up a fine-mesh strainer over a bowl. Pour the contents of the jar into the strainer and squeeze the herbs tightly in your fist to get as much oil out as possible. It’s a messy job; don’t wear your Sunday best. Run the oil through the strainer again if any plant material accidentally got into the bowl. Discard the plant material.
Step 5: I like to puncture a Vitamin E capsule and squeeze it into the jar of finished oil. Vitamin E is a good preservative. Store the oil in the fridge for a longer shelf life.
Step 6 (optional): For an even stronger oil, chop up a new batch of fresh or dried plant material, and put it into the oil you’ve just strained. Place in the sunny spot for a second round of infusion. For my Wound-Healing Oil, I strained the oil after 3 weeks, and then added more fresh Calendula petals and Comfrey leaves (both fresh and dried), and left it to infuse for another 3 weeks.
Antiseptic Herbal Wash

Making the Antiseptic Herbal Wash
Antiseptic Herbal Wash is what I applied to the surgical incisions until they were completely healed. After I made the Herbal Wash, I froze it into ice cube trays, and then stored the ice cubes in the freezer. Each night, I would take out a cube and let it thaw in the fridge. Then, both morning and evening the next day, I would pour the liquid over my foot, rubbing it into the wounds. It didn’t sting, but I tasted a little bit of it once, and it was very strong and very disgusting! Not something you want to drink, certainly! After the wounds had completely closed up and there was no sign of infection, I then stopped using the Wash and began using the Wound-Healing Oil.
Step 1: Gather your plant material — either dried or fresh, or a mix of both. I used all fresh plants this time (fresh is almost always better). For this Antiseptic Herbal Wash, I chose these medicinal plants:
Sage (leaves) – antiseptic
Yarrow (leaves) – antiseptic, heals wounds, anti-inflammatory
Thyme (leaves) – antiseptic (contains Thymol, a very potent germ killer)
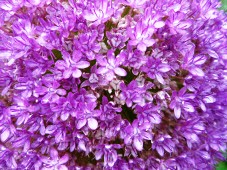
Lavender (leaves) – antiseptic, soothing
Step 2: Chop up the plant material, and place into a large jar that has a lid. Pour enough boiling water over the plant material to cover it completely. Screw the lid on loosely. (If a lid is not used, the precious volatile oils will dissipate into the air.)
Step 3: Let the mixture steep until the water has cooled to room temperature…or longer. I let mine steep for the whole day. Pour the water through a strainer, squeezing the herbs tightly to get all the water out. Discard the herbs, and either refrigerate or freeze the herbal water. Again, I like to freeze mine into ice cubes that can be defrosted when needed.

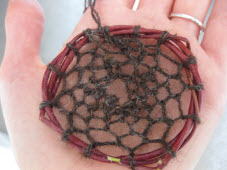
Antiseptic Herbal Wash frozen into ice cubes