Kitchen / Garden / Sanctuary - Urban Homesteading to Nourish Body + Spirit

Month: March 2010 (Page 1 of 2)

Spring Soil Preparation for the Organic Vegetable Garden

Amending the garden soil

Wanna know the best piece of garden advice I’ve ever gotten? “Feed the soil, not the plants.” Yeah! It took me a while to actually appreciate the truth in that statement, but through first-hand experience, I now know that if you concentrate on building rich & delicious soil, you will most certainly get rewarded with much better vegetable harvests — and I do mean MUCH better!!

I amend my soil once a year, in the spring, and like to use 3 different amendments:

– Leaves that have been mulching the garden since autumn

– 1/2″ layer (or more) of composted cow (or other) manure or finished compost

– Dry, organic fertilizer mix (recipes below)

Let me explain…

– Leaves:

As I mentioned last fall, I don’t like to dig or amend my soil in the fall…but rather wait until the spring time. So over the past few weeks, I’ve been gradually pulling away the thick layer of leaves that I had put on the garden in October. The reason I say “gradually” is because once you pull away the dry top layer, there’s a moist layer underneath. You could of course just dig these moist leaves in right away, but my soil was still quite wet, and I wanted it to dry out a bit before digging (digging wet soil is not good for the garden since it destroys the structure of the soil, causing it to compact and dry into brick-like clods). Also, you’ll notice that when you expose the wet leaves, there will probably be lots of worms in that layer. I like to give the worms a chance to burrow back into the soil before I pull off that layer of wet leaves…otherwise you’d be pulling off precious worms that you want to keep in your garden.

Anyway, I dig a thin layer of leaves into the soil, and will use the rest to mulch around my plants as they get bigger.

– Manure or Compost:

If you use manure, it should be composted, not fresh (so as not to burn your plants with nitrogen, and also to prevent the spread of pathogens). I buy mine from the garden center. Important side note: there’s a growing problem with herbicide-contaminated compost (both animal- and plant-based) being sold; this is bad news for gardeners since it has a very negative impact on the growth of crops, and it persists in the soil for years. Read the full story here, and an update here. So in light of all that, if you make your own compost, definitely use it!

– Organic Fertilizer Mix:

First, the recipes!

Here are a couple of dry, organic fertilizer recipes from my favorite vegetable gardening book, Rodale’s Garden Answers – Vegetables, Fruits, and Herbs:

For every 100 square feet of garden space, mix together:

6 lbs alfalfa meal

3 lbs bone meal

4 lbs greensand

1 lb kelp meal

OR, Mix and Match (choose ONE from each category):

Nitrogen (N):

2 parts blood meal – OR – 3 parts fish meal

Phosphorus (P):

3 parts bone meal – OR – 6 parts rock phosphate or colloidal phosphate

Potassium (K):

1 part kelp meal – OR – 6 parts greensand

Unfortunately, the book doesn’t specify how many quarts or pounds to apply for the Mix-n-Match recipe, but I’d guess it would be about 4-6 quarts per 100 sq ft. Or, based on the first recipe, you could figure that 1 part probably equals 1 pound, and measure it out that way.

I used the first Rodale recipe last year with good success; this year, I’m trying the recipe outlined in this Mother Earth News article called “A Better Way to Fertilize Your Garden.” This is probably the best, most helpful organic fertilizer article I’ve seen. It’s worth reading!

As for sourcing ingredients, I was sorely disappointed in the organic fertilizer selection at my local garden centers (do that many people still use all those chemicals?! :-(). I went to four different places before I got what I wanted, and no doubt paid a premium. Next time I’ll go ahead and buy online. Even though the shipping rate might be high because of the weight of the ingredients, it will probably be worth it. Peaceful Valley Farm Supply is a good source, but I’d also do a google search for organic garden suppliers to see who else is out there.

Anyway, in that article, it’s suggested that you initially use 4-6 quarts of fertilizer per 100 square feet (depending on what you’re growing…and possibly adding more throughout the season; more details in the article). I mixed up 7 quarts of fertilizer. The recipe is measured in ratios (“parts”) instead of in cups or pounds, which is annoying if you’re trying to end up with a certain number of quarts. So I did some math to come up with the number of CUPS needed of each ingredient, so that the end result was 7 quarts of fertilizer mix. Measure your ingredients on the generous side, and mix thoroughly before applying to the garden.

7 quarts (28 cups) of fertilizer:

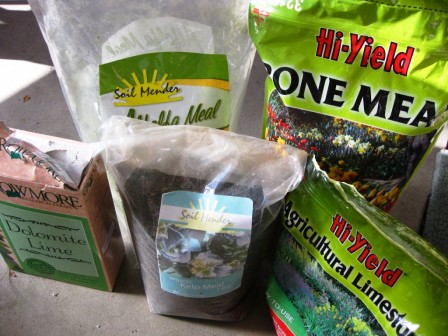
16 cups (4 quarts) alfalfa meal (which is roughly 2.5 – 3 lbs)

2 cups (1 pint) agricultural lime

2 cups (1 pint) dolomite lime

4 cups (1 quart) bone meal

4 cups (1 quart) kelp meal

Ingredients for making organic fertilizer

I dig all 3 amendments into my garden soil in the spring, to a depth of about 4 inches. Once the veggies really get going, I like to supplement my blooming/fruiting veggies with some liquid Neptune’s Harvest Fish/Seaweed emulsion (NPK: 2-3-1), and my leafy greens with Alaska brand Fish Emulsion — though you could certainly use the Fish/Seaweed on all of it. I just happen to have a gallon of the Alaska fish emulsion, so I feed it to the greens since it’s NPK nutrient profile is 5-1-1 (lots of nitrogen!). Instead of the fish emulsion, you could also just dig more dry fertilizer into the soil at regular intervals, as detailed in the fertilizer article, which was linked above.

I hope this was at least kind of helpful…fertilizing the veggie garden had always been a big mystery for me, and within the past couple years, I feel like I’m finally finding my rhythm with it.

Do you have any special organic fertilizer tricks or advice to share??

What Are Your Favorite Seed Catalogs?

I LOVE seeds. LOVE them! You should see my seed collection; it’s enormous, even after paring down a few years ago. 😉

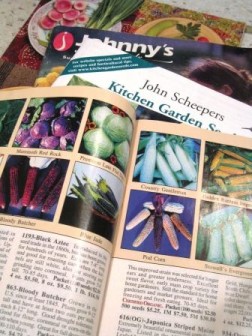
I bet you couldn’t guess, then, that I’m a big fan of seed catalogs. I have my favorites, below, but I’m looking for some new favorites! Please leave a comment and let us know which ones you love!

Seed Savers Exchange – Seed Savers Exchange is a wonderful organization that maintains a collection of 25,000 rare vegetable varieties at their Heritage Farm in Iowa. Their catalog contains only heirloom veggies, and has lots of pictures! You can also become a member of SSE and trade rare garden seeds with other members.

As a side note, I’m totally into heirloom vegetables, and I believe very strongly in the importance of growing and saving one’s own seed; this liberates us from dependence on hybrid crops and the corporate seed companies behind them (“buy new seed from us each year!”), and most importantly, growing & saving seed from heirlooms maintains genetic diversity in our food supply, which could possibly be a matter of life and death at some point in the future. And by saving your own seeds year after year from your heirloom or open-pollinated plants, you are actually “customizing” your veggies for your unique backyard growing conditions!

Johnny’s Seeds – Based in Maine, what I love about their catalog is the detailed seed starting & growing instructions for each vegetable they sell. I love the little charts by each veggie that show the optimum germination temperature for that particular seed. Very helpful! I also like how they clearly denote “F1” if the variety is a hybrid.

Pinetree Garden Seeds – Another friendly, gardener-oriented company based in Maine. Their seeds are generally better priced than other places and are clearly marked with “F1” if the variety is a hybrid. (Not all seed catalogs do this!)

John Scheepers Kitchen Garden Seeds – I like the longer-than-usual variety descriptions, as well as the fact that they list the average seed life for each type of vegetable. They also note whether the variety is hybrid or open pollinated.

Leave a comment and let us know which seed catalogs are your favorites, and why!

http://www.seedsavers.org/

Planning Your Vegetable Garden

It’s that time of year! Spring garden planning and planting time. Usually I get around to planning & planting sooner, but this year it’s been cold right up till now, and plus my surgery has delayed things a bit. But happily, I got the entire garden tilled, amended, fertilized, and planted on Tuesday! All with crutches and a bum foot! It was exhausting, but fun to work in the yard again…and very satisfying when I got it all done.

Today I’m going to give you a little tutorial on how to plan your vegetable garden. Over the years I’ve developed a planning method that works well for me. Admittedly, I don’t really like garden planning very much. I do love looking through all my seed packets and deciding what to grow for the year, but the process of actually planning what to put where is a task that takes literally hours of mental work (for me at least). It’s a lot of thinking, decision-making, & considering all different garden plan configurations in my head before I even put pencil to paper.

That said, though, there comes a feeling of satisfaction and excitement when I’ve completed the plan and am thoroughly happy with it. Each year’s plan is different, depending on what I want to grow and also considering what grew there last year.

I have three 4’x8′ raised beds, a 2’x8′ raised “lasagna” bed (a story for another day!), another 4’x8′ raised bed against the south side of the house, plus various pots here and there for extra tomato growing space.

Here’s my basic planning process:

1. Decide what you want to grow. Look through seed catalogs or go to a garden center to get seeds, or if you’re like me and already have wayyy too many seeds to choose from, go through all your seed packets and set aside what you think you want to grow. (I like to start all my veggies from seed, but you could just as easily decide what you want to grow, and then buy plants from the nursery.)

Once you’ve narrowed down which veggies you want to grow, write them all down on a piece of paper.

2. Determine which vegetables will be in the Spring plan, the Summer plan, or both plans. If you’re planning both a spring and summer garden (which I do), you’ll have 3 categories of vegetables:

– Early-spring-planted veggies that you’ll harvest before summer (like spinach, peas, lettuce, etc.)

– Early-spring-planted veggies that you’ll leave in the garden through the summer — the “spring carry-over veggies” (like cabbage, onions, parsley, potatoes, cilantro, dill, chard, carrots, etc.)

– Summer-planted veggies (like tomatoes, squash, peppers, cucumbers, etc.)

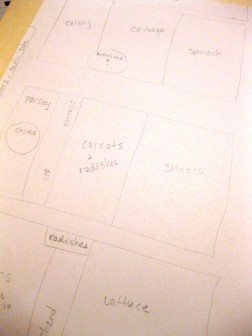
As you can see in the photo below, I mark my piece of paper with “Sp” (for “spring”) to the right of the spring-planted veggies, and “M” (for “main” summer) to the left of the summer-planted veggies. Vegetables with both “Sp” and “M” will be in both garden plans. As I place each vegetable into the plan, I put a check mark next to it.

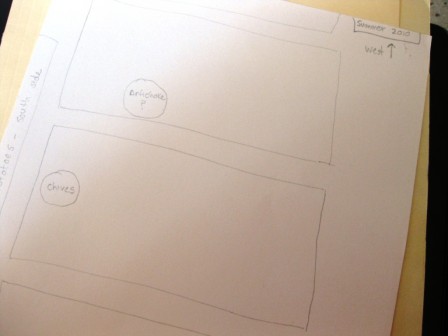
3. Draw two outlines of your garden plots on paper — one for spring, one for summer. For my plans, I have one piece of thick paper; on one side I have Spring, on the other side I have Summer. Be sure to also note the year somewhere on your garden plan. On both plans, draw in any perennial vegetables that have overwintered.

Graph paper isn’t necessary, unless you like to use it. I draw my plans free-hand, and just eye the scale of things. The first year that I did a formal plan, I got mathematical about it and used graph paper, with “one square = 6 inches” and all that, but in the end, I found it unnecessary to be so precise, and I haven’t used graph paper since.

Also, always work in pencil! 🙂

Draw your garden plots, and draw in any overwintering perennial vegetables.

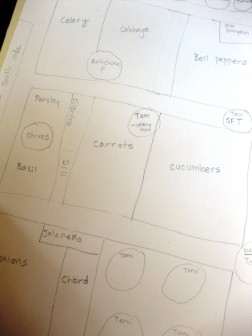
4. Plan your summer garden first. I find it easier to plan my summer garden first, and then my spring garden. To plan my summer garden, I decide on the location of both the spring-planted carry-over vegetables as well as the summer-planted vegetables.

I begin with deciding where I’ll put my tomatoes…though in doing this, you’ll be thinking about all your vegetables — not just the tomatoes. But I like to put the tomatoes down on paper first, as this makes it easier to place other things.

I also place the tallest vegetables (tomatoes, plus anything grown on a trellis) at the north end of each of the raised beds, so that they don’t block the sun from reaching shorter veggies.

I also consider the locations of last year’s vegetables, and try not to plant the same thing in the same place the next year. It doesn’t always work out that way (for instance, this year’s cabbage will be partially in the same spot as last year), but to me, that’s okay.

I like to plan the summer garden first.

5. Plan your spring garden based on the summer garden. Now, on your spring garden plan, copy down the spring carry-over veggies that you placed in your summer plan. Then, fill in the empty spaces with all of your spring veggies that will be harvested before summer, like the lettuce, radishes, spinach, peas, etc.

I plan the spring garden based upon which veggies will be carrying over to summer.

6. Check your veggie list to be sure you’ve placed everything, and then you’re done! Now it’s time to plant your spring garden!

Click here to read about how I amend my soil each year to get ready for spring planting.

And as a side note…if you start your own seedlings inside (rather than buying from a nursery), that adds another step to the spring preparation process, but it’s not bad. I definitely prefer to grow my own seedlings! Mostly I start my summer stuff inside, like tomatoes, squash, cucumbers, and peppers, but this year I also started my cabbage inside and it’s germinating better than when I plant it directly into the garden. But other than cabbage, I plant all my spring stuff directly into the garden, without starting it inside. Anyway, I’ll share more about all that soon, too.

*UPDATE 3/5/11: The past couple years I’ve just planted cucumbers and squash seeds directly into the garden rather than starting them inside. I’m much happier with this method since it’s SO much easier and the difference in fruiting times is not appreciable enough to be worth the bother of starting them inside. So I’ll stick to starting tomatoes, peppers, and cabbage inside. I might also start my celery inside, too, since it never quite took hold when I direct-seeded last year.

Homemade Pumpkin Pie Fruit Leather

I think it’s time for another recipe! It’s been a while since I’ve posted one. I’m still off work for another few days as I continue to recover from my foot surgery, so I’ve got extra time at home which is wonderful! I can’t be in the kitchen all day since I need to continue to rest a lot and elevate my foot, but I could never completely stay away from my kitchen 🙂 — crutches or not — so I’ve been experimenting here and there with some simple recipes.

Today’s recipe for homemade fruit leather is definitely simple! I used to eat fruit leather all the time when I was younger, but I’d pretty much forgotten about it, even though it’s a yummy & very portable snack. Recently I came across the idea of homemade fruit leather, and decided to experiment using a can of pumpkin that’s been sitting in the back of the pantry for over a year (or maybe two…). Voila! Pumpkin Pie Fruit Leather. It’s so good that I had to restrain myself from eating the whole entire tray, and it’s incredibly easy to make!

If you don’t have, or don’t want to use, canned pumpkin, just substitute cooked pumpkin (or winter squash) puree.

Also…if you don’t have pumpkin, you could use this basic method to make fruit leather from cooked/pureed apples, pureed peaches (no need to cook them first), plums, berries, bananas, or a combination of fruits — and with these fruits, there’s no need to add any spices unless you want to! If I have an abundance of tomatoes this year, I think I’ll even try it with tomatoes. Anyway, here’s the recipe:

Pumpkin Pie Fruit Leather

2 cups (or one 15-oz can) cooked pumpkin or winter squash puree

1/4 cup honey

1/4 – 1/2 tsp cinnamon (depending on your taste…I used a 1/2 tsp because I like the bold taste of spices)

1/4 – 1/2 tsp ginger powder, optional

1/4 tsp powdered cloves

1/8 tsp nutmeg

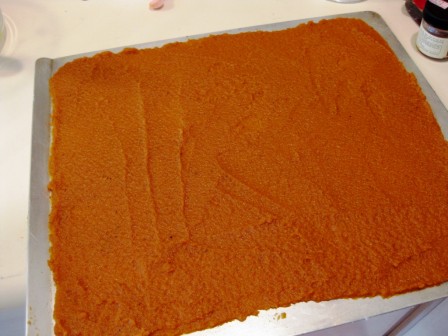
Preheat oven to 200* F. (If you have a dehydrator, you can use it for this recipe. Dehydrate at 140*.) Mix all ingredients well. Generously oil a cookie sheet (really slather the oil on…it’ll make it much easier to peel off the leather!), or use parchment paper. Using a spatula, spread your mixture on the cookie sheet, taking the extra time to spread as thinly and evenly as possible; this took me a few minutes to get it just right. Spreading it as evenly as possible is important because otherwise some parts will be over-done and other parts will be under-done (which will probably happen to some extent anyway, but at least you’ll be minimizing it).

Spread the mixture as evenly and thinly as possible on the oiled cookie sheet.

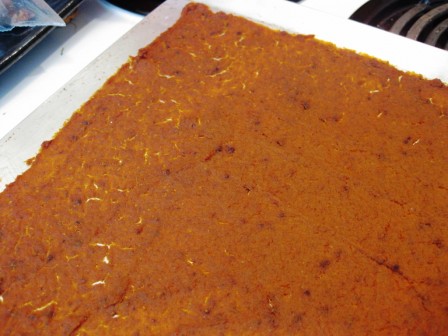
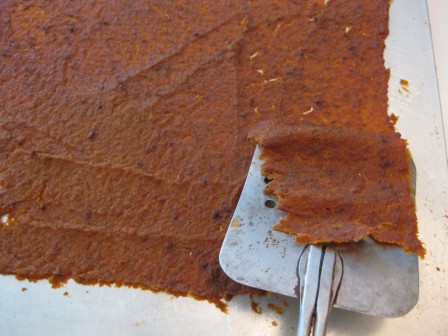
Put your cookie sheet into the oven and let it “dehydrate” in there until the fruit leather is pliable…not wet, but not hard & brittle either. Mine took about 2 1/2 hours to get done; you’ll want to check on yours every now and then. A little bit was over-done and I had to let the cookie sheet cool a little before I could pry it off, and another little patch was under-done, so I just put it back in the oven for a little while. But most of it was easily peeled off the cookie sheet with a flexible metal spatula; this whole process would probably be even easier if you use parchment paper.

The fruit leather is done.

Peel it off the cookie sheet with a flexible metal spatula. If it's not over-done, it should peel right off with no problem. If it's under-done, it will be too wet to peel off...so just pop that part back into the oven for a while.

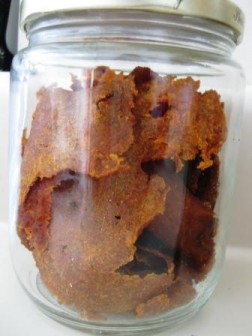
Store in a glass jar. I stored mine in the fridge, but you can also store it at room temperature.

How To Decaffeinate Your Tea

I just love tea! Something about having a hot cup of tea in my hands is very comforting. When I lived for a short while in New Zealand, one of my favorite things to do was make myself a cup of tea, and take it outside into the chilly grayness of the late-winter afternoon and with one hand pull up little weeds from the flower beds while sipping steaming tea from the other hand. That’s a fond memory I’ll never forget.

Anyway, over the past few years I’ve become less and less tolerant of caffeinated tea. Caffeine used to do absolutely nothing to me, so I could drink it and not notice anything one way or the other. But gradually it began to affect me in a negative way. I stay away from any caffeinated drinks now because they make me feel jittery and nauseated (too much strong dark chocolate also has the same effect).

But I love black tea with cream…especially Earl Grey. And the kitchen at work is always stocked with tea bags, hot water, and half & half. But the tea bags are fully-caffeinated English Breakfast black tea, Earl Grey, and green tea. What to do? DIY decaffeination! Here’s my method:

1. Put a teabag into your mug. Fill the mug with very hot (or boiling) water. (Fill the mug a quarter full, half full, or totally full…it doesn’t matter.)

2. Let the teabag sit in the water for 30 seconds.

3. Pour out the water (but keep the teabag!)

4. Now you’re ready to brew your actual cup of tea; fill your mug with very hot (or boiling) water, steep your teabag for as long as you prefer, add milk, cream, or sugar if you want, and enjoy!

I’ve been decaffeinating my own tea for a few years now, and this method really works for me. Caffeine is very water soluble and most of it leaches into the water within the first 30-45 seconds of brewing your tea. I’ve read that this method removes about 80% of the caffeine…about the same as the pre-decaffeinated tea that you can buy at the store. (In fact I like how the little “pre-brew” process softens the bitter bite of the tea.)

Now, I’ve read some silly debates about using hot water versus boiling water…and how you “must never” use this method with tea bags — only with loose tea, and so on. In my opinion, it’s baloney. If the water is hot enough to make tea, it’ll work. If you use tea bags, it’ll work. If you use loose tea, it’ll work.

I use this method daily, though I do get some strange looks in the office kitchen from people who wonder why I’m standing idly at the counter, staring into space with a half-full mug of tea in my hands!

In any case, it’s a trick that definitely comes in handy!

*****

« Older posts

© 2024 The Herbangardener

Theme by Anders NorenUp ↑