Kitchen / Garden / Sanctuary - Urban Homesteading to Nourish Body + Spirit

Tag: food storage (Page 3 of 4)

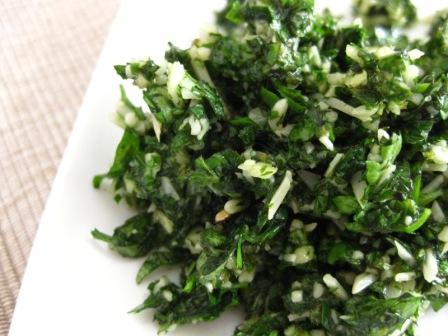
Nourishing Mixed-Herb Pesto

Oregano, parsley, & cilantro pesto

Pesto is such a versatile condiment — it’s wonderful over fish or chicken, on crackers, tossed with pasta, spread over eggs or sauteed zucchini, in a roasted vegetable sandwich, used as a pizza sauce, or straight off the spoon. And although basil pesto is the most common type, pesto can be made with any combination of herbs. In fact, I think I like mixed-herb pesto even better than basil-only — it has more layers of flavor! And don’t forget that herbs are mineral rich and packed with nutrition, and can definitely be thought of as a medicinal food.

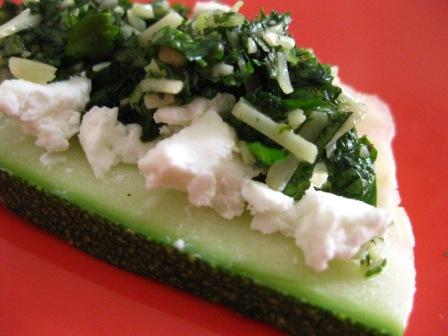
Make a healthy snack with goat cheese and mixed-herb pesto on a raw zucchini slice "cracker"

Use any combination of fresh herbs that you want; pesto is a great way to use up heaps of herbs at once, such as the cilantro sitting in the back of your fridge and the overabundance of oregano in your garden. It’s also a nice way to preserve those herbs for use later in the year; use ice cube trays to freeze pesto into small portions and thaw as needed over the winter.

One nice combination is oregano, parsley, and cilantro — this is probably my favorite. Use equal parts…or not! Just combine according to the amounts you have. I do suggest, however, that you go easy on the fresh sage if you choose to use it; it lends an overpowering (and not all that tasty) element. Also, mint is nice as an added “splash” but go easy on that too, since it can also overpower.

My basic pesto recipe is as follows, though you’ll probably find you don’t even need a recipe. Just gather a bunch of herbs, add a clove or two of garlic (start with less garlic and add more later if needed), add nuts, cheese, and salt, and then olive oil to form a paste.

Basic Herb Pesto

1 cup fresh herbs, packed

2 garlic cloves, small-medium size

3 Tbsp olive oil, approx.

3 Tbsp shredded parmesan cheese, approx.

1-2 Tbsp pine nuts or walnuts, approx. (optional)

Salt to taste

Put everything into the food processor and blend until a paste is formed.

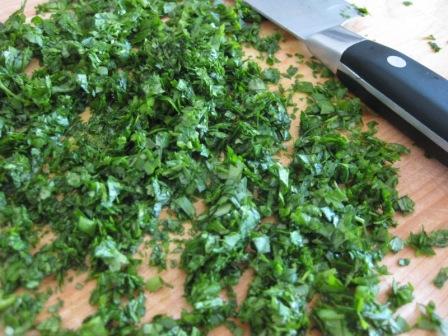
Instead of using the food processor, though, I like to make mine the old fashioned way using a knife and cutting board. If you use a nice sharp chopping knife, the task goes faster and is more fun than the food processor (at least for me — I get angry at my food processor when making pesto!). The key is definitely the sharp knife. Chop your herbs, garlic, and nuts as finely as possible, add the parmesan (chop it up too, if you like), and then add olive oil until a loose paste is formed. You can replace a little of the olive oil with water if you want. Add salt to taste. The texture will be more rustic than paste-like, but that’s not a bad thing. 😉

Making pesto without a food processor

Homemade Pumpkin Pie Fruit Leather

I think it’s time for another recipe! It’s been a while since I’ve posted one. I’m still off work for another few days as I continue to recover from my foot surgery, so I’ve got extra time at home which is wonderful! I can’t be in the kitchen all day since I need to continue to rest a lot and elevate my foot, but I could never completely stay away from my kitchen 🙂 — crutches or not — so I’ve been experimenting here and there with some simple recipes.

Today’s recipe for homemade fruit leather is definitely simple! I used to eat fruit leather all the time when I was younger, but I’d pretty much forgotten about it, even though it’s a yummy & very portable snack. Recently I came across the idea of homemade fruit leather, and decided to experiment using a can of pumpkin that’s been sitting in the back of the pantry for over a year (or maybe two…). Voila! Pumpkin Pie Fruit Leather. It’s so good that I had to restrain myself from eating the whole entire tray, and it’s incredibly easy to make!

If you don’t have, or don’t want to use, canned pumpkin, just substitute cooked pumpkin (or winter squash) puree.

Also…if you don’t have pumpkin, you could use this basic method to make fruit leather from cooked/pureed apples, pureed peaches (no need to cook them first), plums, berries, bananas, or a combination of fruits — and with these fruits, there’s no need to add any spices unless you want to! If I have an abundance of tomatoes this year, I think I’ll even try it with tomatoes. Anyway, here’s the recipe:

Pumpkin Pie Fruit Leather

2 cups (or one 15-oz can) cooked pumpkin or winter squash puree

1/4 cup honey

1/4 – 1/2 tsp cinnamon (depending on your taste…I used a 1/2 tsp because I like the bold taste of spices)

1/4 – 1/2 tsp ginger powder, optional

1/4 tsp powdered cloves

1/8 tsp nutmeg

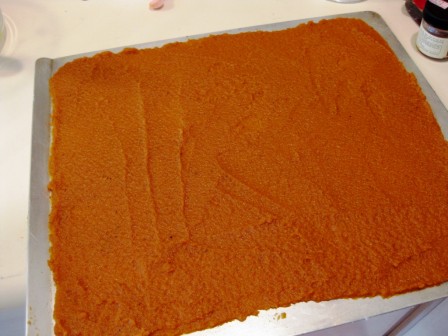
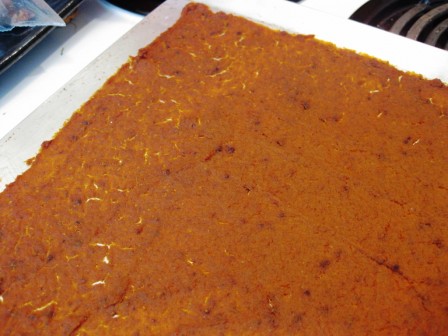
Preheat oven to 200* F. (If you have a dehydrator, you can use it for this recipe. Dehydrate at 140*.) Mix all ingredients well. Generously oil a cookie sheet (really slather the oil on…it’ll make it much easier to peel off the leather!), or use parchment paper. Using a spatula, spread your mixture on the cookie sheet, taking the extra time to spread as thinly and evenly as possible; this took me a few minutes to get it just right. Spreading it as evenly as possible is important because otherwise some parts will be over-done and other parts will be under-done (which will probably happen to some extent anyway, but at least you’ll be minimizing it).

Spread the mixture as evenly and thinly as possible on the oiled cookie sheet.

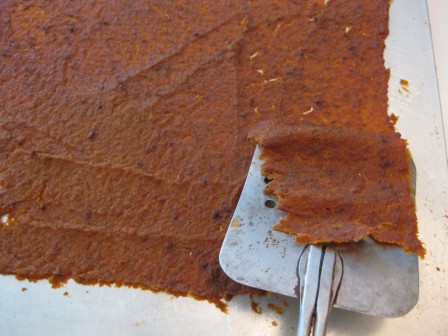
Put your cookie sheet into the oven and let it “dehydrate” in there until the fruit leather is pliable…not wet, but not hard & brittle either. Mine took about 2 1/2 hours to get done; you’ll want to check on yours every now and then. A little bit was over-done and I had to let the cookie sheet cool a little before I could pry it off, and another little patch was under-done, so I just put it back in the oven for a little while. But most of it was easily peeled off the cookie sheet with a flexible metal spatula; this whole process would probably be even easier if you use parchment paper.

The fruit leather is done.

Peel it off the cookie sheet with a flexible metal spatula. If it's not over-done, it should peel right off with no problem. If it's under-done, it will be too wet to peel off...so just pop that part back into the oven for a while.

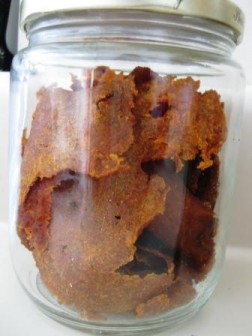
Store in a glass jar. I stored mine in the fridge, but you can also store it at room temperature.

UPDATED Kitchen Tip: Keeping Olive Oil Fresh with…Water?

Remember when I posted this in August? Maybe not? Just as well, because I’ve updated it. Scroll down to the “Update!” section to read how I got the water out of the bottle so I could use up the last bit of olive oil. 😉

Storing Olive Oil with Water

We’ve all heard that heat, light, and air cause oils to oxidize and go rancid. I used to keep my olive oil in the fridge, but it would solidify and I had to plan ahead if I wanted to use it. This was too inconvenient, so I stopped doing it. Recently, I “upgraded” and bought a more expensive Tuscan olive oil at Costco that came in a dark-colored bottle. The dark color prevents the oil from light exposure (especially at the store with all its bright lights). To lessen the oil’s exposure to air, I’ve started topping up my olive oil bottle with water!

After I use any oil, I pour more water into the bottle so that it’s always filled to the top (where there’s only a tiny bit of air between oil and cap). At first, it felt really weird to pour water into the bottle. But since they “mix like oil and water” :-), there’s no problem because the water just settles to the bottom. When using the oil, I just pour carefully so that no water comes up to the surface. I’m wondering what’ll happen when I get to the bottom of the bottle, when there’s only a bit of oil left. Maybe just saute something with it, and let the water boil off? If I ever do get to the bottom of this giant bottle, I’ll let you know what happens.

UPDATE! Okay, I did eventually get to the bottom of the bottle. Toward the end there, I had to pour much more carefully so that the water didn’t come out with the oil. Annoying. When I’d had enough of that, I thought of a clever little way to get the water out: put the bottle in the fridge…on its side…tilted downward, as seen below. Last night’s dinner, covered in foil, works great for supporting the bottle:

Separating oil from water in the fridge

Fridge-eye view. The oil has solidified and I can now just pour off the water.

That way, the oil solidifies from the cold and you can open the cap and pour out all the water! Smart huh. Be sure to set the bottle so that it’s tilted slightly downward; that way, the oil doesn’t solidify and block the opening of the bottle.

Okay, back to the original post:

I’ve read conflicting information (are you as tired of conflicting information as I am??) about storing olive oil in the fridge. Some say yes, some say no. Here’s one perspective, with some interesting FAQs about olive oil, “quality” standards (or lack thereof, it turns out), and storage:

http://www.longmeadowranch.com/Food/About-Olive-Oil

I think I’ll transfer my bottle to a cabinet under the countertop, but away from the stove. I figure I’ll be covering all the bases: keeping the olive oil cool (near the floor, away from the stove), in a dark place (in the cabinet), with minimal air exposure (if I keep topping it up with water).

Do you have a “best practices” method for storing your olive oil? I’d love to know what it is!

Make Your Own Bubbies Pickles

Have you ever had Bubbies? It’s the brand against which all other pickles are judged, at least in our house! My hubby is a huge fan. And if you like garlic, you’ll probably appreciate Bubbies, too. They’re not made with vinegar, but rather are made the old-fashioned way, though lacto-fermentation in brine. (I have a Bubbie’s Bread & Butter Chips pickle recipe too, which is made with vinegar.)

So for my very first attempt at homemade pickles, I turned the Bubbies jar upside down, identified which spices were in there, selected what looked like a good lacto-fermented pickle recipe, and hoped for the best as I sacrificed a couple of humongous garden cucumbers for the Great Pickle Experiment.

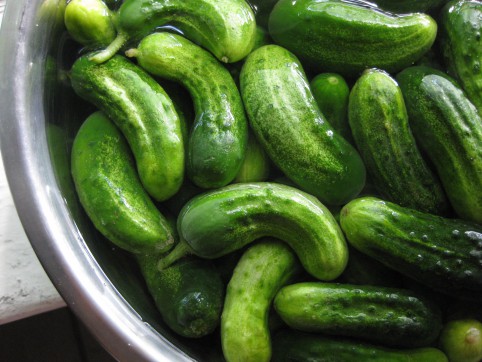
The results were shocking…in that I was shocked I had made something so tasty and convincing on the very first try. I certainly had expected the worst. In fact, I thought Hubby was being sarcastic when he tried the first one and told me they were awesome. He couldn’t stop talking about them! I was skeptical until I tried one, too. YO! Later, I did a taste test of my pickles compared to Bubbies; I actually liked mine even better! In the photo above, I used my large garden cucumbers, but to get the true Bubbies experience, go for the really small cukes; I find these at the farmer’s market, or at ethnic grocery stores. Go for organic if you can (which would be an upgrade from Bubbies, since theirs aren’t organic). Of course the really big cucumbers are fine to use, but because of their size, their insides won’t be quite as firm and crunchy as a smaller cucumber would be, and their skin will be a little tougher.

*****

Lindsey’s Bubbies Pickle Recipe:

1 gallon glass jar or ceramic crock

1/2 a gallon of warm water (tap water is fine)

A handful of fresh, clean grape leaves, oak leaves, or cherry leaves (optional — they supply tannins to keep the pickles crunchy) (UPDATE: raspberry & blackberry leaves work too, but have a stronger flavor than grape leaves)

3-4 lbs of cucumbers (small to medium is ideal, but if all you have is large, cut them into spears)

5-6 Tbsp non-iodized sea salt. I use Redmond RealSalt brand unrefined sea salt. (I usually prefer 6 Tbsp. Using 5 Tbsp of salt will yield a less salty pickle that my hubby prefers, however you may have to contend with more white film, or “kahm yeast,” on the surface of the brine during fermentation. More about kahm yeast in the instructions.)

2 – 3 heads of garlic, separated into cloves, peeled, & roughly chopped

3 Tbsp whole dill seed

2 Tbsp whole coriander seed

1 tsp whole mustard seed (brown or yellow, doesn’t matter)

1 tsp whole peppercorns

1 tsp fennel seed

1/2 tsp red pepper flakes

*****

Ingredients for Homemade Bubbie's Pickles

Ingredients for Homemade Bubbies Pickles. My homegrown garlic was a little small, so I used 4 heads.

*****

Directions:

Rinse the cucumbers, making sure the blossoms are removed. Soak them in very cold water for a couple hours (if they’re not straight off the vine).
In a separate clean jar (not the one you’ll be using for the pickles), dissolve the salt into the 1/2 gallon of warm water. Set aside — this brine will be one of the last things you’ll add.

Into the clean, gallon jar/crock you’ll be using for the pickles, drop in the garlic, dill, coriander, mustard, peppercorns, fennel, and red pepper flakes.

Then, put the cucumbers into the jar. If you’ve sliced large cucumbers into spears, pack the spears vertically into the jar.

Pour the salt water solution (a.k.a. the brine) over the cucumbers.

Now, place the cleaned grape/oak/cherry/raspberry/blackberry leaves into the jar. My jar has a somewhat narrow mouth, so the grape leaves form a nice plug at the top of the jar so the cucumbers (which will rise to the top after you pack them in) don’t go above the brine.

You want your cucumbers (and leaves) to be completely submerged in the brine at all times. If they’re sticking up above the brine, they’ll get moldy. If your jar has a wide mouth, you may need to use a couple of plates to keep everything submerged. Another idea is to nest a smaller glass jar into the opening of the larger jar to keep everything down. Or, use a scrubbed & sterilized rock.
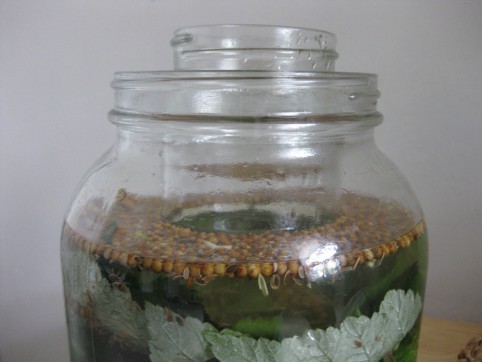
Using nested jars to keep everything submerged.
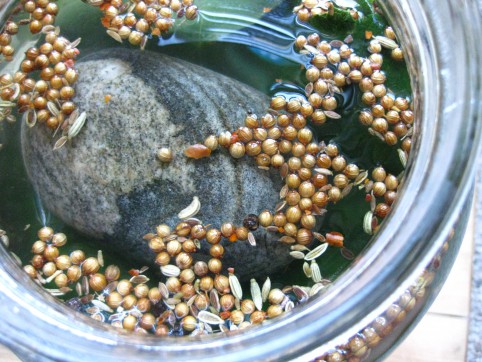
Another idea: use a rock to keep everything submerged.

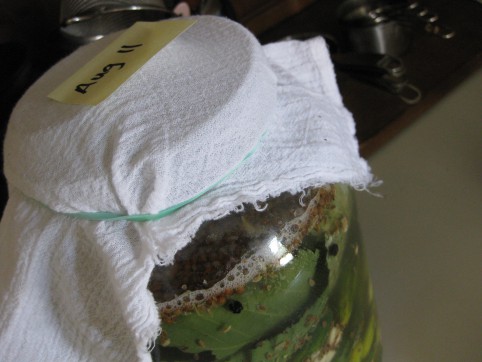
If the brine still doesn’t cover the cucumbers, make more brine solution using: 1 scant Tbsp sea salt to one cup of water. Cover your jar with its lid (loosely), or with a cloth to keep bugs & dust out. If you see a thin film of white scum growing on the surface of the water, just skim it off as often as you can, but don’t worry if you can’t get it all. This is “kahm yeast;” it won’t harm anything, but do try to keep up with it otherwise it can affect the flavor of your pickles.

Sometimes, during pickle making, some of your garlic cloves will turn blue. This is not a problem. The Colorado Extension Service website says this about blue garlic:

Blue, purple or blue-green garlic may result from immature garlic or garlic that is not fully dry, from copper pans, or from a high amount of copper in the water. Garlic contains anthocyanin, a water-soluble pigment that under acid conditions may turn blue or purple. A blue-green color also may develop in pickles made with stored red-skinned garlic. Except for blue-green color resulting from an abnormally high copper-sulfate concentration, such color changes do not indicate the presence of harmful substances.

Your pickles will be ready after 1-4 weeks — depending on the temperature in your house. Our pickles are usually ready after 10 days on the counter in our warm apartment (average of 80-85°F) in late summer. Every couple days, do a taste test of your pickles. They’re ready when they taste done to you! Once they taste done, transfer the jar into the fridge to slow fermentation. Once they’ve fermented and are in the fridge, you can remove the grape/oak/cherry/raspberry/blackberry leaves and you don’t need to worry as much about the pickles being completely submerged in the brine.

Enjoy! These will last months and months in your fridge. I once kept a batch around for 9 months and it was still good.

And the brine is good stuff too; I like to drink it straight. It’s full of beneficial bacteria and good for your digestion! Since it’s salty, it would be especially good after a workout.

*****
How to Harvest Onions & Garlic

How to Harvest Onions & Garlic

The onions have finished curing, and are ready for storage in the fridge.

I love growing my own onions and garlic. They’re such easy crops, and they store really well in the fridge. During the summer, I’m always overwhelmed with produce that must be eaten NOW, so when I harvest these crops, I’m always grateful for their long storage capabilities!

Onion & Garlic Harvesting 101:

When the leaves (“tops”) have mostly died back (turned mostly brown…no longer green and growing…though there may still be some green in a few of the leaves), pull or dig the onions or garlic out of the garden. (Click here to find out exactly when to harvest your garlic.)

Thoroughly wash off any clinging soil.

Put your harvest into baskets in one layer — so that air can circulate around them — and leave them in a shed, garage, or on a covered porch for 2-3 weeks. Make sure neither water nor animals can get to them. After 2-3 weeks, cut off the dead leaves and inspect each onion for softness or mold. Expect to lose about 10-20% of your harvest to softness or mold. Transfer the rest into a bag in the fridge (or wherever you store your onions & garlic).

Harvest garlic & onions when tops have mostly turned brown

Harvest garlic & onions when tops have mostly turned brown. Put them into baskets in one layer (unlike the picture above!) and leave in a sheltered, outdoor place for 2-3 weeks to "cure."

« Older posts Newer posts »

© 2025 The Herbangardener

Theme by Anders NorenUp ↑