Kitchen / Garden / Sanctuary - Urban Homesteading to Nourish Body + Spirit

Tag: gluten free (Page 2 of 7)

Breakfast Salad

***

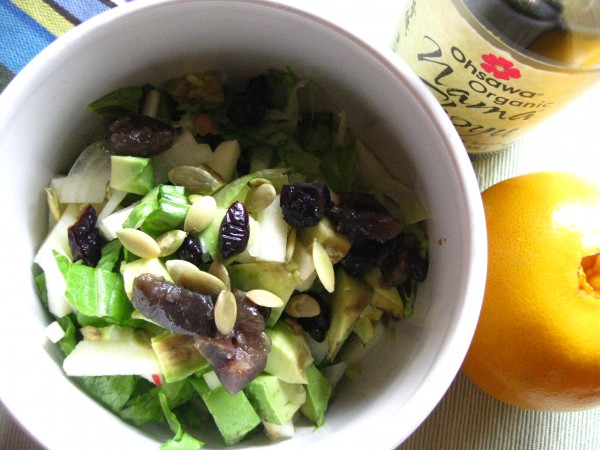
I love salads for breakfast!

I chop everything into small pieces, including the lettuce, and eat the whole salad with a spoon.

This particular breakfast salad contained:

*

Romaine lettuce

Apple

Avocado

Onion

Dried Cranberries

Pepitas

Stewed Figs

+

Apple Cider Vinegar

Freshly squeezed Orange Juice

Nama Shoyu Soy Sauce

Salt/Pepper

(and no oil, although you could certainly add some if you like)

*

Absolutely delicious!!!

***

Homemade Arnold Palmer

***
Iced tea and lemonade — it’s a great combination!

I’ve been perfecting my AP recipe over the summer and I’ve got it just the way I like it. You may want to make slight adjustments according to your tastes of course.

(I find myself craving and making Arnold Palmers when I’ve got some extra nausea goin’ on and plain water doesn’t appeal. So keep it in mind for hydration during times of illness, too.)

***

Lindsey’s Homemade Arnold Palmer

1 tsp good quality black tea OR 1 teabag (for APs, my favorite happens to be Mountain Rose’s bulk Nepalese Black Tea)

3 Tbsp freshly squeezed lemon juice (~ 1 medium lemon)

2 Tbsp honey or maple syrup

1 cup cold water

1 cup ice, OR an additional 1/2 to 1 cup of cold water

***

Boil water for brewing the tea. (Decaffeinate the tea first, if you like.)

Then, in a mug or measuring cup, pour 1/2 cup of boiling water over the tea and allow it to steep for several minutes — only 1/2 cup because you’re making a concentrate.

While the tea is steeping, in a tall glass combine 1 cup of cold water, the lemon juice, and the honey or maple syrup. (If you’re using honey, you may need to dissolve it in a little bit of warm water first.)

Once your tea has steeped for at least several minutes, strain out the leaves and pour into your glass with the water/lemon/honey.

Add either 1 cup of ice OR 1/2 to 1 cup of additional cold water — depending on how cold you want it, how soon you want to drink it (waiting for the ice to melt, you know), and how strong you like it. I usually like mine not-as-cold, ready immediately, and on the more dilute side, so I add the full 1 cup of water in place of the ice.

***

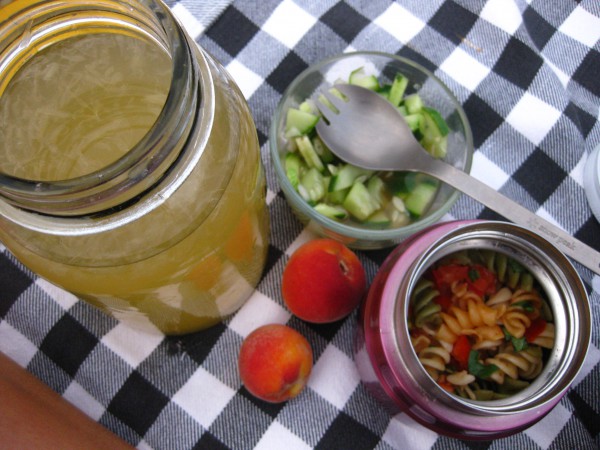
It's lovely to take on picnics

 *****

Soup of the Day

This was a delicious little lunch for today. I pulled the beef broth out of the freezer, and the rest is from my own garden! With everything cut into little pieces, it cooked up in just a few minutes.

beef broth

scallions (white part)

celery

kale

potatoes

…and at the table, I stirred in some raw homemade sauerkraut with some of its juice, which leant a wonderful brightness to the soup!

And I just remembered I have some soaked & cooked lentils, which I think would also go well in this soup.

*****

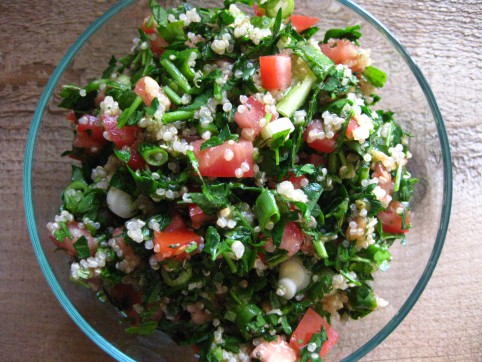
Classic Tabbouleh

One of my all-time favorite foods, ever! This is my mom’s famous recipe.

***

And since my diet has gone essentially low fat vegetarian, which is presently all my body will handle, this stuff is my mainstay. I plow through an entire batch all by myself every 2 or 3 days! And since I can’t eat much oil at all, I change up the dressing to be only a small drizzle of oil, and tons of lemon juice, and I’ve grown to really love it this way!

Also, tabbouleh is normally made with bulghur. I always make it with quinoa now since I love the taste of it and it’s more nutritious and also a complete protein — but bulghur is of course delicious too!

***

Mom’s Tabbouleh

1/2 cup uncooked bulghur or quinoa*

1-2 cups chopped tomatoes — (2 cups = about 1 lb) (I always make it with 2 cups of tomatoes now, but if you do, you may need to increase the amounts of lemon juice and olive oil slightly)

2 cups finely chopped parsley — chop first and then measure (about 1 medium-large bunch parsley…but do measure it first)

1/2 cup chopped green onion or 1/3 cup finely chopped white onion

1 level Tbsp dried mint, crushed (or 2 Tbsp fresh mint, finely chopped)

1/4 – 1/3 cup fresh lemon juice

1/3 cup olive oil

Salt (about 1 to 1 1/2 tsp), or to taste

Pepper to taste

***

Cook the 1/2 cup bulghur or quinoa* (1/2 cup grain to 1 cup boiling water + dash of salt; cover, simmer till water’s absorbed, about 20 minutes). Cool it to room temperature. If I’m in a hurry, I’ll put the hot quinoa into the freezer to cool it quickly.

Mix everything together in a big bowl. But if you don’t think you’ll eat all of it within a day or two, mix the dressing separately, and add it to the tabbouleh right before you eat a helping of it. That way the tabbouleh will stay fresh several days longer in your fridge.

Enjoy!

*****

*Cooking quinoa:

Be sure to rinse the quinoa well to remove bitter saponin residue. The quick way to cook it is to boil your water (ratio of 1 cup grain to scant 2 cups water), add some salt, add quinoa and cover, simmering until the water is absorbed, about 20 minutes.

However, if you’re able to plan ahead enough, it’s much better, healthwise, to soak your quinoa for at least 12 hours to make it more digestible — the way traditional cultures do. Soaking grains neutralizes phytic acid (which binds to essential minerals like calcium, magnesium, iron, and zinc, and blocks their absorption) as well as enzyme inhibitors in the grain. Soaking also breaks down difficult-to-digest proteins and encourages the production of beneficial enzymes which in turn increases the vitamin (especially B vitamin) content of the grain.

So…

To soak quinoa: Thoroughly rinse 1/2 cup of dry quinoa to remove bitter saponin residue. Put 1 Tbsp of lemon juice or vinegar into a measuring cup and fill to the 1/2 cup mark with warm water, then mix with the quinoa in a bowl. Cover and let sit at room temperature for at least 12 hours, or up to 24. When you’re ready to cook, rinse and drain the quinoa well, and place in a saucepan. Add a scant 1/2 cup of water, and a little salt. Bring to a boil and simmer, covered, until all the water is absorbed, about 20 minutes. Cool, and proceed with the recipe.

*****
Make Your Own Sushi

We love sushi at our house, though we don’t often go out for it. Actually though, I prefer to make my own — because then I know the source of the fish (which I think is important if you’re eating it raw). And of course it’s also much cheaper to make your own at home. It’s simple and fun, too!

Let’s begin!

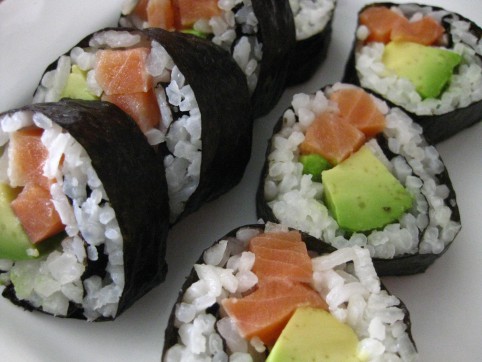
To make one batch of sushi rolls, you’ll need the following. This can easily be multiplied. Today we’ll be making a Raw Salmon-Avocado Roll. But you can fill your sushi roll with anything! That’s part of the fun!

***

You’ll need:

1 sheet of toasted nori seaweed

1/4 cup raw sushi rice or short-grain rice + 1/3 cup water. (This will make enough rice to fill one sheet of nori. To fill about 4 sheets of nori, use 1 cup rice + 1 1/4 cups water.)

half an avocado

about 2 ounces of raw salmon from a company you trust (I always use Lars Larson Trophy Salmon — they’re a Colorado company selling wild, line-caught Alaskan salmon that they process and freeze right on their boat.)

soy sauce to serve with sushi (Nama Shoyu raw soy sauce is our hands-down favorite)

***

1. Cook your sushi rice. You do want to get the actual sushi rice/short-grain rice because you need that sticky texture for your sushi to turn out right. Combine the 1/4 cup rice with 1/3 cup water in a saucepan. Salt the water. Bring to a boil and cover the saucepan. Turn to a very low simmer and cook for 25 minutes. Don’t lift the lid at all during that time.

It’s best to cook the rice right before you plan to make the sushi. Fresh rice gives the best results.

2. While the rice is cooking, slice your avocado and salmon.

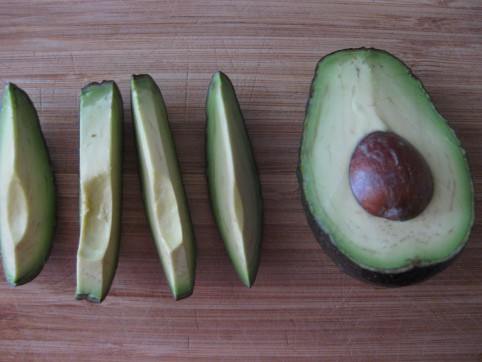
Halve the avocado, then cut into slices

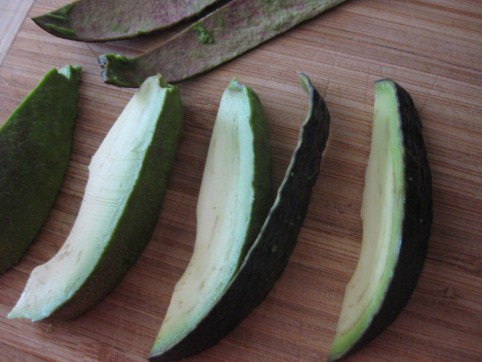
Peel the slices

I like to buy the pre-toasted Nori sheets

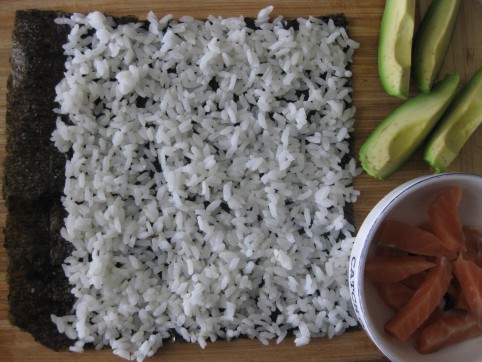
3. Let the rice cool a little and then spread it all out onto your sheet of nori, except for 1″ at the end.

4. Arrange your salmon and avocado down the middle.

5. Wet your fingers with water, and moisten the entire 1″ strip of nori that you didn’t cover with rice. This will be your glue and will hold your roll together.

6. Beginning at the opposite end (not the moistened strip), roll your sushi up. It’s effortless; you don’t need any fancy bamboo sushi rollers or plastic wrap or any other tool. Just your hands! (I threw away my sushi roller many years ago; I found that it just got in the way.)

7. Your roll will end up seam side down, and while you slice it, the gentle pressure will help glue the seam shut.

8. Slice the roll. To get nice clean slices without squashing the roll, work with a nice sharp knife. Wetting it first also helps, as does cleaning it off under running water after every couple of slices.

9. Arrange on a plate and eat it up!

*****

« Older posts Newer posts »

© 2024 The Herbangardener

Theme by Anders NorenUp ↑