Kitchen / Garden / Sanctuary - Urban Homesteading to Nourish Body + Spirit

Tag: gluten free (Page 6 of 7)

Free Shipping Today Only (April 19) at Tropical Traditions!

It’s a Free Shipping Day at one of my very favorite companies, Tropical Traditions! The free shipping will save about $10-15 off your order, so it’s a good day to stock up, or try them out if you haven’t before. I really love this company’s products, and use them daily. Today only, Tuesday April 19th through Midnight EDT, they’re offering free ground-only shipping when you enter coupon code 41118 at checkout.

They have a wide range of high-quality products; here are my favorites:

Moisturizing lotion – I use this every day on my face and hands. It’s the most luxurious stuff, and very gentle since it has only a few wholesome ingredients. Definitely my all-time favorite lotion.

Moisturizing cream – Much thicker than the lotion, this is another favorite. Also great for use on face and hands.

Virgin organic coconut oil – Great for cooking, eating, and also for skin! Has a much better taste than other unrefined coconut oils I’ve tried. I just love this stuff.

Organic raw honey – This is the best-tasting honey I’ve ever had. I like to buy and taste lots of different honeys, and this one always wins, hands down. When I first tried it, my eyes got big and my mouth dropped open; it just has the most amazing taste! Quintessential, flowery honey taste. This stuff is a staple in our house!

Coconut cream concentrate – I love this stuff. LOVE it. The “format” is a little strange, because when you receive it,  it will have settled out into a hardened layer of coconut oil and a layer of dried/finely ground coconut meat. You’ll wonder what to do with it at first; what I do is put the jar into a pan of simmering water and let it sit there until the contents have softened and liquefied, and then I can easily stir it up. Then, I put it in the fridge until it’s hardened again. Once hardened, you can then store it in the fridge or at room temperature (it won’t separate again unless it gets really hot in your house). I usually just eat this stuff plain, it’s so good; I break it into chunks with a knife, and eat it as a snack. Sometimes I’ll eat it dipped in the raw honey, which is a very decadent and extremely delicious snack!!!

Laundry Detergent – This detergent is all we use, now that I’ve discovered it. It works very well, gets the stains out, and lasts a long time, making this a very economical purchase.

Oxygen Bleach – Like OxyClean. If you need a tough stain-fighter/deodorizer for laundry and everywhere else around the house.

*****

Now, I’ve also tried their organic bar soap, and though it was really nice soap, Hubby and I have never seen a bar of soap get used up so fast! It was weird. It just seemed like it was gone in record time. So I wouldn’t get it again. (Though my mom has the liquid soap and really loves it.) I haven’t tried every single product that they sell…but the ones I listed above, I make sure to never run out of!

Also, I bought the Atchara once out of curiosity, and it was extremely strong (even for this vinegar lover!), and a little weird. Not quite a favorite. :-)

*****

And if you’re a new customer and have never bought from them before, you can also get this Virgin Coconut Oil book, with information  & recipes, for free (any time, not just today) by entering my User ID, which is 6032410. When you’re going through the checkout process and you’ve added your shipping address and phone number, you will see the question “How did you hear of us?” Just choose “Referred by a friend” and then a new “User ID” field will appear below that where you can enter my User ID. I also get some sort of little gift if I refer a friend, so that’s nice too.  🙂

(screen shot below)

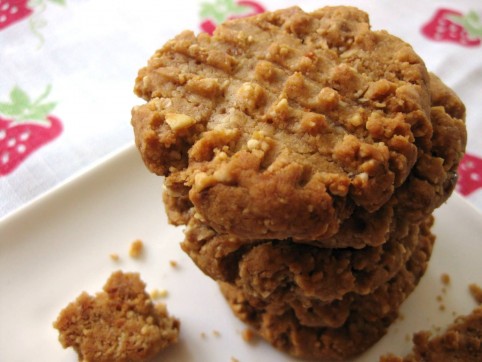
Gluten-Free Peanut Cookies

I tried out a new recipe today, based on the recipe for my favorite Almond Thumbprint Cookies, and it turned out great! If you like classic peanut butter cookies, you’ll love these.

Check it out:

Gluten-Free Peanut Cookies

1 1/2 cups peanuts (I used roasted/unsalted)

1/2 cup melted coconut oil or butter (I like to use 1/4 cup coconut oil & 1/4 cup yogurt or kefir to make these a little less rich for my tummy)

1  1/4 cups arrowroot powder* (start with 1 cup and add more if needed)

1/2 cup sucanat (or a little more if you like)

1/2 tsp sea salt

2 tsp vanilla extract

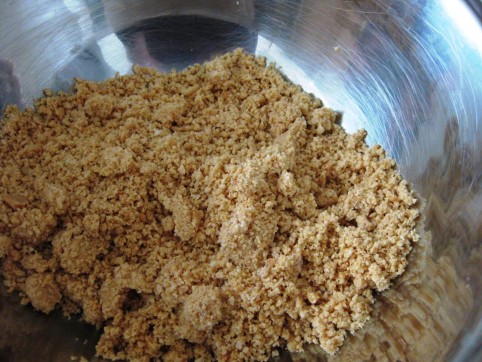
Place the peanuts into a food processor or blender and pulse to a fine meal (but not into peanut butter).

Transfer peanut meal into a bowl, add the rest of the ingredients, and mix well. As mentioned above, start with 1 cup of arrowroot and add more if needed; I always have to add the extra 1/4 cup. The dough should form a nice ball and not be overly sticky.

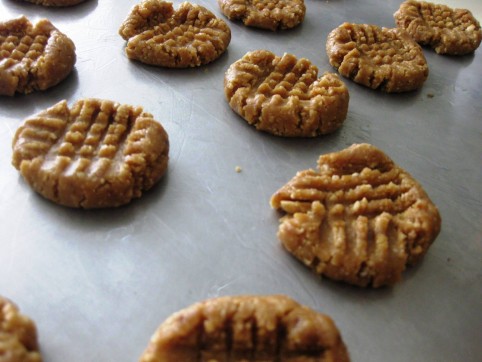
Form dough into tablespoon-sized balls and place on an oiled cookie sheet. On each cookie, make the classic crosshatch pattern with a fork.

Bake at 325° for 20-25 minutes, or until cookies are very lightly browned on the bottom and hold together when you lift them up with a metal spatula.

You’ll want to remove your cookies from the cookie sheet without too much delay. If they cool down and then seem to be glued to the cookie sheet, place them back into the oven to warm up again, and then they’ll be easier to remove.

**********

*Curious about arrowroot? It’s actually not a refined product despite the look of it. It’s the dried, powdered root of a tropical plant that only grows in tidal flats where sea minerals are available. It’s therefore rich in trace minerals and in calcium ash (calcium chloride), which makes it easily digestible. In addition, the calcium ash in arrowroot is very important for maintaining the proper acid-alkali balances in the human body. The downside is its price — $5.35 for a 1lb 4oz bag at our local health food store; however if you have a local Asian store, check with them — I’ve discovered that our local Asian store carries arrowroot for only $2.95/lb!

A Valentine Delight: Almond Thumbprint Cookies

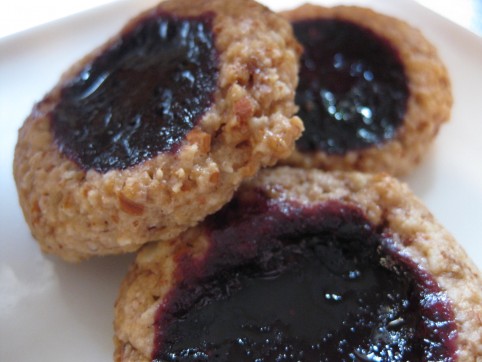
Almond Thumbprint Cookies with homemade wild grape jam

Actually, these grain-free yummies are excellent at any time of the year, but for Valentine’s Day, fill them with any type of pink, red, or purple fruit jam. They are so good!

This recipe is based on the one from p. 528 of my favorite cookbook, Nourishing Traditions. Makes about 24 cookies.

Almond Thumbprint Cookies

1 1/2 cups whole almonds

1/2 cup melted coconut oil or butter (I like to use 1/4 cup coconut oil & 1/4 cup yogurt or kefir to make them a little less rich for my tummy)

1  1/4 cups arrowroot powder* (start with 1 cup and add more if needed)

Rounded 1/2 cup sucanat

1/2 tsp salt

1 tsp vanilla extract

1 tsp almond extract

Fruit jam of your choice

Place the almonds into a food processor or blender and pulse to a fine meal. Transfer almond meal into a bowl, add the rest of the ingredients, and mix well. As mentioned above, start with 1 cup of arrowroot and add more if needed; I always have to add the extra 1/4 cup. The dough should be very nice and workable — not overly sticky.

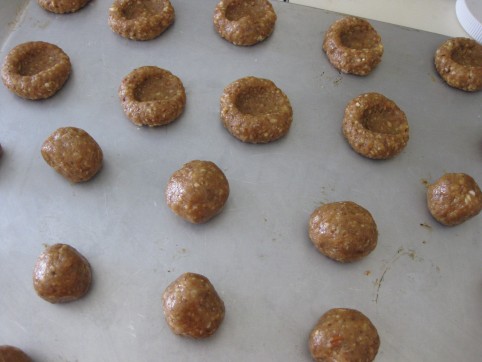
Form dough into tablespoon-sized balls and place on an oiled cookie sheet. Make a thumb print in each cookie and fill the indentation with jam.

Bake at 325° for 20-30 minutes, or until cookies are lightly browned on the bottom. I’ve both under-baked and over-baked these, and they’re good no matter what; however I’ve noticed that if they’re under-baked they do tend to fall apart a little more easily.

Cool a bit and remove from the cookie sheet while still warm. If they seem to be glued to the cookie sheet, place them back into the oven to warm up again, and then they’ll be easier to remove.

**********

*Curious about arrowroot? It’s actually not a refined product despite the look of it. It’s the dried, powdered root of a tropical plant that only grows in tidal flats where sea minerals are available. It’s therefore rich in trace minerals and in calcium ash (calcium chloride), which makes it easily digestible. In addition, the calcium ash in arrowroot is very important for maintaining the proper acid-alkali balances in the human body. Its downside is the price — $5.35 for a 1lb 4oz bag at our local health food store.

Delicious Chocolate-Orange Macaroons

Well it’s obviously been far too long since I’ve posted a recipe from one of my favorite food groups. So here!

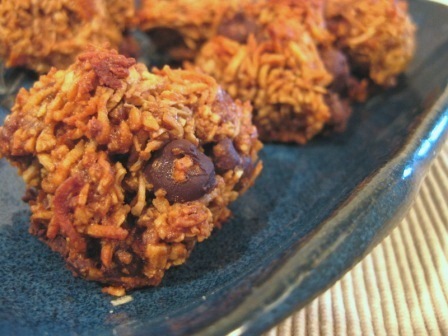
You should definitely try out these macaroons sometime — they’re delicious! I made mine with granulated coconut sugar, which darkens the color of the macaroons as you can see in the picture above. They’re also gluten free if you make them with arrowroot powder instead of whole wheat flour. In fact, I prefer them with arrowroot because of the crunchy-edge-soft-center texture that results!

Chocolate-Orange Macaroons

2 cups unsweetened dried coconut, shredded

2/3 cup sugar (granulated coconut sugar or sucanat are health-minded choices…but use white sugar if it’s important that they be white, like typical macaroons)

1/4 cup arrowroot powder* OR whole wheat flour

1 Tbsp fresh orange zest

1/8 teaspoon salt

1/4 tsp almond extract

2 egg whites, unbeaten (I like to freeze egg whites for times like this)

2 tablespoons coconut oil or unsalted butter, melted

1/4 cup chocolate chips

Preheat oven to 350 degrees F.

In a large bowl, mix the coconut, sugar, flour, orange zest, and salt. Stir the almond extract into the egg whites. Then mix the egg whites and coconut oil into the dry coconut mixture. Stir well. Now, mix in the chocolate chips.

Either generously oil your cookie sheet, or line it with parchment paper (the macaroons will be easier to remove from parchment). Form tablespoons of dough into balls and place onto the cookie sheet; they won’t really expand, so you can place them pretty close together. Bake about 10 minutes or until they’re firm to the touch and lightly browned on the bottom.

Cool before serving, and enjoy!

**********

*Curious about arrowroot? It’s actually not a refined product despite the look of it. It’s the dried, powdered root of a tropical plant that only grows in tidal flats where sea minerals are available. It’s therefore rich in trace minerals and in calcium ash (calcium chloride), which makes it very easily digestible. In addition, the calcium ash in arrowroot is very important for maintaining the proper acid-alkali balances in the human body. Its downside is the price — it’s $5.35 for a 1lb 4oz bag at our local health food store.

How to Make Sauerkraut

Today I’m going to show you how to make your own old-fashioned, raw, lacto-fermented sauerkraut. The first time I made sauerkraut, I was sure I was doing something wrong because it was so easy!

Ingredients:

Cabbage – red or green (or a combo), organic

Sea salt – See my salting chart below, plus you may need more to mix up extra brine. (Any non-iodized salt will do, but unrefined sea salt is better for your body.)

*****

Here’s my salting chart. These are just guidelines — if you want, you can add a little more salt in the summer and a little less in the winter.

10 tsp salt per 5 lbs vegetables

5 tsp salt per 2 ½ lbs vegetables

2 tsp salt per 1 lb vegetables

1 tsp salt per ½ lb vegetables

½ tsp salt per ¼ lb vegetables

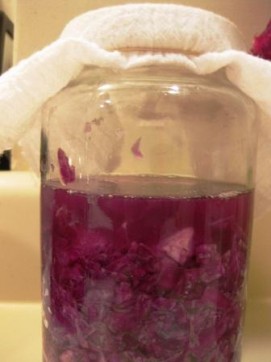
Cabbage becoming sauerkraut. (Little bits of cabbage clinging to the side of the jar --like in the picture-- should be scraped down into the brine, otherwise they'll get moldy.)

Chop, shred, or grate your cabbage — coarse or fine, however you like it. Sprinkle the salt onto the cabbage and mix it up. I let mine sit on the counter for several hours or overnight (this step is in place of pounding) so that the salt can begin to draw water out of the cabbage. The water contains nutrients, and these nutrients then become the substrate for the growth of the lactic acid bacteria which is what turns your cabbage into kraut. (Steinkraus, Handbook of Indigenous Fermented Foods, p.120.)

After the cabbage is wilted and some water has been drawn out, pack the cabbage WITH its water into a glass jar. You really want to pack it in there (use your fist or any kitchen tool), because this will help squeeze more water out. You can also use a specially-made ceramic sauerkraut crock, or a glass or ceramic bowl (anything except metal, since salt and acid can react with metal).

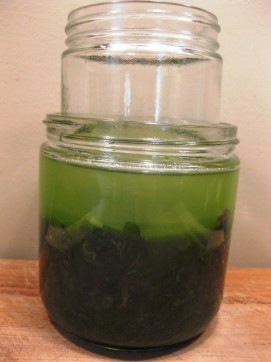
Keep your cabbage submerged under the brine by placing a smaller plate on top and weighing it down with something heavy (a jug of water, a boiled rock, etc.). Or, nest a smaller jar of water inside your larger glass jar. Or, wedge a whole cabbage leaf into the jar to keep everything submerged.

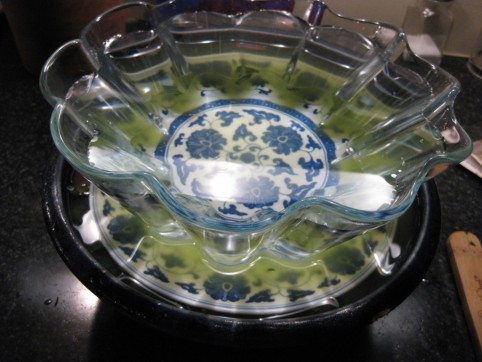
Sauerkraut fermenting in a ceramic bowl, weighed down with a plate & a water-filled bowl.

This is kale, not sauerkraut, but same idea. I particularly like this nesting-jars method for keeping everthing submerged in brine.

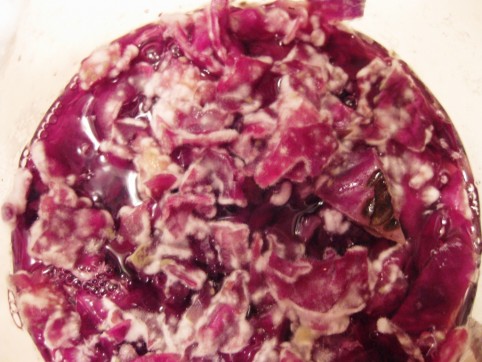
Whatever method you devise, just be sure that all traces of cabbage are completely submerged in the brine. Little bits sticking up above the water line will quickly lead to a moldy situation like the photo below (and if you do end up with mold like this, scrape off the entire top layer of cabbage, but the rest underneath should be fine! The kraut below the mold in this picture turned out great.)  So if you need to mix up some more brine (which is just a fancy name for salt water), use the ratio of 1 tsp salt to 1 cup of water.

This is what happens if your cabbage doesn't stay submerged in brine.

Cover the jar with either a lid (leave it loose to prevent pressure buildup) or a towel to keep bugs out.* Leave it to ferment at room temperature until you like the taste of your kraut. Let your tongue be your guide to done-ness. Taste it every few days, and transfer into the fridge when it tastes the way you like it. I like mine pretty sour, so I usually leave it out for 1-2 weeks or more, depending on how warm it is in the kitchen.

Once in the fridge, your sauerkraut will keep for many months. Don’t throw out the sauerkraut juice; it’s full of beneficial Lactobacillus (lactic acid bacteria) and is said to be a very good digestive tonic. And if you like, add a little of the juice to your next batch of sauerkraut as a starter.

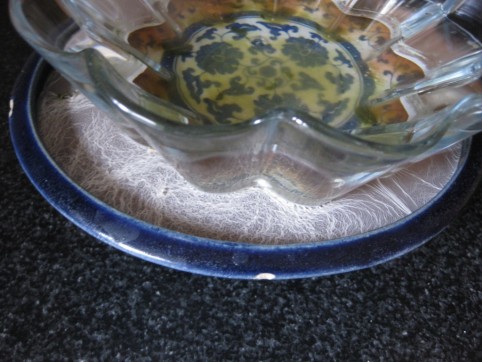
*If you see a white film (“kahm yeast”) develop on the surface of the brine, scrape off what you can each day until the kraut is done. Sometimes I don’t get any film. Sometimes I get a fair amount. There doesn’t seem to be any rhyme or reason. The kahm yeast won’t harm anything, but if you keep getting a lot of it day after day, it can sometimes (not always) impart an off taste to the brine. If that happens, I will actually dump out the brine and replace with new brine. How salty to make the replacement brine? Good question. I’m still experimenting with this. When I did this I used 1 tsp salt to 1 cup water, but then my kraut was almost done fermenting and ready to go into the fridge. In the summer — or if your kraut still has a ways to go — I might increase the ratio to 1 Tbsp salt per 1 cup water. Use your judgment and go for it; fermentation is an imprecise art!

Here you can see the white film (kahm yeast) that sometimes develops on the brine's surface (between the blue bowl and glass bowl).

« Older posts Newer posts »

© 2024 The Herbangardener

Theme by Anders NorenUp ↑