Kitchen / Garden / Sanctuary - Urban Homesteading to Nourish Body + Spirit

Tag: holiday (Page 8 of 10)

An Autumn Road Trip!

Last weekend (Oct 8-11) we went on the most wonderful little road trip through our beautiful state of Colorado! It was a spur-of-the-moment decision; we didn’t have a plan, or even a map! We just got up and went.

Thursday night Hubby came home talking about a trip to the mountains to see the fall colors, and by Friday afternoon we had rented a car and were on the road. Although we had originally planned to camp, we decided not to when we got up to Breckenridge and there were snowflakes in the air! The aspen leaves are done, and winter has arrived up there; it was awfully cold! We needed to go south if we were going to see any fall colors. And so Saturday was a beautiful drive down through the Arkansas river valley past Buena Vista and onto Gunnison where we stayed the night. We were up early Sunday morning and on the road by 8am, stopping for breakfast and tea at a little coffee shop in town, which is something we never do normally, so it really felt like vacation. And being on vacation always makes me re-appreciate hot tea! I normally drink multiple cups of tea throughout the day whenever I want — but on vacation, hot tea becomes a commodity because it’s not readily available. It’s nice when you gain a whole new appreciation for something in your everyday life, isn’t it!

Anyway, Sunday we drove to Ouray in the southwestern area of the state – stopping many times along the way to take pictures and absorb the beauty and the fall colors. There’s such a variety of landforms in that area; I had no idea! The huge and jagged San Juan mountains were an incredible sight. And Ouray! What a place! It’s a sweet little historic town from the late 1800s, dwarfed by steep canyon walls all around. It’s aptly called the Switzerland of America, and even has a Matterhorn look-alike peak. If you find yourself in Colorado sometime, go to Ouray! Even if you live in Colorado, it’s a great destination. I had no idea how beautiful that part of our state is!

While looking for a place to stay the night in Ouray, we stumbled upon the Wiesbaden Hot Springs Spa and asked to see a few of their rooms. They were a little out of the price range we wanted to spend, but upon seeing the little cabin on the hill with screen door and wood burning stove, we had to have it. At $200 a night, it was somewhat overpriced we thought — a definite splurge — but the experience was great. I dream of one day living in a place like that, and it was so fun to “play house” in it, even for just one night. Staying in that little cabin in nature, my heart got a taste of what it loves…and it was very hard to leave and drive back home. Very hard; tears were shed!

One’s heart does not lie; when you’re doing something against your heart’s will, it hurts. F. and I long to quit our rat-race jobs, buy property, and live closer to the earth. It’s been getting pretty difficult lately to get up and go to work each morning since it’s really not what my heart loves (he’s in the same situation with his job too)…but earning and saving money for a homestead is our priority right now. We yearn for a piece of land where we can have chickens, goats, gardens, fruit trees, and a creek for fishing; a slower pace, closer to nature. The desire is screaming louder and louder. It’s hard when you know you’re moving toward something you want, but you’re not close enough yet to see how it’s all going to work out.

Anyway, that’s a topic for another day. Here are some pictures from our much-needed getaway!
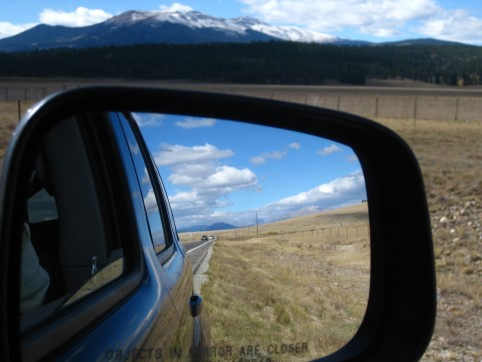
Breckenridge from our balcony

Highway 285 south of Fairplay

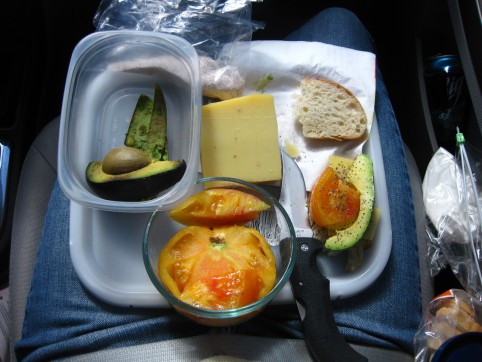
Lunch on the road: Garden tomato, Comte cheese, avocado, sourdough bread, salt & pepper.
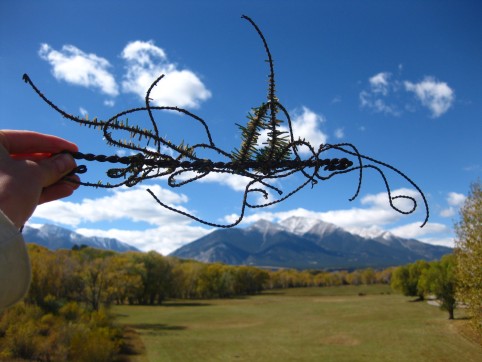
Highway art! An artificial Christmas tree branch, flattened and spontaneously shaped into a sculpture by car tires.
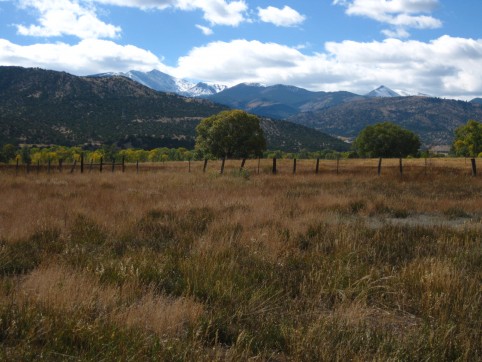
Poncha Springs area

Summit of Monarch Pass

Dillon Pinnacles
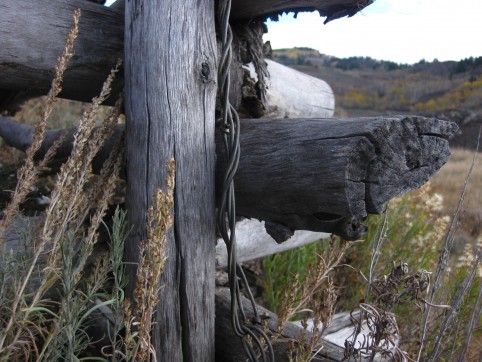

Near Ridgway, CO

Ouray, CO
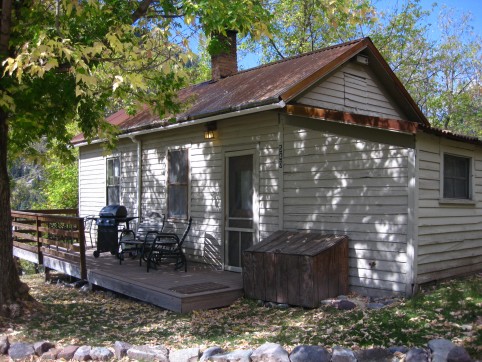
Wiesbaden Hot Springs Hill House
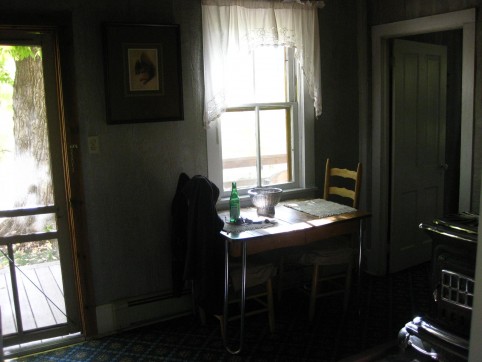
Inside the Hill House cabin
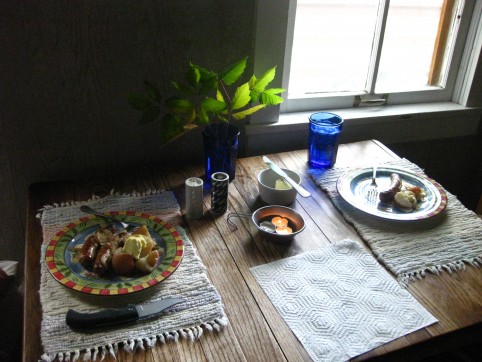
Rustic candlelight dinner in the cabin: grilled sausage, boiled potatoes with butter, sauteed onions. Tea lights in a sierra cup. A bouquet of autumn leaves. Our kind of romance! 🙂

Baby deer with Mom and another female, right next to our cabin!
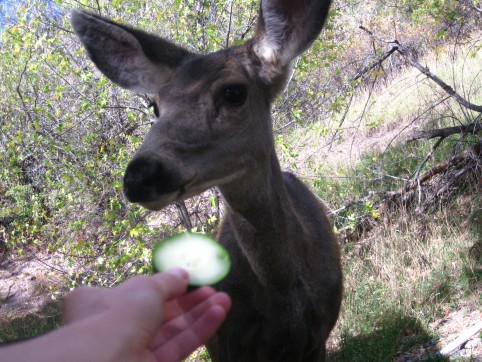
This deer came within a foot of my outstretched hand!


HAPPY EASTER!

Happy Easter to you!

We have a beautiful spring morning here today, and I hope you do, too. Easter is one of my favorite holidays (that, and Christmas)! My family and I will go out later this morning for a light brunch of crepes at a cute little French bistro not far away. I can’t wait! We used to do it up big for Easter, and go out to a fancy buffet brunch at a nice hotel (ohh how I loved that — it was SO special!), but these days, I’m quite happy with something more casual and light. As long as Easter involves chocolate and family, I’m good. 🙂

How about you — what are you doing for Easter today? Do you have any special Easter traditions?

Homemade Pumpkin Pie Fruit Leather

I think it’s time for another recipe! It’s been a while since I’ve posted one. I’m still off work for another few days as I continue to recover from my foot surgery, so I’ve got extra time at home which is wonderful! I can’t be in the kitchen all day since I need to continue to rest a lot and elevate my foot, but I could never completely stay away from my kitchen 🙂 — crutches or not — so I’ve been experimenting here and there with some simple recipes.

Today’s recipe for homemade fruit leather is definitely simple! I used to eat fruit leather all the time when I was younger, but I’d pretty much forgotten about it, even though it’s a yummy & very portable snack. Recently I came across the idea of homemade fruit leather, and decided to experiment using a can of pumpkin that’s been sitting in the back of the pantry for over a year (or maybe two…). Voila! Pumpkin Pie Fruit Leather. It’s so good that I had to restrain myself from eating the whole entire tray, and it’s incredibly easy to make!

If you don’t have, or don’t want to use, canned pumpkin, just substitute cooked pumpkin (or winter squash) puree.

Also…if you don’t have pumpkin, you could use this basic method to make fruit leather from cooked/pureed apples, pureed peaches (no need to cook them first), plums, berries, bananas, or a combination of fruits — and with these fruits, there’s no need to add any spices unless you want to! If I have an abundance of tomatoes this year, I think I’ll even try it with tomatoes. Anyway, here’s the recipe:

Pumpkin Pie Fruit Leather

2 cups (or one 15-oz can) cooked pumpkin or winter squash puree

1/4 cup honey

1/4 – 1/2 tsp cinnamon (depending on your taste…I used a 1/2 tsp because I like the bold taste of spices)

1/4 – 1/2 tsp ginger powder, optional

1/4 tsp powdered cloves

1/8 tsp nutmeg

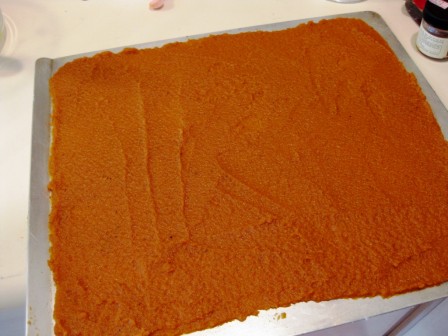
Preheat oven to 200* F. (If you have a dehydrator, you can use it for this recipe. Dehydrate at 140*.) Mix all ingredients well. Generously oil a cookie sheet (really slather the oil on…it’ll make it much easier to peel off the leather!), or use parchment paper. Using a spatula, spread your mixture on the cookie sheet, taking the extra time to spread as thinly and evenly as possible; this took me a few minutes to get it just right. Spreading it as evenly as possible is important because otherwise some parts will be over-done and other parts will be under-done (which will probably happen to some extent anyway, but at least you’ll be minimizing it).

Spread the mixture as evenly and thinly as possible on the oiled cookie sheet.

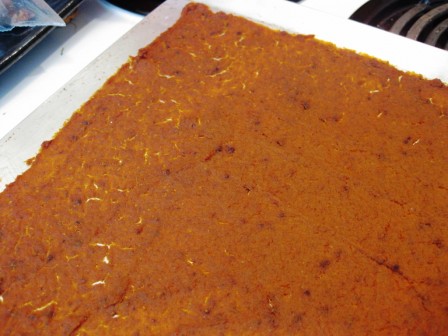
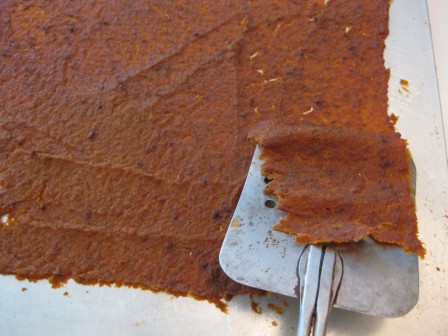
Put your cookie sheet into the oven and let it “dehydrate” in there until the fruit leather is pliable…not wet, but not hard & brittle either. Mine took about 2 1/2 hours to get done; you’ll want to check on yours every now and then. A little bit was over-done and I had to let the cookie sheet cool a little before I could pry it off, and another little patch was under-done, so I just put it back in the oven for a little while. But most of it was easily peeled off the cookie sheet with a flexible metal spatula; this whole process would probably be even easier if you use parchment paper.

The fruit leather is done.

Peel it off the cookie sheet with a flexible metal spatula. If it's not over-done, it should peel right off with no problem. If it's under-done, it will be too wet to peel off...so just pop that part back into the oven for a while.

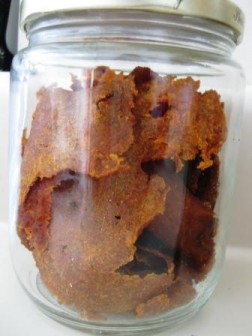
Store in a glass jar. I stored mine in the fridge, but you can also store it at room temperature.

From Trash to Treasure: Chocolate-Dipped Candied Orange Peel

Chocolate-Dipped Candied Orange Peel, (c) The Herbangardener

First of all, I have to say that since I made these chocolate-dipped candied orange peels over the weekend, I have NOT been able to stop eating them — they’re just the perfect combination of chocolate and orange, a flavor combination which I love. They are just SO GOOD!

And I can’t get over that they’re made with the orange peels that you’d normally toss into the trash or compost heap! Besides that, the fact that they’re dipped in chocolate means that you stretch your chocolate further, while still getting your chocolate fix! All in all, a delightful & unusual treat that can be made for not much money at all.

Chocolate-Dipped Candied Orange Peel, (c) The Herbangardener

Don't toss 'em...Eat 'em!

Start by saving your orange/mandarin orange/tangelo/clementine peels. I store mine in a sealed container in the fridge for a few days while collecting enough to use. You can store them in the freezer, but if they’re in there too long the texture suffers and the peels become mealy; I like to stick with the fridge.

Also, I use peels from organic mandarin oranges. I feel it’s important that the peels be organic, since the highest concentration of pesticides is present in the peels of conventionally grown fruit.

First you’ll cook your orange peel in boiling water for about 15 minutes. This seems to mellow out the bitterness. Then you’ll candy it with a honey-water solution (takes about an hour), let the orange peels cool (10 minutes), and then dip them into melted chocolate and refrigerate for about 10 minutes until set. Easy!

Here’s the recipe:

Chocolate-Dipped Candied Orange Peel

2 -3 cups of orange peels, cut into pieces (I used mandarin orange)

1/4 cup water

1/3 cup honey (or 1/2 cup regular sugar or rapadura)

About 2/3 to 3/4 cup chocolate chips (I used basic semisweet chocolate chips, but another idea is to chop up a special bar of chocolate)

First, put the orange peel into a pan and cover with cold water (you’ll use the 1/4 cup of water & honey a little later). Bring to a boil and boil gently until the peel is soft, about 15 minutes. Drain.

Now, bring the 1/4 cup of water and honey to a boil. Add the peel. Boil gently on low heat, uncovered, stirring occasionally. This takes about an hour. When the peel is sodden and the syrup is almost gone from the bottom of the pan, take the peels out and put them onto a cookie sheet to cool.

When the syrup is almost gone, the peel is done.

When the syrup is almost gone, the peel is done.

Transfer the wet peel onto a cookie sheet to cool.

Transfer the wet peel onto a cookie sheet to cool.

While the peels are cooling, put your chocolate into a double boiler to melt over hot water. (Don’t melt chocolate over direct heat because it tends to burn. I don’t have a double boiler, so instead I just use a metal bowl set over a small pan of simmering water.)

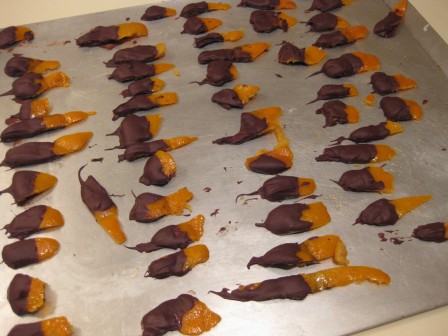
When the chocolate has melted, dip the lower half of each orange peel into the chocolate and set on a cookie sheet. (You can line the cookie sheet with wax paper, but I didn’t.)

Chocolate-Dipped Candied Orange Peel, (c) The Herbangardener

Put the cookie sheet into the fridge for 10-15 minutes to allow the chocolate to set. After cooling in the fridge, the peels will come off just fine with a flexible metal spatula. Though, if you don’t have a flexible metal spatula, you may want to use the wax paper so that you can just peel them off. If they don’t come off very easily, allow the cookie sheet to sit at room temperature for several minutes; they should peel right off then.

I found that storing them at room temperature was just fine, as long as you don’t put a lid on the container; I noticed that they got a little soggy if I kept the lid on. But if having an open container of chocolate orange peels on your counter is just too tempting (uhh, yeah!), you can put them in a sealed container in the fridge — they don’t seem to get soggy then. You can also just as easily store them in the freezer (I have some in the freezer right now), and snack on them directly from there.

Since this recipe produces a large tray full of decadent treats made with what would otherwise be trash…I feel that it deserves a place in this week’s Pennywise Platter Carnival over at The Nourishing Gourmet.

An Old-Fashioned Christmas

Old Fasioned Christmas, (c) The Herbangardener

Did you have a nice Christmas? I sure did. I love how Christmas doesn’t have to be about the money. Indeed, the best things about Christmas (to me) are free/priceless: baking, putting up decorations, sitting in front of the glowing Christmas tree, relaxing with a cup of tea and listening to Christmas music, watching the snow fall outside, hanging out with family, and visiting neighbors and friends.

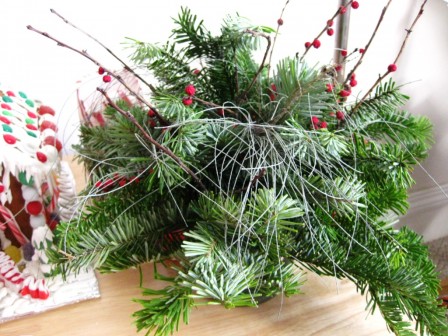
Coincidentally, two of my main decorations this year happened to be free (and definitely priceless!). The were both dumpster-dived, in fact. The beautiful evergreen centerpiece in the photo above was on a table at work for about a week. I admired it each time I walked down the hall to the kitchen. One day, it was gone. When I got to the kitchen, I spotted it in the trash. Who would throw this away?! I plucked it right out and carted the little darling home. It’s certainly getting much more enjoyment at my house!

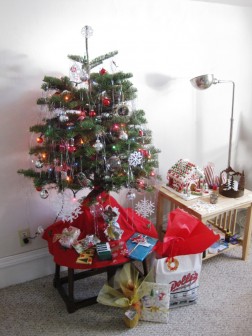
The other free decoration was the Christmas tree!! I went over to a tree lot a couple days before Christmas, only to find them closed up, having sold all their trees. I noticed a few branches sticking out of a dumpster in the far corner of the parking lot, though, so I walked over to have a look. There inside the dumpster was my lonely little tree, obviously waiting for me. 🙂

Isn’t it sweet? I just love it.

Old Fashioned Christmas, (c) The Herbangardener

And for another old-fashioned Christmas activity, my mom and I got together and made gingerbread houses. What a blast!

Gingerbread House, (c) The Herbangardener

Gingerbread House, (c) The Herbangardener

What are your favorite commercialism-free ways to enjoy the Christmas season?? I would love to know!!

Happy New Year!

« Older posts Newer posts »

© 2024 The Herbangardener

Theme by Anders NorenUp ↑