Kitchen / Garden / Sanctuary - Urban Homesteading to Nourish Body + Spirit

Tag: summer (Page 8 of 9)

How To Plan Your Spring & Summer Vegetable Garden

Good grief, it’s already March! Planning my spring & summer vegetable garden is on the agenda for this coming week, and so I’m re-posting my instructions from last year on the planning process I devised and use every year. Hopefully it’s helpful to you!

Today I’m going to give you a little tutorial on how to plan your vegetable garden. Over the years I’ve developed a planning method that works well for me. Admittedly, I don’t really like garden planning very much. I do love looking through all my seed packets and deciding what to grow for the year, but the process of actually planning what to put where is a task that takes literally hours of mental work (for me at least). It’s a lot of thinking, decision-making, & considering all different garden plan configurations (and past years’ plant placements) in my head before I even put pencil to paper.

That said, though, there comes a feeling of satisfaction and excitement when I’ve completed the plan and am thoroughly happy with it. Each year’s plan is different, depending on what I want to grow and also considering what grew there last year.

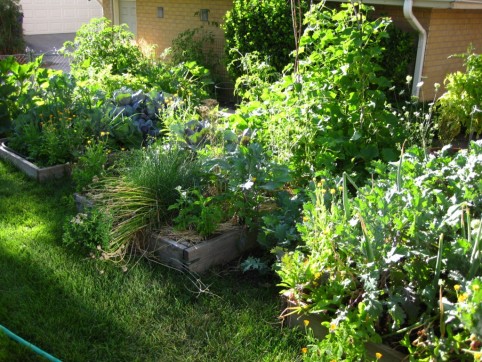
I have three 4’x8′ raised beds, one 2’x8′ raised “lasagna” bed (a story for another day!), another 4’x8′ raised bed against the south side of the house, plus various pots here and there for extra tomato growing space.

Here’s my basic planning process:

1. Decide what you want to grow. Look through seed catalogs or go to a garden center to get seeds, or if you’re like me and already have wayyy too many seeds to choose from, go through all your seed packets and set aside what you think you want to grow. (I like to start all my veggies from seed, but you could just as easily decide what you want to grow, and then buy plants from the nursery.)

Once you’ve narrowed down which veggies you want to grow, write them all down on a piece of paper.

2. Determine which vegetables will be in the Spring plan, the Summer plan, or both plans. If you’re planning both a spring and summer garden (which I do), you’ll have 3 categories of vegetables:

– Early-spring-planted veggies that you’ll harvest before summer (like spinach, peas, lettuce, etc.)

– Early-spring-planted veggies that you’ll leave in the garden through the summer — the “spring carry-over veggies” (like cabbage, onions, parsley, potatoes, cilantro, dill, chard, carrots, etc.)

– Summer-planted veggies (like tomatoes, squash, peppers, cucumbers, etc.)

Click here for a comprehensive list of which veggies fit into which categories.

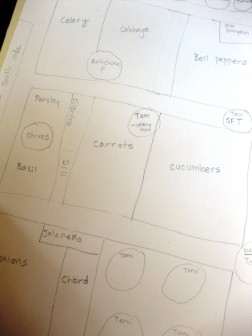
As you can see in the photo below, I mark my piece of paper with “Sp” (for “spring”) to the right of the spring-planted veggies, and “M” (for “main” summer) to the left of the summer-planted veggies. Vegetables with both “Sp” and “M” will be in both garden plans. As I place each vegetable into the plan, I put a check mark next to it.

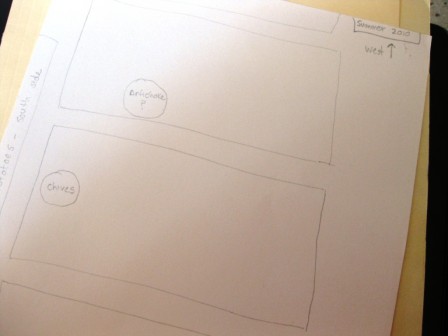
3. Draw two outlines of your garden plots on paper — one for spring, one for summer. For my plans, I have one piece of thick paper; on one side I have Spring, on the other side I have Summer. Be sure to also note the year somewhere on your garden plan. On both plans, draw in any perennial vegetables that have overwintered.

Graph paper isn’t necessary, unless you like to use it. I draw my plans free-hand, and just eye the scale of things. The first year that I did a formal plan, I got mathematical about it and used graph paper, with “one square = 6 inches” and all that, but in the end, I found it unnecessary to be so precise, and I haven’t used graph paper since.

Also, always work in pencil! 🙂

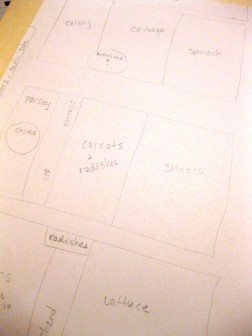
Draw your garden plots, and draw in any overwintering perennial vegetables.

4. Plan your summer garden first. I find it easier to plan my summer garden first, and then my spring garden. To plan my summer garden, I decide on the location of both the spring-planted carry-over vegetables as well as the summer-planted vegetables.

I begin with deciding where I’ll put my tomatoes…though in doing this, you’ll be thinking about all your vegetables — not just the tomatoes. But I like to put the tomatoes down on paper first, as this makes it easier to place other things.

I also place the tallest vegetables (tomatoes, plus anything grown on a trellis) at the north end of each of the raised beds, so that they don’t block the sun from reaching shorter veggies.

I also consider the locations of last year’s vegetables, and try not to plant the same thing in the same place the next year. It doesn’t always work out that way (for instance, this year’s cabbage will be partially in the same spot as last year), but to me, that’s okay.

I like to plan the summer garden first.

5. Plan your spring garden based on the summer garden. Now, on your spring garden plan, copy down the spring carry-over veggies that you placed in your summer plan. Then, fill in the empty spaces with all of your spring veggies that will be harvested before summer, like the lettuce, radishes, spinach, peas, etc.

I plan the spring garden based upon which veggies will be carrying over to summer.

6. Check your veggie list to be sure you’ve placed everything, and then you’re done! Now it’s time to plant your spring garden!

Click here to read about how I amend my soil each year to get ready for spring planting.

And as a side note…if you start your own seedlings inside (rather than buying from a nursery), that adds another step to the spring preparation process, but it’s not bad. I definitely prefer to grow my own seedlings! Mostly I start my summer stuff inside, like tomatoes, squash, cucumbers, and peppers, but this year I also started my cabbage inside and it’s germinating better than when I plant it directly into the garden. But other than cabbage, I plant all my spring stuff directly into the garden, without starting it inside. Anyway, I’ll share more about all that soon, too.

*UPDATE 3/5/11: The past couple years I’ve just planted cucumbers and squash seeds directly into the garden rather than starting them inside. I’m much happier with this method since it’s SO much easier and the difference in fruiting times is not appreciable enough to be worth the bother of starting them inside. So I’ll stick to starting tomatoes, peppers, and cabbage inside. I might also start my celery inside, too, since it never quite took hold when I direct-seeded last year.

Camping Trip Supply List

Well gosh, it’s a little late in the season to be posting a camping supply list, but if anyone is going camping over the Labor Day weekend, it might help. I came up with the list (in no particular order!) based on what we took on our recent camping trip, so this will pretty much cover all your bases.

tent

tarp (optional, but nice to have something to put the tent on so you don’t track dirt inside and all over your sleeping bags)

water — roughly a gallon per person per day or more, for drinking/cooking/washing

sleeping bags or bed rolls

inflatable pads to go under your sleeping bag

pillows

toilet paper

trowel/small shovel (if there aren’t outhouses, bring a trowel to dig a 6” deep hole for when nature really calls)

unscented baby wipes for “dry showers”

bath towels

kitchen hand towel

coleman stove

extra gas or propane if needed

coleman lantern (optional if you have flashlights)

fire extinguisher

matches

pots and pans as needed

potholder if needed (or use kitchen towel as a pot holder)

tupperware or ziploc bags for leftovers

cooler

food

measuring cup/measuring spoons if needed

metal spatula

ladle

steak knife or slicing knife

silverware

napkins

dish soap (we like Dr. Bronners because it’s gentle on the environment, and can be used for dishes, hands, bodies, hair, toothpaste, etc)

sponge

trash bags

2 flash lights

cups or mugs

plates and/or bowls

rope for clothesline if needed

collapsible chairs if your site doesn’t have a picnic table

bug spray

salt & pepper

oil for cooking

[UPDATE: rain ponchos are handy, too!]

What are your camping essentials?

August Photo Update

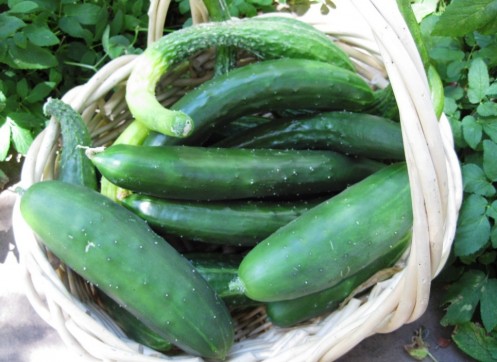
How have you been these past two weeks? Hopefully you’re out enjoying summer while it’s still around! The mornings are already getting cooler around here, and the autumn birds are beginning to sing. The garden is really at its peak, and we’ve been blessed with heaps of organic cucumbers, zucchini, kale, parsley, basil, cabbage, onions, potatoes, mini pumpkins, and tomatoes. I love the bounty! It’s the freshest, most organic, delicious, wholesome, high-vibration, grown-with-love food, and ingesting it just feels good! We are certainly eating like kings right now! I am so grateful for our garden.

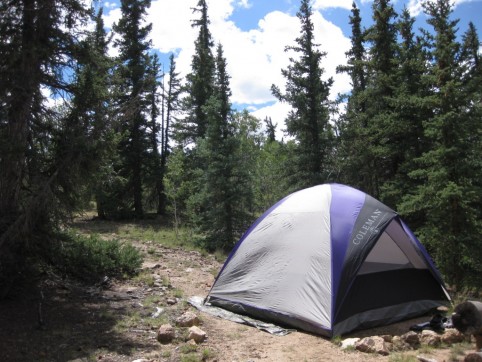
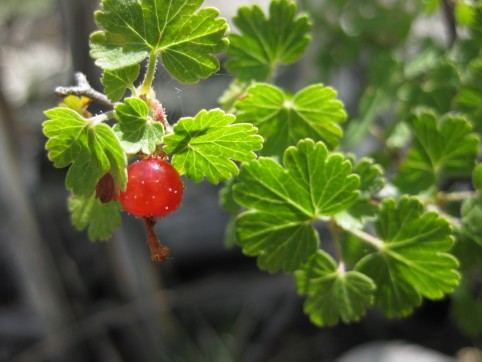
August has been busy around here in a good way; my sister was in town for a week (so fun!), and Hubby and I went camping last weekend at my parents’ land which was completely wonderful. In the rush of work-a-day living, I forget how peaceful and healing it is to just hang out in nature. Sitting in the sun, looking out at the view, I kept thinking “This is life.” The weather couldn’t have been more perfect, and we just hung out and read, cooked at the coleman stove, drank tea, ate, laughed, watched chipmunks, ate wild currants, hiked around a little, and enjoyed the fresh mountain mornings, the twilight hour, a few shooting stars at night, and the nearly-full moon shining into our tent.

And since we had a rental car, I took all of our giveaway stuff to the thrift store drop-off after we got back; that stuff had been lingering in our entryway for far too long, and it felt great to clear it out. Doing that inspired me to clean up the rest of our house, too. It has been in shambles because we’re both too busy and too tired to devote energy to it. I find that in terms of the house, my outer realm both reflects and affects my inner realm. So when the house is out of control, it’s an accurate snapshot of my life at that moment in time. But if I take the time to really get it back under control (9 1/2 hours on Friday!), then I feel as if I have my whole life back under control. Whether your house is clean or dirty really affects your psyche more than I’ve ever realized.

Anyway, here are some photos from the past month:

The Garden in August

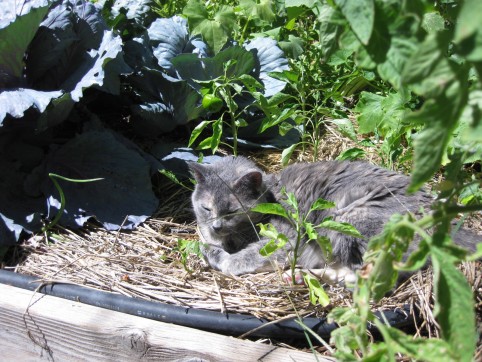
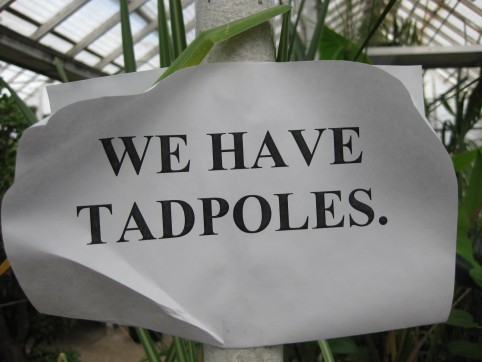
Cute sign

HAD to take a picture of these lovelies!

Camping

Each wild currant bush has its own taste.

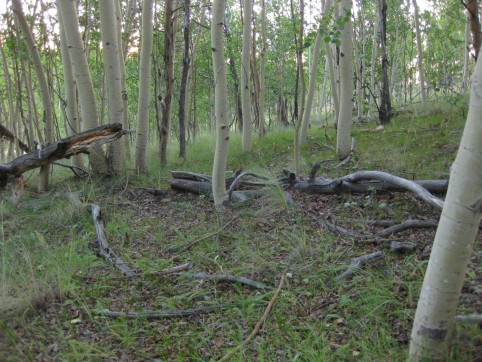
Aspen grove on the Land

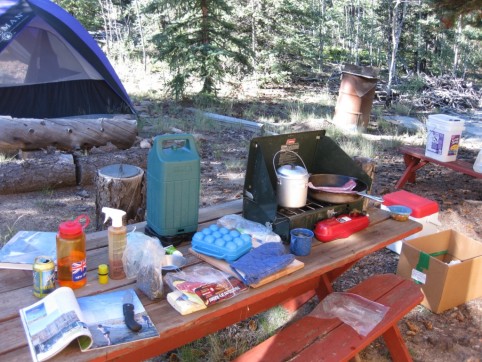
Look at that -- our campsite is as messy as our house!

Nourishing Mixed-Herb Pesto

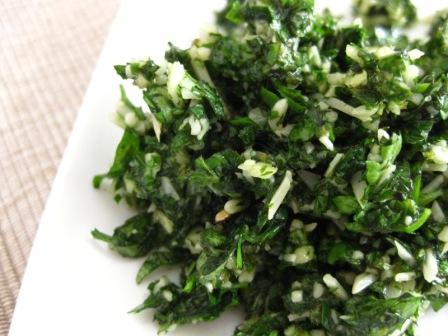
Oregano, parsley, & cilantro pesto

Pesto is such a versatile condiment — it’s wonderful over fish or chicken, on crackers, tossed with pasta, spread over eggs or sauteed zucchini, in a roasted vegetable sandwich, used as a pizza sauce, or straight off the spoon. And although basil pesto is the most common type, pesto can be made with any combination of herbs. In fact, I think I like mixed-herb pesto even better than basil-only — it has more layers of flavor! And don’t forget that herbs are mineral rich and packed with nutrition, and can definitely be thought of as a medicinal food.

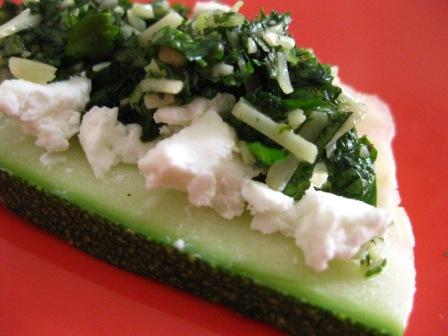
Make a healthy snack with goat cheese and mixed-herb pesto on a raw zucchini slice "cracker"

Use any combination of fresh herbs that you want; pesto is a great way to use up heaps of herbs at once, such as the cilantro sitting in the back of your fridge and the overabundance of oregano in your garden. It’s also a nice way to preserve those herbs for use later in the year; use ice cube trays to freeze pesto into small portions and thaw as needed over the winter.

One nice combination is oregano, parsley, and cilantro — this is probably my favorite. Use equal parts…or not! Just combine according to the amounts you have. I do suggest, however, that you go easy on the fresh sage if you choose to use it; it lends an overpowering (and not all that tasty) element. Also, mint is nice as an added “splash” but go easy on that too, since it can also overpower.

My basic pesto recipe is as follows, though you’ll probably find you don’t even need a recipe. Just gather a bunch of herbs, add a clove or two of garlic (start with less garlic and add more later if needed), add nuts, cheese, and salt, and then olive oil to form a paste.

Basic Herb Pesto

1 cup fresh herbs, packed

2 garlic cloves, small-medium size

3 Tbsp olive oil, approx.

3 Tbsp shredded parmesan cheese, approx.

1-2 Tbsp pine nuts or walnuts, approx. (optional)

Salt to taste

Put everything into the food processor and blend until a paste is formed.

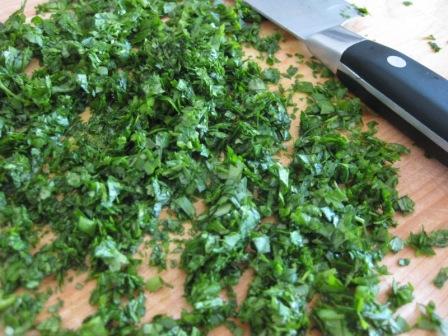
Instead of using the food processor, though, I like to make mine the old fashioned way using a knife and cutting board. If you use a nice sharp chopping knife, the task goes faster and is more fun than the food processor (at least for me — I get angry at my food processor when making pesto!). The key is definitely the sharp knife. Chop your herbs, garlic, and nuts as finely as possible, add the parmesan (chop it up too, if you like), and then add olive oil until a loose paste is formed. You can replace a little of the olive oil with water if you want. Add salt to taste. The texture will be more rustic than paste-like, but that’s not a bad thing. 😉

Making pesto without a food processor

Quinoa Salad, Greek Style

This is a recipe that my best friend Sonja gave me a long time ago; it was one of our very favorite things to eat. I love it! It’s a light, refreshing dinner choice which is great for this time of the year because it doesn’t require use of the oven. Heck, you could even cook the quinoa in your solar oven (you have built one, right? ;-)) and you wouldn’t even need the stove, either! It would also be a great meal to take on a picnic.

Quinoa Salad, Greek Style

1 cup uncooked quinoa

2 tomatoes, chopped

1 cucumber, diced

3/4 cup chopped green onions

Scant 1/2 cup olive oil

6 Tbsp freshly-squeezed lemon juice

6 ounces feta cheese, crumbled

Black or Kalamata olives, chopped (as many as you like…I usually use between 1/2 and 1 cup)

Lettuce, torn into pieces (use as much as you like, though not too much — it’s not meant to be the main ingredient)

Salt + Pepper to taste

Cook the quinoa* and cool it to room temperature. If I’m in a hurry, I’ll put my hot quinoa into the freezer to cool it quickly.

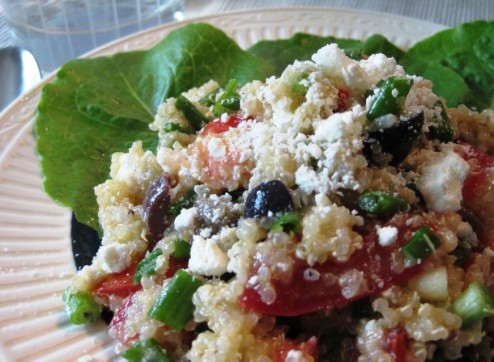
Then, gently stir everything else — except the lettuce — into the quinoa. I leave the lettuce out until I’m ready to serve the salad, and then I stir it in. That way, I can store the leftovers for a day or two and not have to worry about wilted, soggy lettuce. You could also leave the lettuce out altogether, and just serve the salad on a bed of lettuce leaves, as in the picture above.

This salad is best served on the day you make it. Enjoy!

***

*Cooking quinoa:

Be sure to rinse the quinoa well to remove bitter saponin residue. The quick way to cook it is to boil your water (ratio of 1 cup grain to scant 2 cups water), add some salt, add quinoa and cover, simmering until the water is absorbed, about 20 minutes.

However, if you’re able to plan ahead enough, it’s much better, healthwise, to soak your quinoa for at least 12 hours to make it more digestible — the way traditional cultures do. Soaking grains neutralizes phytic acid (which binds to essential minerals like calcium, magnesium, iron, and zinc, and blocks their absorption) as well as enzyme inhibitors in the grain. Soaking also breaks down difficult-to-digest proteins and encourages the production of beneficial enzymes which in turn increases the vitamin (especially B vitamin) content of the grain.

So…

To soak quinoa: Thoroughly rinse 1 cup of dry quinoa to remove bitter saponin residue. Put 2 Tbsp of lemon juice or vinegar into a measuring cup and fill to the 1 cup mark with warm water, then mix with the quinoa in a bowl. Cover and let sit at room temperature for at least 12 hours, or up to 24. When you’re ready to cook, rinse and drain the quinoa well. Place in a saucepan. Add a scant 1 cup of water, and a little salt. Bring to a boil and simmer, covered, until all the water is absorbed, about 20 minutes. Cool, and proceed with the recipe.

*****

« Older posts Newer posts »

© 2024 The Herbangardener

Theme by Anders NorenUp ↑