Kitchen / Garden / Sanctuary - Urban Homesteading to Nourish Body + Spirit

Tag: summer (Page 9 of 9)

Update + Garden Pictures

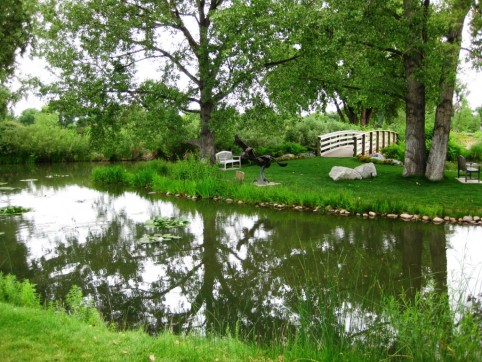
Scene from my mini vacation

Well, long time no post!

This past week was the death anniversary of my best friend Sonja – my soul sister – and it upset my emotional balance a little more than I would have liked. When that happens, in addition to surrendering to the sadness (rather than stuffing it), I know I need to devote extra time to good medicine, as well as make a point to get out of the house and do fun things. So on one of my days off, I rode my bike over to Hubby’s office and met him for lunch, which is something we both just totally love. On the way back I stopped at Whole Foods and wandered around, picking out some fun things while completely ignoring the exorbitant prices. On my other day off, my mom and I took a mini vacation day and drove to a botanic gardens area. We enjoyed the water gardens and natural woodlands amidst sprinkling rain, snarfed potato chips at the cafe, and relished how we had the place to ourselves. After that we went to Penzeys Spices (we get so inspired at that store!) and I bought some special peppercorns, expensive Ceylon cinnamon, smoked Spanish paprika, and Cajun seasoning (an all-time favorite). To top it off, we had drinks and a cookie at a little sidewalk cafe. Back at their house, I made a batch of homemade cat food, worked in the garden, and visited with mom and dad over wine and cheese. Lovely! Family, gardens, nature, mini vacations…those are all things that help lift the funk and get me re-energized for daily life.

In other news, it’s been pretty hot here. Though the sweltering 95-degree days are punctuated with not-as-hot days in the mid-80s. It’s been really nice actually.

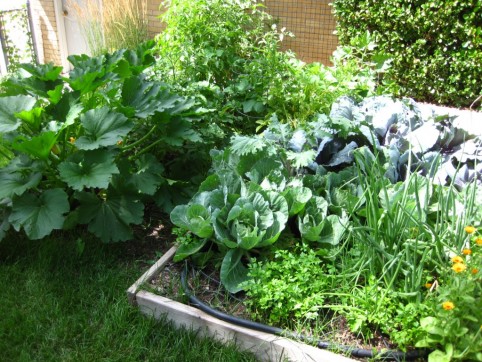
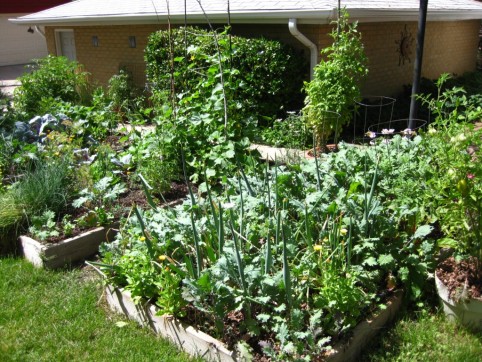
And the garden is progressing well! The bell peppers and a few of the tomatoes are still puny, but the zucchini, cucumbers, cabbage, potatoes, onions, and the tomatoes I started early in the Walls-O-Water are doing very well. I harvested the first ripe tomato today, and I think in a week’s time there should be many more, as well as the first of the cucumbers; I did harvest a nice zucchini today which I cannot wait to sautee in the Penzeys Cajun seasoning — such amazing flavor!! The garden seems a bit delayed compared to some other years; we had a long, wet, cold spring, plus I did plant a little late this year due to surgery interfering with my normal seed-starting schedule. But that’s okay! I just love watching the veggie garden grow and produce. Here are a couple pictures of it:
Knowing Exactly When To Harvest Garlic

In this post I described how to harvest and cure your garlic (and onions too). However, knowing exactly when to pull your garlic out of the ground isn’t always easy.

There’s a period of time — a “sweet spot” — when the garlic will be perfect. Harvest too soon and the head won’t yet have formed into distinct cloves…harvest too late and the protective papery skin that encases the head will have broken down, allowing dirt and worms into the crevices between the cloves. So I took some pictures for you that will hopefully help to identify the sweet spot.

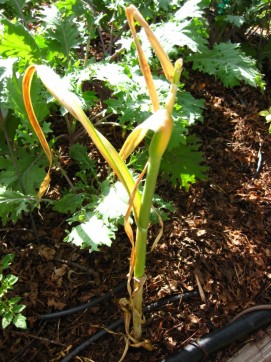
Harvest your garlic when the leaves have mostly turned yellow or brown, but the stem is still green. It’s okay if a few of the leaves are still green, too, though if all the leaves are still green, it’s too early to harvest.

Harvest your garlic when it looks like this. (Click for larger image.)

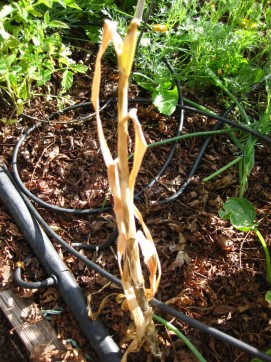
And if the leaves and stem are completely dry and brown, like in the photo below, you’ve missed the sweet spot, so definitely dig the garlic immediately.

Left in the ground a little too long...but do still dig it up ASAP! (Click for larger image.)

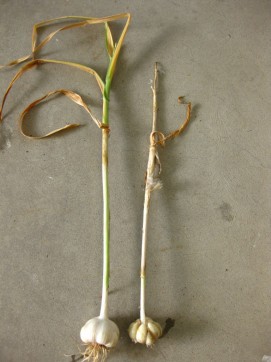
Left side: Harvested at the perfect time. Right side: Left in the ground a little too long. (Click for larger image.)

In the picture above, the garlic on the left was harvested at the perfect time: the stem is still green, the cloves are fully formed, and the outer papery skin is intact. The garlic on the right was left in the ground a little too long (notice how the stem is completely brown and the outer papery skin has mostly broken down).

If you miss that sweet spot and find that the outer papery skin of your garlic has disappeared and the dirt and worms have gotten in between the cloves, attach a spray nozzle to your garden hose and spray a forceful stream of water straight into the middle of the garlic head, which will blast out the dirt.

For further info on how to cure and store your garlic, pop on over to this post.

Left: Harvested at the perfect time. Right: Left in the ground a little too long. (Click for larger image.)

Summertime Gazpacho

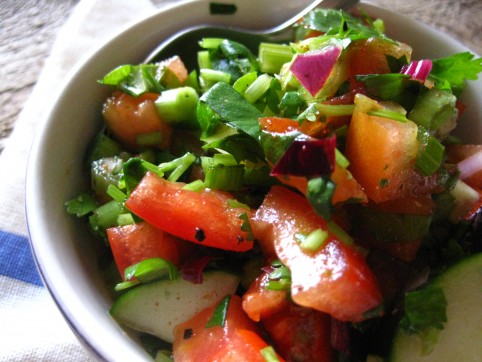
Today I’d like to share with you one of my favorite summer recipes — gazpacho! This chilled, raw-vegetable soup is so refreshing on a hot summer evening. Pair it with buttered, rustic bread and a cold beer, and you’ve got yourself a fabulous quick summer meal that’s light and delicious.

I don’t actually measure my gazpacho ingredients anymore, and it’s a little different each time I make it. But this recipe is a favorite, and is a good place to start.

Summertime Gazpacho

2 lbs (approx.) ripe tomatoes, diced (3 – 4 large tomatoes)

2 scallions, chopped

1 red bell pepper, diced (optional – I usually leave it out if they’re too expensive or I can’t find organic)

2 celery stalks, chopped

1 – 2 garlic cloves, minced

2/3 cup lightly packed cilantro, chopped (or lots more if you like!)

1/2 – 1 jalapeno, diced with seeds removed (optional!)

Half a cucumber, diced

6 Tbsp olive oil

2 – 3 Tbsp red wine vinegar

3 – 4 Tbsp freshly squeezed lemon juice

Salt to taste (usually between 1/2 and 1 tsp)

1/2 to 1 tsp pepper

Couple dashes of Penzeys Smoked Paprika (optional, but adds incredible flavor…I am obsessed with this smoked paprika! It’s one of those “secret weapon” ingredients.)

*****

Mix everything together in a bowl. If you’d like, transfer half to a blender and blend until somewhat pureed but still a little bit course. Transfer back into main bowl. OR, feel free to skip that step! It’s up to you whether you like the texture smoother and soup-like, or chunkier and salsa-like.

Serve with homemade croutons, or toasted & buttered rustic bread.

Yum, I could eat this every day!

*****

Early Summer Update, Solar Oven, and Baby Robins

How’s your summer going so far?

Mine’s nice! It’s just starting to get hot here, after an unusually cool, wet, windy spring. I usually don’t love hot weather, but the heat feels good right now, after being cold for such a long time…for the last 8 months, it seems.

I spent the last 3 weeks house/cat sitting for my parents, since they were out of town house sitting for family friends. It was great to stay in a real house with a real yard. While of course we have a nice apartment in the attic of a 100-year-old house, I do miss having a clothesline, a private yard, a front and back porch, and my gardens. I spent most of my time outside on the porch, reading and drinking tea! It was like a little retreat. And since my parents have a piano, I played a lot of piano while I was there. I love playing; it’s both a creative outlet and a stress release for me. Though I sure hated those piano lessons in my younger years! But now, I’m so glad my mom & dad forced me to stick with it. (Side note: If you’re considering the Suzuki method of piano instruction for your children, beware! I’ve been playing since I was seven… I took Suzuki lessons for nine years… and I still cannot read sheet music proficiently and I really regret that! It takes me hours upon weeks to learn a complicated piece, and although I then have it memorized, I would give anything to be able to sit down in front of an unfamiliar piece of music and just play it. If I were going to invest in piano lessons for my children, I would make sure they learned how to read music!) Anyway, moving right along!

In other news, my gardens are doing well; as always, some veggies are doing better than others, and it’s different year to year. This year the spinach did nothing. Which was actually fine with me, since last year it went berserk and grew waist-high (it actually did!). The kale has more than made up for that, having self seeded from last year. We have organic, homegrown Red Russian Kale everywhere! What a wonderful “problem”! I’ve been making lots of lacto-fermented kale (like sauerkraut) with good results. The recipe for that is forthcoming.

I’ve heard you can also toast kale in the oven at high heat to make kale crisps. Has anyone tried that?

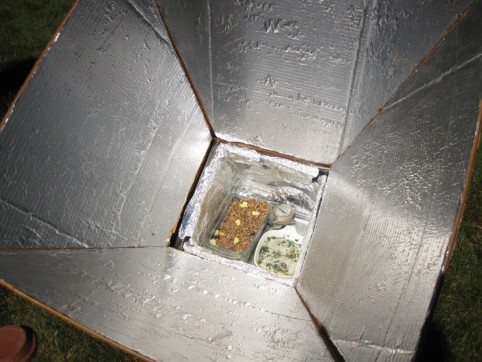
Over Memorial Day Weekend, I hauled out my solar oven while I was house sitting. I built it six years ago and used it all the time that first year, but since then it’s mostly been in the shed, sadly. I dusted it off, and baked some wonderful things in it – eggs topped with garden herbs and parmesan cheese, apple-blueberry crisp, and a homemade frozen calzone. The temperature inside reached an amazing 330*F! I’m going to write up and post some instructions for you on how to build a solar oven…it’s easy, cheap (a few dollars total), and completely fun and satisfying to cook stuff using nothing more than the sun in the sky. [UPDATE: I’ve posted the instructions here.] It’s also very useful for summer cooking, since you don’t have to heat up the house with your regular oven – and of course that will also save you money on the energy bill.

Baking herbed eggs with parmesan and apple-blueberry crisp in the solar oven.

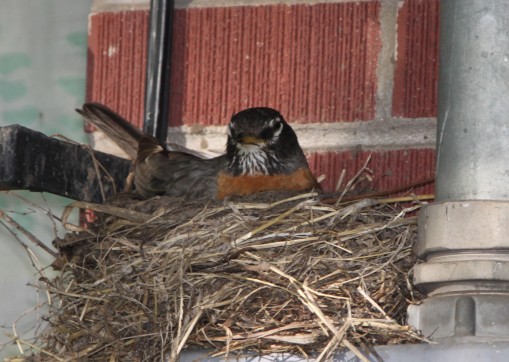
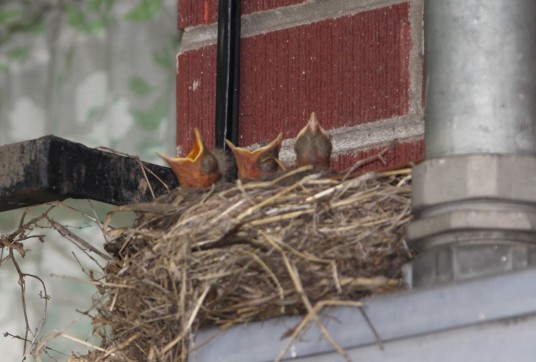
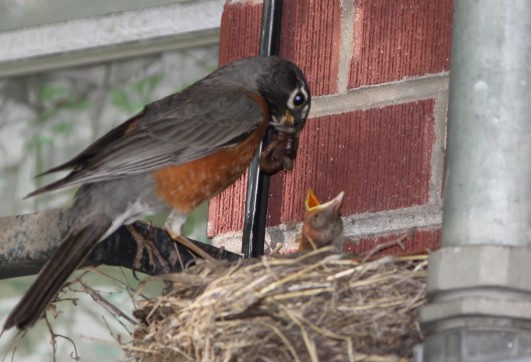
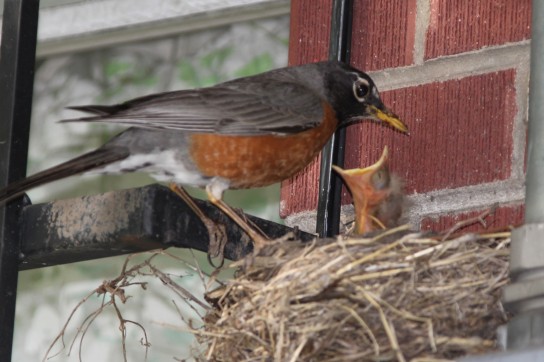
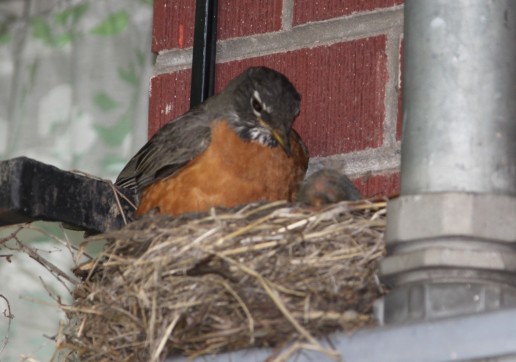
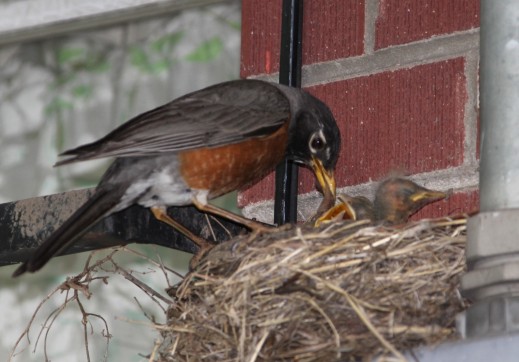
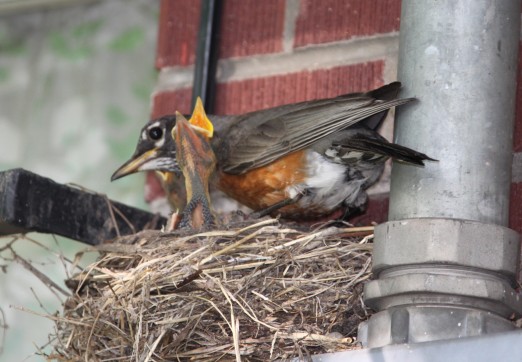
I have to show you one more thing. There’s a brand new family of robins at the house next to my parents’. The house sitting job came at the perfect time because I was able to watch each day as the robins vigilantly sat on their eggs, keeping very silent so as not to attract attention. One day the robin was gone, and instead I saw a little yellow beak — wide open — waving frailly back and forth above the edge of the nest. Now there are four little babies packed into that nest, and every day they’re bigger and stronger. It’s so incredible to watch! Take a look:

Mama's tasks: 1.) Be very quiet. 2.) Keep eggs warm.

"What do I do with it?"

...And Then There Were Three...

A fresh, plump worm for snack.

I'm still HUNGRY!

A quiet moment.

FEAR. (She had just heard crows squawking overhead.)

Serving up dinner bugs.

You'd be exasperated too.

How to Harvest Onions & Garlic

How to Harvest Onions & Garlic

The onions have finished curing, and are ready for storage in the fridge.

I love growing my own onions and garlic. They’re such easy crops, and they store really well in the fridge. During the summer, I’m always overwhelmed with produce that must be eaten NOW, so when I harvest these crops, I’m always grateful for their long storage capabilities!

Onion & Garlic Harvesting 101:

When the leaves (“tops”) have mostly died back (turned mostly brown…no longer green and growing…though there may still be some green in a few of the leaves), pull or dig the onions or garlic out of the garden. (Click here to find out exactly when to harvest your garlic.)

Thoroughly wash off any clinging soil.

Put your harvest into baskets in one layer — so that air can circulate around them — and leave them in a shed, garage, or on a covered porch for 2-3 weeks. Make sure neither water nor animals can get to them. After 2-3 weeks, cut off the dead leaves and inspect each onion for softness or mold. Expect to lose about 10-20% of your harvest to softness or mold. Transfer the rest into a bag in the fridge (or wherever you store your onions & garlic).

Harvest garlic & onions when tops have mostly turned brown

Harvest garlic & onions when tops have mostly turned brown. Put them into baskets in one layer (unlike the picture above!) and leave in a sheltered, outdoor place for 2-3 weeks to "cure."

Newer posts »

© 2024 The Herbangardener

Theme by Anders NorenUp ↑