Kitchen / Garden / Sanctuary - Urban Homesteading to Nourish Body + Spirit

Tag: gardening (Page 11 of 14)

How To Plan Your Spring & Summer Vegetable Garden

Good grief, it’s already March! Planning my spring & summer vegetable garden is on the agenda for this coming week, and so I’m re-posting my instructions from last year on the planning process I devised and use every year. Hopefully it’s helpful to you!

Today I’m going to give you a little tutorial on how to plan your vegetable garden. Over the years I’ve developed a planning method that works well for me. Admittedly, I don’t really like garden planning very much. I do love looking through all my seed packets and deciding what to grow for the year, but the process of actually planning what to put where is a task that takes literally hours of mental work (for me at least). It’s a lot of thinking, decision-making, & considering all different garden plan configurations (and past years’ plant placements) in my head before I even put pencil to paper.

That said, though, there comes a feeling of satisfaction and excitement when I’ve completed the plan and am thoroughly happy with it. Each year’s plan is different, depending on what I want to grow and also considering what grew there last year.

I have three 4’x8′ raised beds, one 2’x8′ raised “lasagna” bed (a story for another day!), another 4’x8′ raised bed against the south side of the house, plus various pots here and there for extra tomato growing space.

Here’s my basic planning process:

1. Decide what you want to grow. Look through seed catalogs or go to a garden center to get seeds, or if you’re like me and already have wayyy too many seeds to choose from, go through all your seed packets and set aside what you think you want to grow. (I like to start all my veggies from seed, but you could just as easily decide what you want to grow, and then buy plants from the nursery.)

Once you’ve narrowed down which veggies you want to grow, write them all down on a piece of paper.

2. Determine which vegetables will be in the Spring plan, the Summer plan, or both plans. If you’re planning both a spring and summer garden (which I do), you’ll have 3 categories of vegetables:

– Early-spring-planted veggies that you’ll harvest before summer (like spinach, peas, lettuce, etc.)

– Early-spring-planted veggies that you’ll leave in the garden through the summer — the “spring carry-over veggies” (like cabbage, onions, parsley, potatoes, cilantro, dill, chard, carrots, etc.)

– Summer-planted veggies (like tomatoes, squash, peppers, cucumbers, etc.)

Click here for a comprehensive list of which veggies fit into which categories.

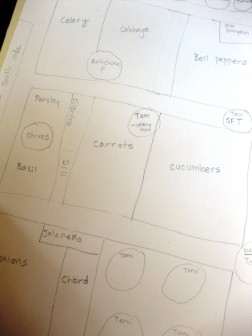
As you can see in the photo below, I mark my piece of paper with “Sp” (for “spring”) to the right of the spring-planted veggies, and “M” (for “main” summer) to the left of the summer-planted veggies. Vegetables with both “Sp” and “M” will be in both garden plans. As I place each vegetable into the plan, I put a check mark next to it.

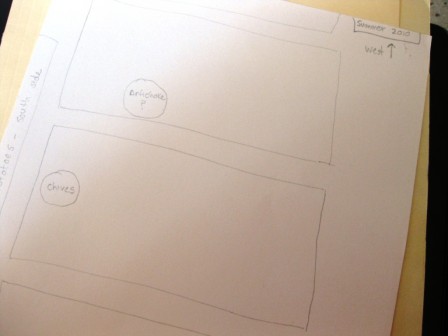
3. Draw two outlines of your garden plots on paper — one for spring, one for summer. For my plans, I have one piece of thick paper; on one side I have Spring, on the other side I have Summer. Be sure to also note the year somewhere on your garden plan. On both plans, draw in any perennial vegetables that have overwintered.

Graph paper isn’t necessary, unless you like to use it. I draw my plans free-hand, and just eye the scale of things. The first year that I did a formal plan, I got mathematical about it and used graph paper, with “one square = 6 inches” and all that, but in the end, I found it unnecessary to be so precise, and I haven’t used graph paper since.

Also, always work in pencil! 🙂

Draw your garden plots, and draw in any overwintering perennial vegetables.

4. Plan your summer garden first. I find it easier to plan my summer garden first, and then my spring garden. To plan my summer garden, I decide on the location of both the spring-planted carry-over vegetables as well as the summer-planted vegetables.

I begin with deciding where I’ll put my tomatoes…though in doing this, you’ll be thinking about all your vegetables — not just the tomatoes. But I like to put the tomatoes down on paper first, as this makes it easier to place other things.

I also place the tallest vegetables (tomatoes, plus anything grown on a trellis) at the north end of each of the raised beds, so that they don’t block the sun from reaching shorter veggies.

I also consider the locations of last year’s vegetables, and try not to plant the same thing in the same place the next year. It doesn’t always work out that way (for instance, this year’s cabbage will be partially in the same spot as last year), but to me, that’s okay.

I like to plan the summer garden first.

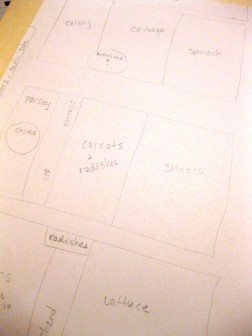
5. Plan your spring garden based on the summer garden. Now, on your spring garden plan, copy down the spring carry-over veggies that you placed in your summer plan. Then, fill in the empty spaces with all of your spring veggies that will be harvested before summer, like the lettuce, radishes, spinach, peas, etc.

I plan the spring garden based upon which veggies will be carrying over to summer.

6. Check your veggie list to be sure you’ve placed everything, and then you’re done! Now it’s time to plant your spring garden!

Click here to read about how I amend my soil each year to get ready for spring planting.

And as a side note…if you start your own seedlings inside (rather than buying from a nursery), that adds another step to the spring preparation process, but it’s not bad. I definitely prefer to grow my own seedlings! Mostly I start my summer stuff inside, like tomatoes, squash, cucumbers, and peppers, but this year I also started my cabbage inside and it’s germinating better than when I plant it directly into the garden. But other than cabbage, I plant all my spring stuff directly into the garden, without starting it inside. Anyway, I’ll share more about all that soon, too.

*UPDATE 3/5/11: The past couple years I’ve just planted cucumbers and squash seeds directly into the garden rather than starting them inside. I’m much happier with this method since it’s SO much easier and the difference in fruiting times is not appreciable enough to be worth the bother of starting them inside. So I’ll stick to starting tomatoes, peppers, and cabbage inside. I might also start my celery inside, too, since it never quite took hold when I direct-seeded last year.

Recipe Collection For A Bounty of Vegetables

September is always a very busy month in our kitchen as I scramble to use as much of our fresh garden produce in as many meals, smoothies, muffins, and cookies as possible! I’ve also been freezing meals made with garden produce, as well as freezing the produce itself to use in the coming winter months (so far, cooked kale as well as peach & cucumber slices for smoothies).

So I’ve put together a recipe collection (from my archive) categorized by vegetable in hopes that it might give you some fresh ideas if you’re overloaded with a particular veggie at this time of the year!

**List UPDATED on 2/3/2016**

Apples

Apple Harvest Salad

Applesauce (Homemade)

Apple Peanut Butter “Sandwiches”

Traditional Hot Mulled Apple Cider

Basil

Pesto

Zucchini Pie (Crustless)

Zucchini Parmesan

Beets

Beet Kvass

Cabbage

Minnestrone Soup

Sauerkraut

Carrots

Minnestrone Soup

Moroccan Carrot Salad

Cilantro

Citrus Salad with Macadamia Oil, Cilantro, and Avocado

Moroccan Carrot Salad

Pesto

Gazpacho

Salsa Fresca (Fresh Salsa with Avocado)

Cucumbers

Baked Cucumbers

Homemade Bubbies Pickles (raw, lacto-fermented pickles)

Gazpacho

Israeli Cucumber-Tomato Salad

Quinoa Salad, Greek Style

Cucumber Raita

Grapes

Concord Grape Freezer Jam (sugar & pectin free)

Concord Grape Fruit Leather

Grape Leaves

Pickled Grape Leaves

Zucchini Dolmas

Kale

Kale Chips

Minnestrone Soup

Parsley

Israeli Cucumber-Tomato Salad

Pesto

Tabbouleh

Zucchini Dolmas

Pumpkin

(see Winter Squash, below)

Spinach

Greek Melt Pita Sandwiches

Green Smoothies

Green smoothie frozen concentrate cubes

Spanakopita

Tomatoes

Gazpacho

Israeli Cucumber-Tomato Salad

Fresh Tomato & Zucchini Chili

Greek Melt Pita Sandwiches

Minnestrone Soup

Quinoa Salad, Greek Style

Salsa Fresca (Fresh Salsa with Avocado)

Tabbouleh

Tomato-Quinoa Soup

Zucchini Parmesan

Winter Squash/Pumpkin

Cranberry-Pumpkin Muffins

Japanese Squash and Mushroom Soup

Pumpkin Pie Fruit Leather

Pumpkin Pie

Pumpkin Spice Cookies

Zucchini/Summer Squash

Zucchini Dolmas

Zucchini Pie (Crustless)

Fresh Tomato & Zucchini Chili

Zucchini Parmesan

Chocolate Zucchini Cookies

Zucchini Cake with Spiced Frosting

Zucchini Muffins (or Bread)


Bumblebee Advice Needed!

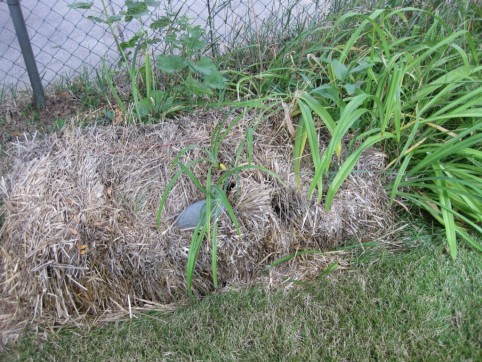
Straw bale beehive (hive entrance is the hole at the bottom right)

Have you had a nice week? I have! My sister has been visiting from out of town, and the past week has been all about having fun — like being on vacation while still being home!

Anyway, I have a question for those of you with beekeeping experience. In my parents’ yard (where my gardens are), there’s a bumblebee hive (not honeybees…but the big, fuzzy bumblebees) inside one of the straw bales that I was going to use for garden mulch. This is such a special thing, and I feel honored that these bumblebees have chosen a home near my gardens; it makes the yard feel like a nature preserve!

I’d like to do everything I can to encourage them to stick around. Unfortunately, the Wikipedia article about bumblebees states that they only use their hive for one summer, and don’t overwinter in it. Is that really true? Do you have any experience with bumblebees? Should I build anything around the straw bale for the winter to persuade them to stay?

Leave a comment if you have any insight!

Growing Fruit Trees From Seed: Peach, Plum, Nectarine, & Apricot

I’d always thought that growing fruit trees from seed was too much of a long-term proposition, and so I wouldn’t bother with it. And then three years down the road I’d still be thinking about fruit trees from seed — no closer to my dream orchard than I was three years prior.

Determined to put an end to this mental hangup, I began saving the pits from the most delicious local peaches and plums that I ate during the summer of 2008. I then followed the instructions in this great article, which takes you through the whole process:

Mother Earth News: “Growing Free Fruit Trees”

4-month-old Plum and Peach seedlings (in the foreground — plum on the left, peach on the right)

Now my baby fruit trees are about a year and a half old and I’m astounded at how big they are. These things are growing like weeds, and I need to seriously start considering where to plant them!

As a side note, I overwintered the baby trees in the black pots in the photos below, against the south side of the house, mounded up with dry autumn leaves. All survived the winter!

So if you’d like to embark on this fun little project, now is the time to begin saving your peach, plum, nectarine, and/or apricot pits. I let the pits dry on a shelf for several weeks (more like months, actually). To open the pit, use whatever tool you have the most success with (as outlined in the article), but the nutcracker I initially used broke clean in half before it cracked even one pit. So I got out the hammer and had no problem shattering pits out on the back sidewalk; surprisingly, none of the actual seeds got crushed in the process.

After a year and a half of growth, here’s what my trees look like:

1 1/2-year-old Plum trees

1 1/2-year-old Peach tree

***

Update 5/3/2012: The three-year-old peach trees have baby peaches on them! Click here for photos.

Update September 2016: Many of the trees died due to peach tree borer. The surviving trees are marauded by squirrels each year so that there are few peaches left. Here are some that survived this year! The peach I picked was picked too early I think, but otherwise the squirrels were going to get it. Its taste was ‘ok’ once it sorta ripened.

Peach tree from seed (c) The Herbangardener

Peach tree from seed (c) The Herbangardener

***


Update + Garden Pictures

Scene from my mini vacation

Well, long time no post!

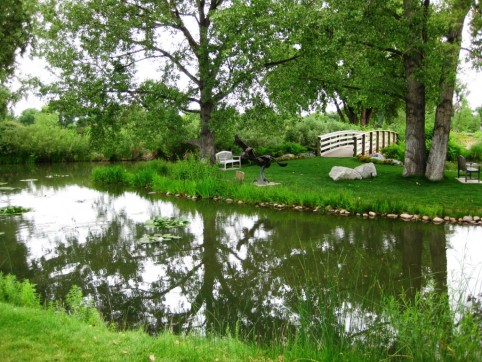
This past week was the death anniversary of my best friend Sonja – my soul sister – and it upset my emotional balance a little more than I would have liked. When that happens, in addition to surrendering to the sadness (rather than stuffing it), I know I need to devote extra time to good medicine, as well as make a point to get out of the house and do fun things. So on one of my days off, I rode my bike over to Hubby’s office and met him for lunch, which is something we both just totally love. On the way back I stopped at Whole Foods and wandered around, picking out some fun things while completely ignoring the exorbitant prices. On my other day off, my mom and I took a mini vacation day and drove to a botanic gardens area. We enjoyed the water gardens and natural woodlands amidst sprinkling rain, snarfed potato chips at the cafe, and relished how we had the place to ourselves. After that we went to Penzeys Spices (we get so inspired at that store!) and I bought some special peppercorns, expensive Ceylon cinnamon, smoked Spanish paprika, and Cajun seasoning (an all-time favorite). To top it off, we had drinks and a cookie at a little sidewalk cafe. Back at their house, I made a batch of homemade cat food, worked in the garden, and visited with mom and dad over wine and cheese. Lovely! Family, gardens, nature, mini vacations…those are all things that help lift the funk and get me re-energized for daily life.

In other news, it’s been pretty hot here. Though the sweltering 95-degree days are punctuated with not-as-hot days in the mid-80s. It’s been really nice actually.

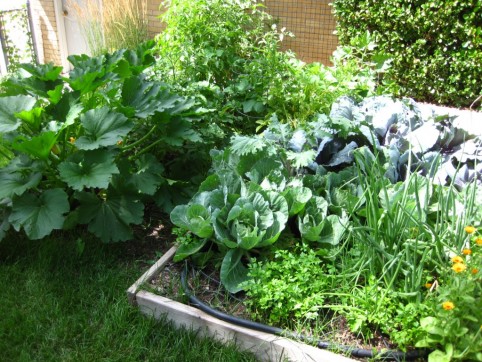
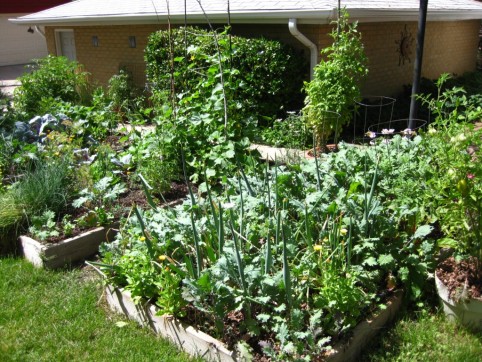
And the garden is progressing well! The bell peppers and a few of the tomatoes are still puny, but the zucchini, cucumbers, cabbage, potatoes, onions, and the tomatoes I started early in the Walls-O-Water are doing very well. I harvested the first ripe tomato today, and I think in a week’s time there should be many more, as well as the first of the cucumbers; I did harvest a nice zucchini today which I cannot wait to sautee in the Penzeys Cajun seasoning — such amazing flavor!! The garden seems a bit delayed compared to some other years; we had a long, wet, cold spring, plus I did plant a little late this year due to surgery interfering with my normal seed-starting schedule. But that’s okay! I just love watching the veggie garden grow and produce. Here are a couple pictures of it:

« Older posts Newer posts »

© 2024 The Herbangardener

Theme by Anders NorenUp ↑