Kitchen / Garden / Sanctuary - Urban Homesteading to Nourish Body + Spirit

Tag: garden harvest (Page 7 of 8)

Wilted Cucumbers? Bake Them!

Ever wonder what to do with cucumbers that have begun to wilt and lose their crunch? Obviously the first thing you’d think of is to make a Loch Ness monster like the one below, right?
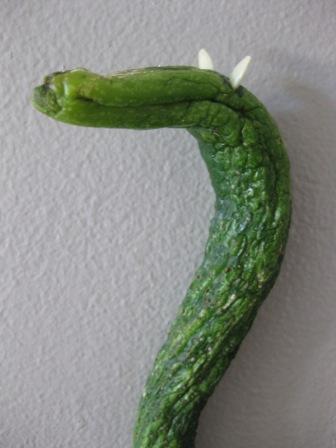
The Loch Ness Cucumber

I thought so.

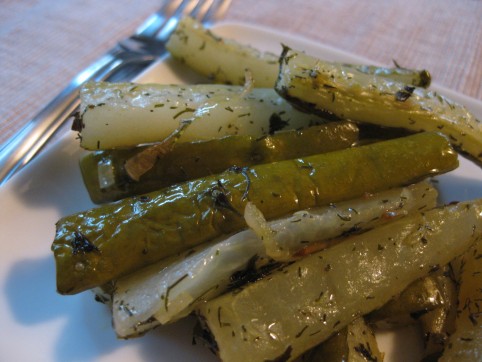
And although that’s fun — yes — the thing that really uses up those cukes is to bake them. This was originally a Julia Child recipe from Mastering the Art of French Cooking, but I’ve tweaked it somewhat to be simpler, with bolder flavors. I never thought to bake a cucumber until my mom made them last year; delicious! And a real bonus is that they freeze pretty well after baking. Thawed, they’re a little softer than the original out-of-the-oven ones, but that doesn’t bother you, right?

Try them out…I think they’re absolutely delicious! They have kind of a pickle-y flavor, yet gentle and buttery. This recipe makes a fair amount, but they do cook down to about half their original volume; and of course, feel free to cut the recipe in half.

Baked Cucumbers

3 lbs cucumbers

1/2 cup finely minced onion

1/4 – 1/3 cup wine vinegar (to your liking)

1/4 tsp sugar

1 1/4 tsp salt

1 Tbsp dry basil

1 Tbsp dry dill weed

4 Tbsp butter, melted

1/4 cup minced parsley (optional, for serving)

Preheat oven to 375*. Peel cucumbers if the skin is bitter. Cut them in half lengthwise and scoop out the seeds with a spoon. Cut into lengthwise strips 1/4″ to 1/2″ wide. Cut the strips into pieces that are 2″ long.

Mix all ingredients together, stirring well to evenly coat the cucumber pieces. Divide into two baking pans (I use two 9″x13″ glass pans) and bake, uncovered, for about an hour, tossing every 20-30 minutes. They should be tender, but still have a little crunch. Sprinkle with minced parsley (if desired), and serve. Mmmm!
Recipe Collection For A Bounty of Vegetables

September is always a very busy month in our kitchen as I scramble to use as much of our fresh garden produce in as many meals, smoothies, muffins, and cookies as possible! I’ve also been freezing meals made with garden produce, as well as freezing the produce itself to use in the coming winter months (so far, cooked kale as well as peach & cucumber slices for smoothies).

So I’ve put together a recipe collection (from my archive) categorized by vegetable in hopes that it might give you some fresh ideas if you’re overloaded with a particular veggie at this time of the year!

**List UPDATED on 2/3/2016**

Apples

Apple Harvest Salad

Applesauce (Homemade)

Apple Peanut Butter “Sandwiches”

Traditional Hot Mulled Apple Cider

Basil

Pesto

Zucchini Pie (Crustless)

Zucchini Parmesan

Beets

Beet Kvass

Cabbage

Minnestrone Soup

Sauerkraut

Carrots

Minnestrone Soup

Moroccan Carrot Salad

Cilantro

Citrus Salad with Macadamia Oil, Cilantro, and Avocado

Moroccan Carrot Salad

Pesto

Gazpacho

Salsa Fresca (Fresh Salsa with Avocado)

Cucumbers

Baked Cucumbers

Homemade Bubbies Pickles (raw, lacto-fermented pickles)

Gazpacho

Israeli Cucumber-Tomato Salad

Quinoa Salad, Greek Style

Cucumber Raita

Grapes

Concord Grape Freezer Jam (sugar & pectin free)

Concord Grape Fruit Leather

Grape Leaves

Pickled Grape Leaves

Zucchini Dolmas

Kale

Kale Chips

Minnestrone Soup

Parsley

Israeli Cucumber-Tomato Salad

Pesto

Tabbouleh

Zucchini Dolmas

Pumpkin

(see Winter Squash, below)

Spinach

Greek Melt Pita Sandwiches

Green Smoothies

Green smoothie frozen concentrate cubes

Spanakopita

Tomatoes

Gazpacho

Israeli Cucumber-Tomato Salad

Fresh Tomato & Zucchini Chili

Greek Melt Pita Sandwiches

Minnestrone Soup

Quinoa Salad, Greek Style

Salsa Fresca (Fresh Salsa with Avocado)

Tabbouleh

Tomato-Quinoa Soup

Zucchini Parmesan

Winter Squash/Pumpkin

Cranberry-Pumpkin Muffins

Japanese Squash and Mushroom Soup

Pumpkin Pie Fruit Leather

Pumpkin Pie

Pumpkin Spice Cookies

Zucchini/Summer Squash

Zucchini Dolmas

Zucchini Pie (Crustless)

Fresh Tomato & Zucchini Chili

Zucchini Parmesan

Chocolate Zucchini Cookies

Zucchini Cake with Spiced Frosting

Zucchini Muffins (or Bread)


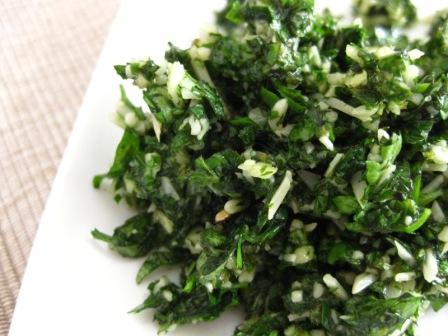
Nourishing Mixed-Herb Pesto

Oregano, parsley, & cilantro pesto

Pesto is such a versatile condiment — it’s wonderful over fish or chicken, on crackers, tossed with pasta, spread over eggs or sauteed zucchini, in a roasted vegetable sandwich, used as a pizza sauce, or straight off the spoon. And although basil pesto is the most common type, pesto can be made with any combination of herbs. In fact, I think I like mixed-herb pesto even better than basil-only — it has more layers of flavor! And don’t forget that herbs are mineral rich and packed with nutrition, and can definitely be thought of as a medicinal food.

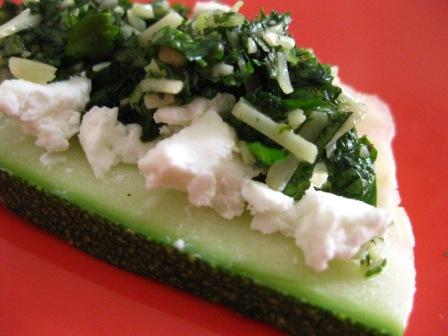
Make a healthy snack with goat cheese and mixed-herb pesto on a raw zucchini slice "cracker"

Use any combination of fresh herbs that you want; pesto is a great way to use up heaps of herbs at once, such as the cilantro sitting in the back of your fridge and the overabundance of oregano in your garden. It’s also a nice way to preserve those herbs for use later in the year; use ice cube trays to freeze pesto into small portions and thaw as needed over the winter.

One nice combination is oregano, parsley, and cilantro — this is probably my favorite. Use equal parts…or not! Just combine according to the amounts you have. I do suggest, however, that you go easy on the fresh sage if you choose to use it; it lends an overpowering (and not all that tasty) element. Also, mint is nice as an added “splash” but go easy on that too, since it can also overpower.

My basic pesto recipe is as follows, though you’ll probably find you don’t even need a recipe. Just gather a bunch of herbs, add a clove or two of garlic (start with less garlic and add more later if needed), add nuts, cheese, and salt, and then olive oil to form a paste.

Basic Herb Pesto

1 cup fresh herbs, packed

2 garlic cloves, small-medium size

3 Tbsp olive oil, approx.

3 Tbsp shredded parmesan cheese, approx.

1-2 Tbsp pine nuts or walnuts, approx. (optional)

Salt to taste

Put everything into the food processor and blend until a paste is formed.

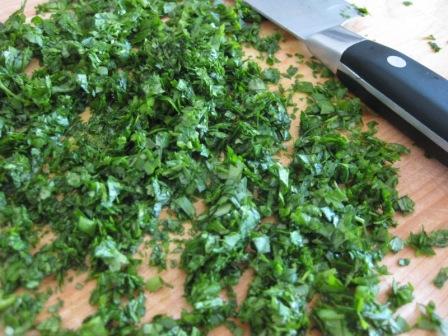
Instead of using the food processor, though, I like to make mine the old fashioned way using a knife and cutting board. If you use a nice sharp chopping knife, the task goes faster and is more fun than the food processor (at least for me — I get angry at my food processor when making pesto!). The key is definitely the sharp knife. Chop your herbs, garlic, and nuts as finely as possible, add the parmesan (chop it up too, if you like), and then add olive oil until a loose paste is formed. You can replace a little of the olive oil with water if you want. Add salt to taste. The texture will be more rustic than paste-like, but that’s not a bad thing. 😉

Making pesto without a food processor

Update + Garden Pictures

Scene from my mini vacation

Well, long time no post!

This past week was the death anniversary of my best friend Sonja – my soul sister – and it upset my emotional balance a little more than I would have liked. When that happens, in addition to surrendering to the sadness (rather than stuffing it), I know I need to devote extra time to good medicine, as well as make a point to get out of the house and do fun things. So on one of my days off, I rode my bike over to Hubby’s office and met him for lunch, which is something we both just totally love. On the way back I stopped at Whole Foods and wandered around, picking out some fun things while completely ignoring the exorbitant prices. On my other day off, my mom and I took a mini vacation day and drove to a botanic gardens area. We enjoyed the water gardens and natural woodlands amidst sprinkling rain, snarfed potato chips at the cafe, and relished how we had the place to ourselves. After that we went to Penzeys Spices (we get so inspired at that store!) and I bought some special peppercorns, expensive Ceylon cinnamon, smoked Spanish paprika, and Cajun seasoning (an all-time favorite). To top it off, we had drinks and a cookie at a little sidewalk cafe. Back at their house, I made a batch of homemade cat food, worked in the garden, and visited with mom and dad over wine and cheese. Lovely! Family, gardens, nature, mini vacations…those are all things that help lift the funk and get me re-energized for daily life.

In other news, it’s been pretty hot here. Though the sweltering 95-degree days are punctuated with not-as-hot days in the mid-80s. It’s been really nice actually.

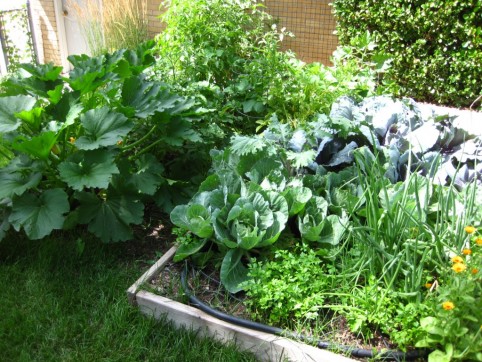
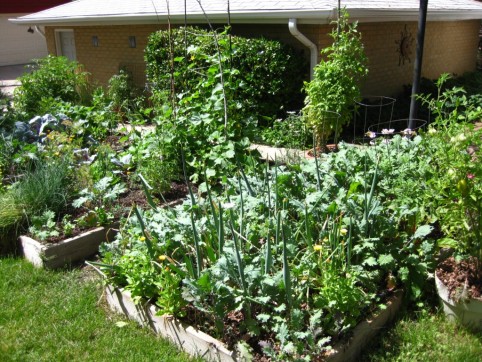
And the garden is progressing well! The bell peppers and a few of the tomatoes are still puny, but the zucchini, cucumbers, cabbage, potatoes, onions, and the tomatoes I started early in the Walls-O-Water are doing very well. I harvested the first ripe tomato today, and I think in a week’s time there should be many more, as well as the first of the cucumbers; I did harvest a nice zucchini today which I cannot wait to sautee in the Penzeys Cajun seasoning — such amazing flavor!! The garden seems a bit delayed compared to some other years; we had a long, wet, cold spring, plus I did plant a little late this year due to surgery interfering with my normal seed-starting schedule. But that’s okay! I just love watching the veggie garden grow and produce. Here are a couple pictures of it:

Knowing Exactly When To Harvest Garlic

In this post I described how to harvest and cure your garlic (and onions too). However, knowing exactly when to pull your garlic out of the ground isn’t always easy.

There’s a period of time — a “sweet spot” — when the garlic will be perfect. Harvest too soon and the head won’t yet have formed into distinct cloves…harvest too late and the protective papery skin that encases the head will have broken down, allowing dirt and worms into the crevices between the cloves. So I took some pictures for you that will hopefully help to identify the sweet spot.

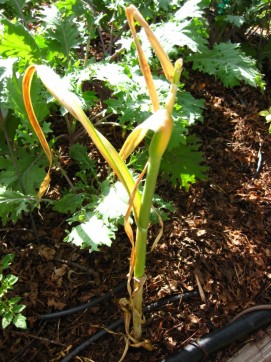
Harvest your garlic when the leaves have mostly turned yellow or brown, but the stem is still green. It’s okay if a few of the leaves are still green, too, though if all the leaves are still green, it’s too early to harvest.

Harvest your garlic when it looks like this. (Click for larger image.)

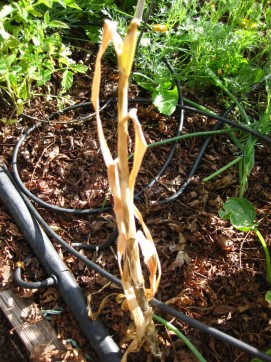
And if the leaves and stem are completely dry and brown, like in the photo below, you’ve missed the sweet spot, so definitely dig the garlic immediately.

Left in the ground a little too long...but do still dig it up ASAP! (Click for larger image.)

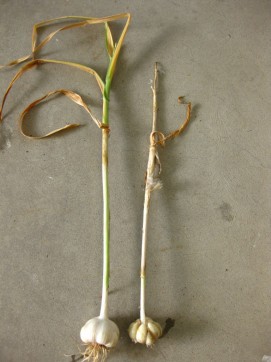
Left side: Harvested at the perfect time. Right side: Left in the ground a little too long. (Click for larger image.)

In the picture above, the garlic on the left was harvested at the perfect time: the stem is still green, the cloves are fully formed, and the outer papery skin is intact. The garlic on the right was left in the ground a little too long (notice how the stem is completely brown and the outer papery skin has mostly broken down).

If you miss that sweet spot and find that the outer papery skin of your garlic has disappeared and the dirt and worms have gotten in between the cloves, attach a spray nozzle to your garden hose and spray a forceful stream of water straight into the middle of the garlic head, which will blast out the dirt.

For further info on how to cure and store your garlic, pop on over to this post.

Left: Harvested at the perfect time. Right: Left in the ground a little too long. (Click for larger image.)

« Older posts Newer posts »

© 2024 The Herbangardener

Theme by Anders NorenUp ↑