Kitchen / Garden / Sanctuary - Urban Homesteading to Nourish Body + Spirit

Tag: lacto-fermentation (Page 1 of 3)

Soup of the Day

This was a delicious little lunch for today. I pulled the beef broth out of the freezer, and the rest is from my own garden! With everything cut into little pieces, it cooked up in just a few minutes.

beef broth

scallions (white part)

celery

kale

potatoes

…and at the table, I stirred in some raw homemade sauerkraut with some of its juice, which leant a wonderful brightness to the soup!

And I just remembered I have some soaked & cooked lentils, which I think would also go well in this soup.

*****

How to Make Sauerruben

Sauerruben is made just like sauerkraut, only with rutabagas (or turnips, or a combo). It’s lovely stuff, and a nice change from kraut. It has a sweet, radish-like bite — although that will mellow out after a few weeks in the fridge. I like sauerruben a lot more than I thought I would, especially after it mellowed. Give it a try!

Ingredients:

Rutabagas (or turnips, or a combo), washed/scrubbed. I don’t bother to peel mine.

Sea salt (see my salting chart below, plus you may need more to mix up extra brine. (Any non-iodized salt will do, but unrefined sea salt is better for your body.)

*****

Here’s my salting chart. I usually just stick to this, but you can add a little more salt in the summer and a little less in the winter if you like.

10 tsp salt per 5 lbs vegetables

5 tsp salt per 2 ½ lbs vegetables

2 tsp salt per 1 lb vegetables

1 tsp salt per ½ lb vegetables

½ tsp salt per ¼ lb vegetables

*****
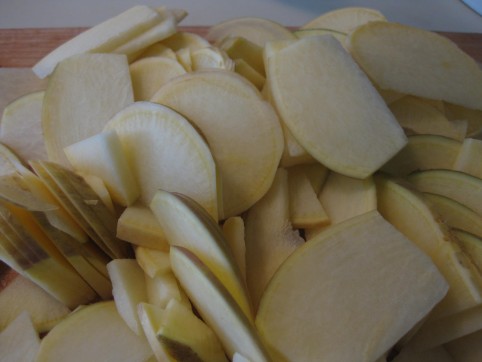

Shred, grate, or finely chop your rutabagas. Add the salt, and mix well.

I let this sit on the counter for several hours or overnight (this step is in place of pounding) so that the salt can begin to draw water out of the rutabagas. The water contains nutrients, and these nutrients then become the substrate for the growth of the lactic acid bacteria which is what turns your rutabagas into sauerruben. (Steinkraus, Handbook of Indigenous Fermented Foods, p.120.)

After some water has been drawn out, pack the rutabaga WITH its water into a glass jar. You really want to pack it in there (use your fist or any kitchen tool), because this will help squeeze more water out. You can also use a specially-made ceramic sauerkraut crock, or a glass or ceramic bowl (anything except metal, since salt and acid can react with metal).

Keep the rutabaga submerged under the brine by placing a smaller plate on top and weighing it down with something heavy (a jug of water, a boiled rock, etc.). Or, nest a smaller jar of water inside your larger glass jar.
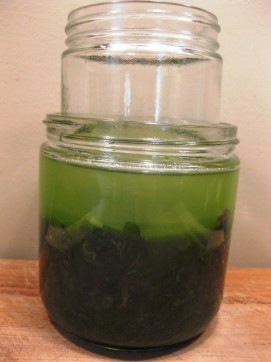
This is kale, not sauerruben, but same idea. I particularly like this nesting-jars method for keeping everthing submerged under the brine.

Whatever method you devise, just be sure that all traces of rutabaga are completely submerged in the brine. Little bits sticking up above the water line will quickly lead to a moldy situation (and if you do end up with mold, scrape off the entire top layer, but the rest underneath should be fine!). So if you need to mix up some more brine (which is just a fancy name for salt water), use the ratio of 1 tsp salt to 1 cup of water.

Cover the jar with a towel to keep bugs out. Leave it to ferment at room temperature until you like the taste of your sauerruben. Let your tongue be your guide to done-ness. Taste it every few days, and transfer into the fridge when it tastes the way you like it. I like mine pretty sour, so I usually leave it out for 1-2 weeks or more, depending on how warm it is in the kitchen. If the taste is right but the ‘ruben is still too bitey, shove it to the back of the fridge for several weeks for it to mellow out.
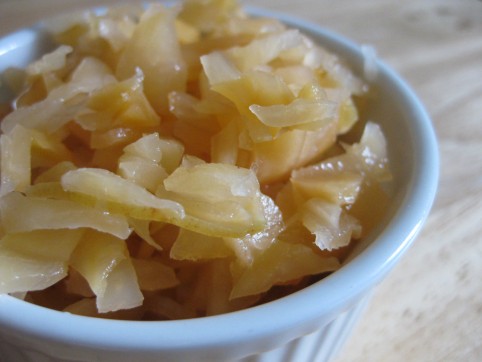
Once in the fridge, your sauerruben will keep for many months. And when it’s all gone, don’t throw out the juice; it’s full of beneficial Lactobacillus (lactic acid bacteria) and is said to be a very good digestive tonic. And if you like, add a little of the juice to your next batch of sauerruben as a starter.

Troubleshooting:

If you see a white film (“kahm yeast”) develop on the surface of the brine, scrape off what you can each day until the ‘ruben is done fermenting. Sometimes I don’t get any film. Sometimes I get a fair amount. There doesn’t seem to be any rhyme or reason. The kahm yeast won’t harm anything, but if you keep getting a lot of it day after day, it can sometimes (not always) impart an off taste to the brine. Just try to scrape it off on a regular basis (daily is nice).

*****

How to Make Beet Kvass

Beet kvass is a favorite at our house! It’s so easy to make and so good for your body, and we love the taste — salty, sour, very refreshing.

Beets are extremely nutrient rich and have long been valued as a blood tonic (and their doctrine of signatures would suggest this — they make everything look bloody after you’ve cut into them!). They are rich in iron, calcium, magnesium, phosphorus, carotene, B complex, copper, and vitamin C. Beets and their greens contain special substances that protect the liver and stimulate the flow of bile (Nourishing Traditions, p. 373). And drinking beet kvass is especially beneficial to digestion because it’s lacto-fermented and therefore contains beneficial enzymes and bacteria for your digestive tract. It’s an all-around health tonic, and according to p. 610 of Nourishing Traditions, beet kvass promotes regular elimination, aids digestion, alkalinizes the blood, cleanses the liver, and is a good treatment for kidney stones and other ailments.

Well, all I know is that it tastes good!

The recipe in Nourishing Traditions describes letting your beet kvass ferment for 2 days on the counter and then refrigerating it. However, I find it usually needs to ferment a lot longer than that. I let mine go a week or two on the counter, until the kvass is completely opaque — a deep, thick red that you can’t see through. I give it a taste, and if it’s sour with no hint of sweetness left, I know it’s done (though some may like to have that hint of sweetness). As with all fermentations, let it go until it tastes good to you, regardless of what the directions say.

Here’s my recipe:

Beet Kvass

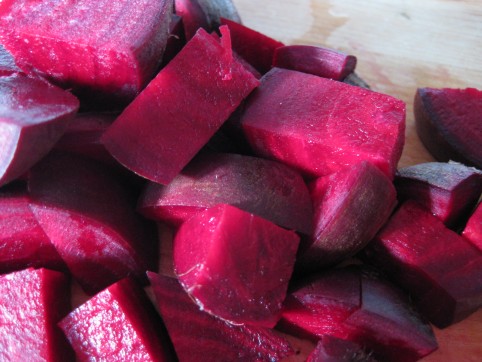
8 – 10 ounces organic beets, scrubbed & coarsely chopped (I don’t bother to peel them)

1/4 cup whey* (optional)

1 Tbsp sea salt (I like unrefined sea salt because the minerals haven’t been taken out)

water

Place the salt into a 2-quart glass jar. Pour in a little warm water to dissolve the salt, and then add the beets and whey (if using). Fill the jar to the top with water. Stir and cover. Let sit at room temperature until the kvass tastes good to you — several days to a couple weeks, depending on your kitchen temperature and your tastes. Transfer to the fridge. If the kvass isn’t delicious, it may need a few weeks to “do its thing” in the fridge. I always find that my ferments taste even better when they’ve been shoved to the back of the fridge for a few weeks (or…er…months!).

And I have found that the whey is an optional ingredient, even though it isn’t listed as such in Nourishing Traditions. Feel free to leave it out; your kvass will take a little longer to ferment, but will be just as delicious!

When the liquid is nearly gone from your jar, you can fill it halfway again with water (no extra salt) and let it re-ferment if you want. Or you can save some kvass to add to your new batch as an innoculant, or you can juice your spent beet chunks! Or all of the above.

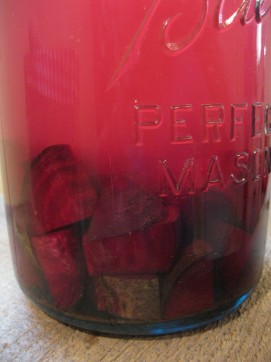
Starting a new batch of beet kvass

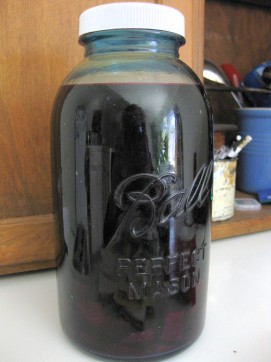
Beet kvass, finished and ready to drink

*****

*Whey: a clear yellowish liquid that can be drained off a fermented milk product like yogurt, buttermilk, or kefir. Whey will actually last for a couple months in your fridge. There are several ways to collect it:

– Easiest way: make kefir and let it over-ferment until curds and whey have separated. Spoon off the curds, and strain the whey through a fine mesh seive.

– Another way: Place a colander or seive over a bowl. Line the colander with a clean, damp tea towel, and pour yogurt into that. Leave for a day or two in your fridge to drain. You’ll then be left with whey in the bowl and “Greek yogurt” (or “yogurt cheese” if it’s really thick) in the colander. Both are great for making dips.

*****

Troubleshooting:

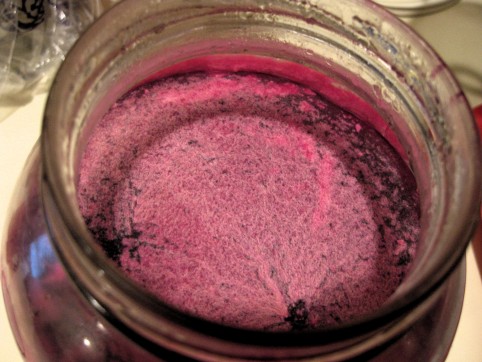
My ferments, including my kvass, sometimes get a white film (kahm yeast) on top during fermentation. It looks like this:

Kahm yeast is harmless, but you’ll want to try to keep it scraped off so it doesn’t affect the flavor of the kvass too much. I do find that my kvass gains a depth of flavor when it’s had this film on it, but if you let it go uncontrolled, it can make your kvass taste weird. Try to scrape as much of it off each day as you can.

*****

Recipe Collection For A Bounty of Vegetables

September is always a very busy month in our kitchen as I scramble to use as much of our fresh garden produce in as many meals, smoothies, muffins, and cookies as possible! I’ve also been freezing meals made with garden produce, as well as freezing the produce itself to use in the coming winter months (so far, cooked kale as well as peach & cucumber slices for smoothies).

So I’ve put together a recipe collection (from my archive) categorized by vegetable in hopes that it might give you some fresh ideas if you’re overloaded with a particular veggie at this time of the year!

**List UPDATED on 2/3/2016**

Apples

Apple Harvest Salad

Applesauce (Homemade)

Apple Peanut Butter “Sandwiches”

Traditional Hot Mulled Apple Cider

Basil

Pesto

Zucchini Pie (Crustless)

Zucchini Parmesan

Beets

Beet Kvass

Cabbage

Minnestrone Soup

Sauerkraut

Carrots

Minnestrone Soup

Moroccan Carrot Salad

Cilantro

Citrus Salad with Macadamia Oil, Cilantro, and Avocado

Moroccan Carrot Salad

Pesto

Gazpacho

Salsa Fresca (Fresh Salsa with Avocado)

Cucumbers

Baked Cucumbers

Homemade Bubbies Pickles (raw, lacto-fermented pickles)

Gazpacho

Israeli Cucumber-Tomato Salad

Quinoa Salad, Greek Style

Cucumber Raita

Grapes

Concord Grape Freezer Jam (sugar & pectin free)

Concord Grape Fruit Leather

Grape Leaves

Pickled Grape Leaves

Zucchini Dolmas

Kale

Kale Chips

Minnestrone Soup

Parsley

Israeli Cucumber-Tomato Salad

Pesto

Tabbouleh

Zucchini Dolmas

Pumpkin

(see Winter Squash, below)

Spinach

Greek Melt Pita Sandwiches

Green Smoothies

Green smoothie frozen concentrate cubes

Spanakopita

Tomatoes

Gazpacho

Israeli Cucumber-Tomato Salad

Fresh Tomato & Zucchini Chili

Greek Melt Pita Sandwiches

Minnestrone Soup

Quinoa Salad, Greek Style

Salsa Fresca (Fresh Salsa with Avocado)

Tabbouleh

Tomato-Quinoa Soup

Zucchini Parmesan

Winter Squash/Pumpkin

Cranberry-Pumpkin Muffins

Japanese Squash and Mushroom Soup

Pumpkin Pie Fruit Leather

Pumpkin Pie

Pumpkin Spice Cookies

Zucchini/Summer Squash

Zucchini Dolmas

Zucchini Pie (Crustless)

Fresh Tomato & Zucchini Chili

Zucchini Parmesan

Chocolate Zucchini Cookies

Zucchini Cake with Spiced Frosting

Zucchini Muffins (or Bread)


Quinoa Salad, Greek Style

This is a recipe that my best friend Sonja gave me a long time ago; it was one of our very favorite things to eat. I love it! It’s a light, refreshing dinner choice which is great for this time of the year because it doesn’t require use of the oven. Heck, you could even cook the quinoa in your solar oven (you have built one, right? ;-)) and you wouldn’t even need the stove, either! It would also be a great meal to take on a picnic.

Quinoa Salad, Greek Style

1 cup uncooked quinoa

2 tomatoes, chopped

1 cucumber, diced

3/4 cup chopped green onions

Scant 1/2 cup olive oil

6 Tbsp freshly-squeezed lemon juice

6 ounces feta cheese, crumbled

Black or Kalamata olives, chopped (as many as you like…I usually use between 1/2 and 1 cup)

Lettuce, torn into pieces (use as much as you like, though not too much — it’s not meant to be the main ingredient)

Salt + Pepper to taste

Cook the quinoa* and cool it to room temperature. If I’m in a hurry, I’ll put my hot quinoa into the freezer to cool it quickly.

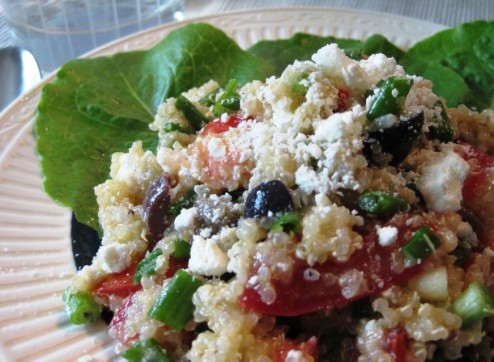
Then, gently stir everything else — except the lettuce — into the quinoa. I leave the lettuce out until I’m ready to serve the salad, and then I stir it in. That way, I can store the leftovers for a day or two and not have to worry about wilted, soggy lettuce. You could also leave the lettuce out altogether, and just serve the salad on a bed of lettuce leaves, as in the picture above.

This salad is best served on the day you make it. Enjoy!

***

*Cooking quinoa:

Be sure to rinse the quinoa well to remove bitter saponin residue. The quick way to cook it is to boil your water (ratio of 1 cup grain to scant 2 cups water), add some salt, add quinoa and cover, simmering until the water is absorbed, about 20 minutes.

However, if you’re able to plan ahead enough, it’s much better, healthwise, to soak your quinoa for at least 12 hours to make it more digestible — the way traditional cultures do. Soaking grains neutralizes phytic acid (which binds to essential minerals like calcium, magnesium, iron, and zinc, and blocks their absorption) as well as enzyme inhibitors in the grain. Soaking also breaks down difficult-to-digest proteins and encourages the production of beneficial enzymes which in turn increases the vitamin (especially B vitamin) content of the grain.

So…

To soak quinoa: Thoroughly rinse 1 cup of dry quinoa to remove bitter saponin residue. Put 2 Tbsp of lemon juice or vinegar into a measuring cup and fill to the 1 cup mark with warm water, then mix with the quinoa in a bowl. Cover and let sit at room temperature for at least 12 hours, or up to 24. When you’re ready to cook, rinse and drain the quinoa well. Place in a saucepan. Add a scant 1 cup of water, and a little salt. Bring to a boil and simmer, covered, until all the water is absorbed, about 20 minutes. Cool, and proceed with the recipe.

*****

« Older posts

© 2024 The Herbangardener

Theme by Anders NorenUp ↑