Kitchen / Garden / Sanctuary - Urban Homesteading to Nourish Body + Spirit

Tag: pickles

Autumn at the Homestead

*****

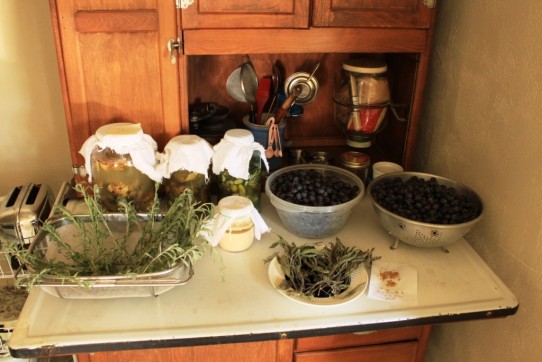
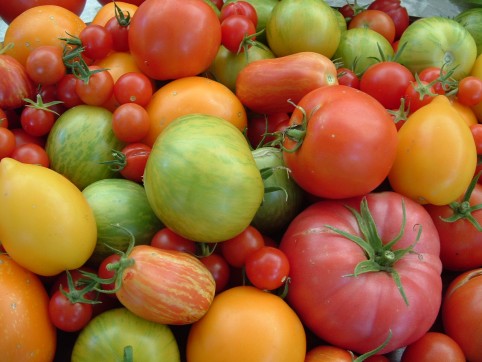
This could certainly be a scene from a rural farmhouse, but actually it’s right here in our own urban attic apartment!

There are pickles fermenting…12 lbs of wild grapes washed & de-stemmed & waiting to be made into jam or fruit leather…lavender drying for tea through the winter…a bubbling sourdough starter waiting to be used for whole wheat sourdough tortillas or pancakes…sage drying…and heirloom Black Russian tomato seeds drying for next year.

♥~ You don’t necessarily need a farm to have a homestead! ~♥

*****

Wilted Cucumbers? Bake Them!

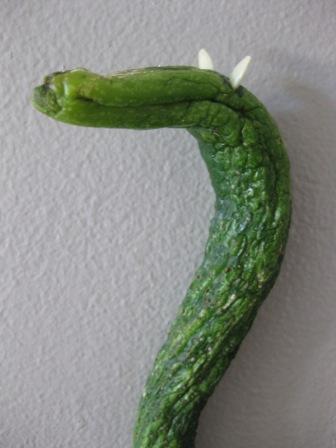
Ever wonder what to do with cucumbers that have begun to wilt and lose their crunch? Obviously the first thing you’d think of is to make a Loch Ness monster like the one below, right?

The Loch Ness Cucumber

I thought so.

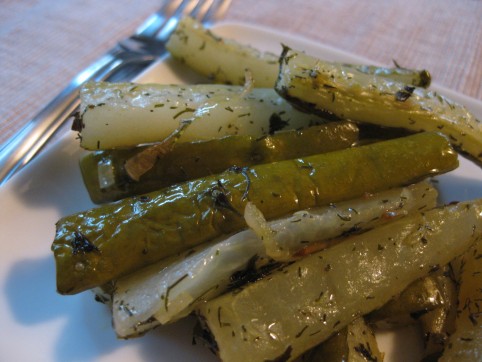
And although that’s fun — yes — the thing that really uses up those cukes is to bake them. This was originally a Julia Child recipe from Mastering the Art of French Cooking, but I’ve tweaked it somewhat to be simpler, with bolder flavors. I never thought to bake a cucumber until my mom made them last year; delicious! And a real bonus is that they freeze pretty well after baking. Thawed, they’re a little softer than the original out-of-the-oven ones, but that doesn’t bother you, right?

Try them out…I think they’re absolutely delicious! They have kind of a pickle-y flavor, yet gentle and buttery. This recipe makes a fair amount, but they do cook down to about half their original volume; and of course, feel free to cut the recipe in half.

Baked Cucumbers

3 lbs cucumbers

1/2 cup finely minced onion

1/4 – 1/3 cup wine vinegar (to your liking)

1/4 tsp sugar

1 1/4 tsp salt

1 Tbsp dry basil

1 Tbsp dry dill weed

4 Tbsp butter, melted

1/4 cup minced parsley (optional, for serving)

Preheat oven to 375*. Peel cucumbers if the skin is bitter. Cut them in half lengthwise and scoop out the seeds with a spoon. Cut into lengthwise strips 1/4″ to 1/2″ wide. Cut the strips into pieces that are 2″ long.

Mix all ingredients together, stirring well to evenly coat the cucumber pieces. Divide into two baking pans (I use two 9″x13″ glass pans) and bake, uncovered, for about an hour, tossing every 20-30 minutes. They should be tender, but still have a little crunch. Sprinkle with minced parsley (if desired), and serve. Mmmm!

Recipe Collection For A Bounty of Vegetables

September is always a very busy month in our kitchen as I scramble to use as much of our fresh garden produce in as many meals, smoothies, muffins, and cookies as possible! I’ve also been freezing meals made with garden produce, as well as freezing the produce itself to use in the coming winter months (so far, cooked kale as well as peach & cucumber slices for smoothies).

So I’ve put together a recipe collection (from my archive) categorized by vegetable in hopes that it might give you some fresh ideas if you’re overloaded with a particular veggie at this time of the year!

**List UPDATED on 2/3/2016**

Apples

Apple Harvest Salad

Applesauce (Homemade)

Apple Peanut Butter “Sandwiches”

Traditional Hot Mulled Apple Cider

Basil

Pesto

Zucchini Pie (Crustless)

Zucchini Parmesan

Beets

Beet Kvass

Cabbage

Minnestrone Soup

Sauerkraut

Carrots

Minnestrone Soup

Moroccan Carrot Salad

Cilantro

Citrus Salad with Macadamia Oil, Cilantro, and Avocado

Moroccan Carrot Salad

Pesto

Gazpacho

Salsa Fresca (Fresh Salsa with Avocado)

Cucumbers

Baked Cucumbers

Homemade Bubbies Pickles (raw, lacto-fermented pickles)

Gazpacho

Israeli Cucumber-Tomato Salad

Quinoa Salad, Greek Style

Cucumber Raita

Grapes

Concord Grape Freezer Jam (sugar & pectin free)

Concord Grape Fruit Leather

Grape Leaves

Pickled Grape Leaves

Zucchini Dolmas

Kale

Kale Chips

Minnestrone Soup

Parsley

Israeli Cucumber-Tomato Salad

Pesto

Tabbouleh

Zucchini Dolmas

Pumpkin

(see Winter Squash, below)

Spinach

Greek Melt Pita Sandwiches

Green Smoothies

Green smoothie frozen concentrate cubes

Spanakopita

Tomatoes

Gazpacho

Israeli Cucumber-Tomato Salad

Fresh Tomato & Zucchini Chili

Greek Melt Pita Sandwiches

Minnestrone Soup

Quinoa Salad, Greek Style

Salsa Fresca (Fresh Salsa with Avocado)

Tabbouleh

Tomato-Quinoa Soup

Zucchini Parmesan

Winter Squash/Pumpkin

Cranberry-Pumpkin Muffins

Japanese Squash and Mushroom Soup

Pumpkin Pie Fruit Leather

Pumpkin Pie

Pumpkin Spice Cookies

Zucchini/Summer Squash

Zucchini Dolmas

Zucchini Pie (Crustless)

Fresh Tomato & Zucchini Chili

Zucchini Parmesan

Chocolate Zucchini Cookies

Zucchini Cake with Spiced Frosting

Zucchini Muffins (or Bread)


Make Your Own Bubbies Pickles

Have you ever had Bubbies? It’s the brand against which all other pickles are judged, at least in our house! My hubby is a huge fan. And if you like garlic, you’ll probably appreciate Bubbies, too. They’re not made with vinegar, but rather are made the old-fashioned way, though lacto-fermentation in brine. (I have a Bubbie’s Bread & Butter Chips pickle recipe too, which is made with vinegar.)

So for my very first attempt at homemade pickles, I turned the Bubbies jar upside down, identified which spices were in there, selected what looked like a good lacto-fermented pickle recipe, and hoped for the best as I sacrificed a couple of humongous garden cucumbers for the Great Pickle Experiment.

The results were shocking…in that I was shocked I had made something so tasty and convincing on the very first try. I certainly had expected the worst. In fact, I thought Hubby was being sarcastic when he tried the first one and told me they were awesome. He couldn’t stop talking about them! I was skeptical until I tried one, too. YO! Later, I did a taste test of my pickles compared to Bubbies; I actually liked mine even better! In the photo above, I used my large garden cucumbers, but to get the true Bubbies experience, go for the really small cukes; I find these at the farmer’s market, or at ethnic grocery stores. Go for organic if you can (which would be an upgrade from Bubbies, since theirs aren’t organic). Of course the really big cucumbers are fine to use, but because of their size, their insides won’t be quite as firm and crunchy as a smaller cucumber would be, and their skin will be a little tougher.

*****

Lindsey’s Bubbies Pickle Recipe:

1 gallon glass jar or ceramic crock

1/2 a gallon of warm water (tap water is fine)

A handful of fresh, clean grape leaves, oak leaves, or cherry leaves (optional — they supply tannins to keep the pickles crunchy) (UPDATE: raspberry & blackberry leaves work too, but have a stronger flavor than grape leaves)

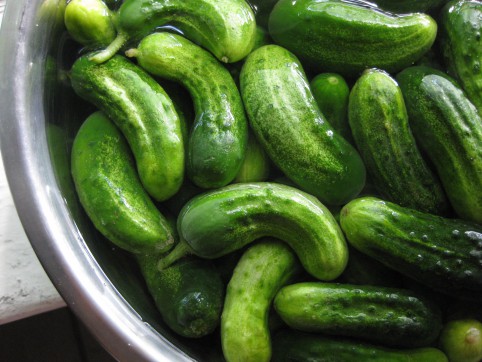
3-4 lbs of cucumbers (small to medium is ideal, but if all you have is large, cut them into spears)

5-6 Tbsp non-iodized sea salt. I use Redmond RealSalt brand unrefined sea salt. (I usually prefer 6 Tbsp. Using 5 Tbsp of salt will yield a less salty pickle that my hubby prefers, however you may have to contend with more white film, or “kahm yeast,” on the surface of the brine during fermentation. More about kahm yeast in the instructions.)

2 – 3 heads of garlic, separated into cloves, peeled, & roughly chopped

3 Tbsp whole dill seed

2 Tbsp whole coriander seed

1 tsp whole mustard seed (brown or yellow, doesn’t matter)

1 tsp whole peppercorns

1 tsp fennel seed

1/2 tsp red pepper flakes

*****

Ingredients for Homemade Bubbie's Pickles

Ingredients for Homemade Bubbies Pickles. My homegrown garlic was a little small, so I used 4 heads.

*****

Directions:

Rinse the cucumbers, making sure the blossoms are removed. Soak them in very cold water for a couple hours (if they’re not straight off the vine).
In a separate clean jar (not the one you’ll be using for the pickles), dissolve the salt into the 1/2 gallon of warm water. Set aside — this brine will be one of the last things you’ll add.

Into the clean, gallon jar/crock you’ll be using for the pickles, drop in the garlic, dill, coriander, mustard, peppercorns, fennel, and red pepper flakes.

Then, put the cucumbers into the jar. If you’ve sliced large cucumbers into spears, pack the spears vertically into the jar.

Pour the salt water solution (a.k.a. the brine) over the cucumbers.

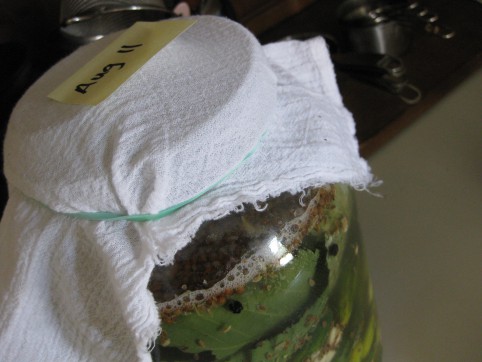
Now, place the cleaned grape/oak/cherry/raspberry/blackberry leaves into the jar. My jar has a somewhat narrow mouth, so the grape leaves form a nice plug at the top of the jar so the cucumbers (which will rise to the top after you pack them in) don’t go above the brine.

You want your cucumbers (and leaves) to be completely submerged in the brine at all times. If they’re sticking up above the brine, they’ll get moldy. If your jar has a wide mouth, you may need to use a couple of plates to keep everything submerged. Another idea is to nest a smaller glass jar into the opening of the larger jar to keep everything down. Or, use a scrubbed & sterilized rock.
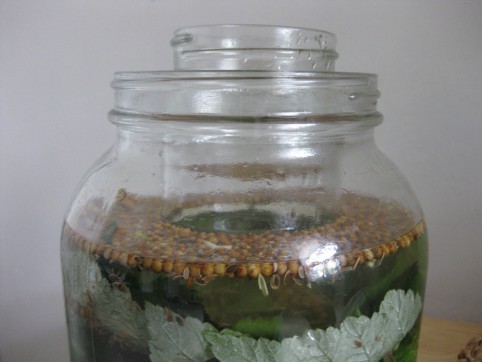
Using nested jars to keep everything submerged.
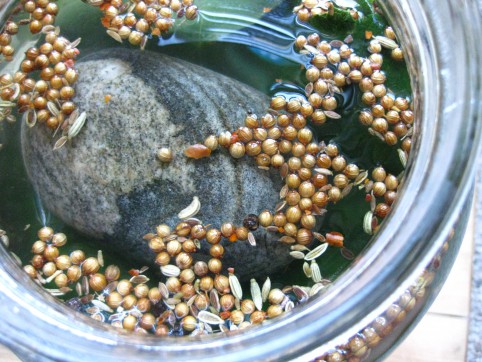
Another idea: use a rock to keep everything submerged.

If the brine still doesn’t cover the cucumbers, make more brine solution using: 1 scant Tbsp sea salt to one cup of water. Cover your jar with its lid (loosely), or with a cloth to keep bugs & dust out. If you see a thin film of white scum growing on the surface of the water, just skim it off as often as you can, but don’t worry if you can’t get it all. This is “kahm yeast;” it won’t harm anything, but do try to keep up with it otherwise it can affect the flavor of your pickles.

Sometimes, during pickle making, some of your garlic cloves will turn blue. This is not a problem. The Colorado Extension Service website says this about blue garlic:

Blue, purple or blue-green garlic may result from immature garlic or garlic that is not fully dry, from copper pans, or from a high amount of copper in the water. Garlic contains anthocyanin, a water-soluble pigment that under acid conditions may turn blue or purple. A blue-green color also may develop in pickles made with stored red-skinned garlic. Except for blue-green color resulting from an abnormally high copper-sulfate concentration, such color changes do not indicate the presence of harmful substances.

Your pickles will be ready after 1-4 weeks — depending on the temperature in your house. Our pickles are usually ready after 10 days on the counter in our warm apartment (average of 80-85°F) in late summer. Every couple days, do a taste test of your pickles. They’re ready when they taste done to you! Once they taste done, transfer the jar into the fridge to slow fermentation. Once they’ve fermented and are in the fridge, you can remove the grape/oak/cherry/raspberry/blackberry leaves and you don’t need to worry as much about the pickles being completely submerged in the brine.

Enjoy! These will last months and months in your fridge. I once kept a batch around for 9 months and it was still good.

And the brine is good stuff too; I like to drink it straight. It’s full of beneficial bacteria and good for your digestion! Since it’s salty, it would be especially good after a workout.

*****
Make Your Own Pickled Grape Leaves

Ingredients for making pickled, lacto-fermented grape leaves

Have you ever eaten Dolmas (or “Dolmades”)? I absolutely love them! Dolmas are a delicious Turkish finger food made by stuffing pickled grape leaves with a filling made from rice, onion, parsley, olive oil, spices, and various other things. Sometimes they’re also made with meat.

A couple years ago, I created my own recipe for Dolmas that doesn’t use rice, but rather shredded zucchini, as the main filling. I ought to make that recipe more often, since it’s one of my favorite things to eat! I’ll post my recipe for Zucchini Dolmas soon (UPDATE: here’s the recipe), but today I’m going to show you how to make your own pickled grape leaves — which you’ll need for the Dolmas. (You can also just buy pickled grape leaves in a jar, which is what I used to do, until I recently discovered how much cheaper and more fun it is to make my own!)

Grape leaves are plentiful and ubiquitous, so you shouldn’t have much trouble finding them. If you don’t have your own grape vine, just take a walk down any random alley, and you’ll probably find at least one vine spilling out over someone’s fence. (You could ask first before picking of course, but if the vine is trailing into the alley — or hanging over a public sidewalk — it’s in the public domain.) The grape leaves I collected were from a vine in my alley. Choose leaves that are young enough to be tender, but large enough to stuff with filling, and clip the stem close to the leaf.

The grape leaves we’ll be making are pickled by way of lacto-fermentation, rather than vinegar. Lacto-fermentation is a traditional way of preserving fruits & vegetables by harnessing the power of lactobacilli bacteria, which are present on the surface of all living things. The bacteria convert plant starches & sugars into lactic acid, which is the preservative. The lactobacilli themselves also improve the vegetable’s digestibility, as well as boost its vitamin and enzyme levels.

Pickled Grape Leaves

24 grape leaves

1 Tbsp sea salt

4 Tbsp whey* (if you don’t have whey, use an additional 1 Tbsp salt)

2 cups water, filtered if you have it

Wash the leaves well, and stack them neatly together.

Put water, salt, and whey in a big bowl and stir. Soak the leaves in the liquid for about an hour, weighting them down with a plate.

Soak the leaves for about an hour, weighted down with a plate.

Soak the leaves for about an hour, weighted down with a plate.

Roll up the leaves and stuff them into a pint jar. Pour in enough liquid to cover the leaves, but leave 1 inch of space between the liquid and the top of the jar. Cover tightly, and leave on the counter for about 3 days. Then, transfer to the fridge, where they’ll keep for quite a while. I had mine in the fridge for about 10 days before using them.

* Whey is the clear, yellowish liquid strained off when making yogurt or cheese. Don’t use powdered or commercial concentrated whey!

Pickled grape leaves

Recipe courtesy of Nourishing Traditions by Sally Fallon.

© 2024 The Herbangardener

Theme by Anders NorenUp ↑